Garden Art Party part 2
I am always experimenting and playing with my art printables (I hope you do too!)
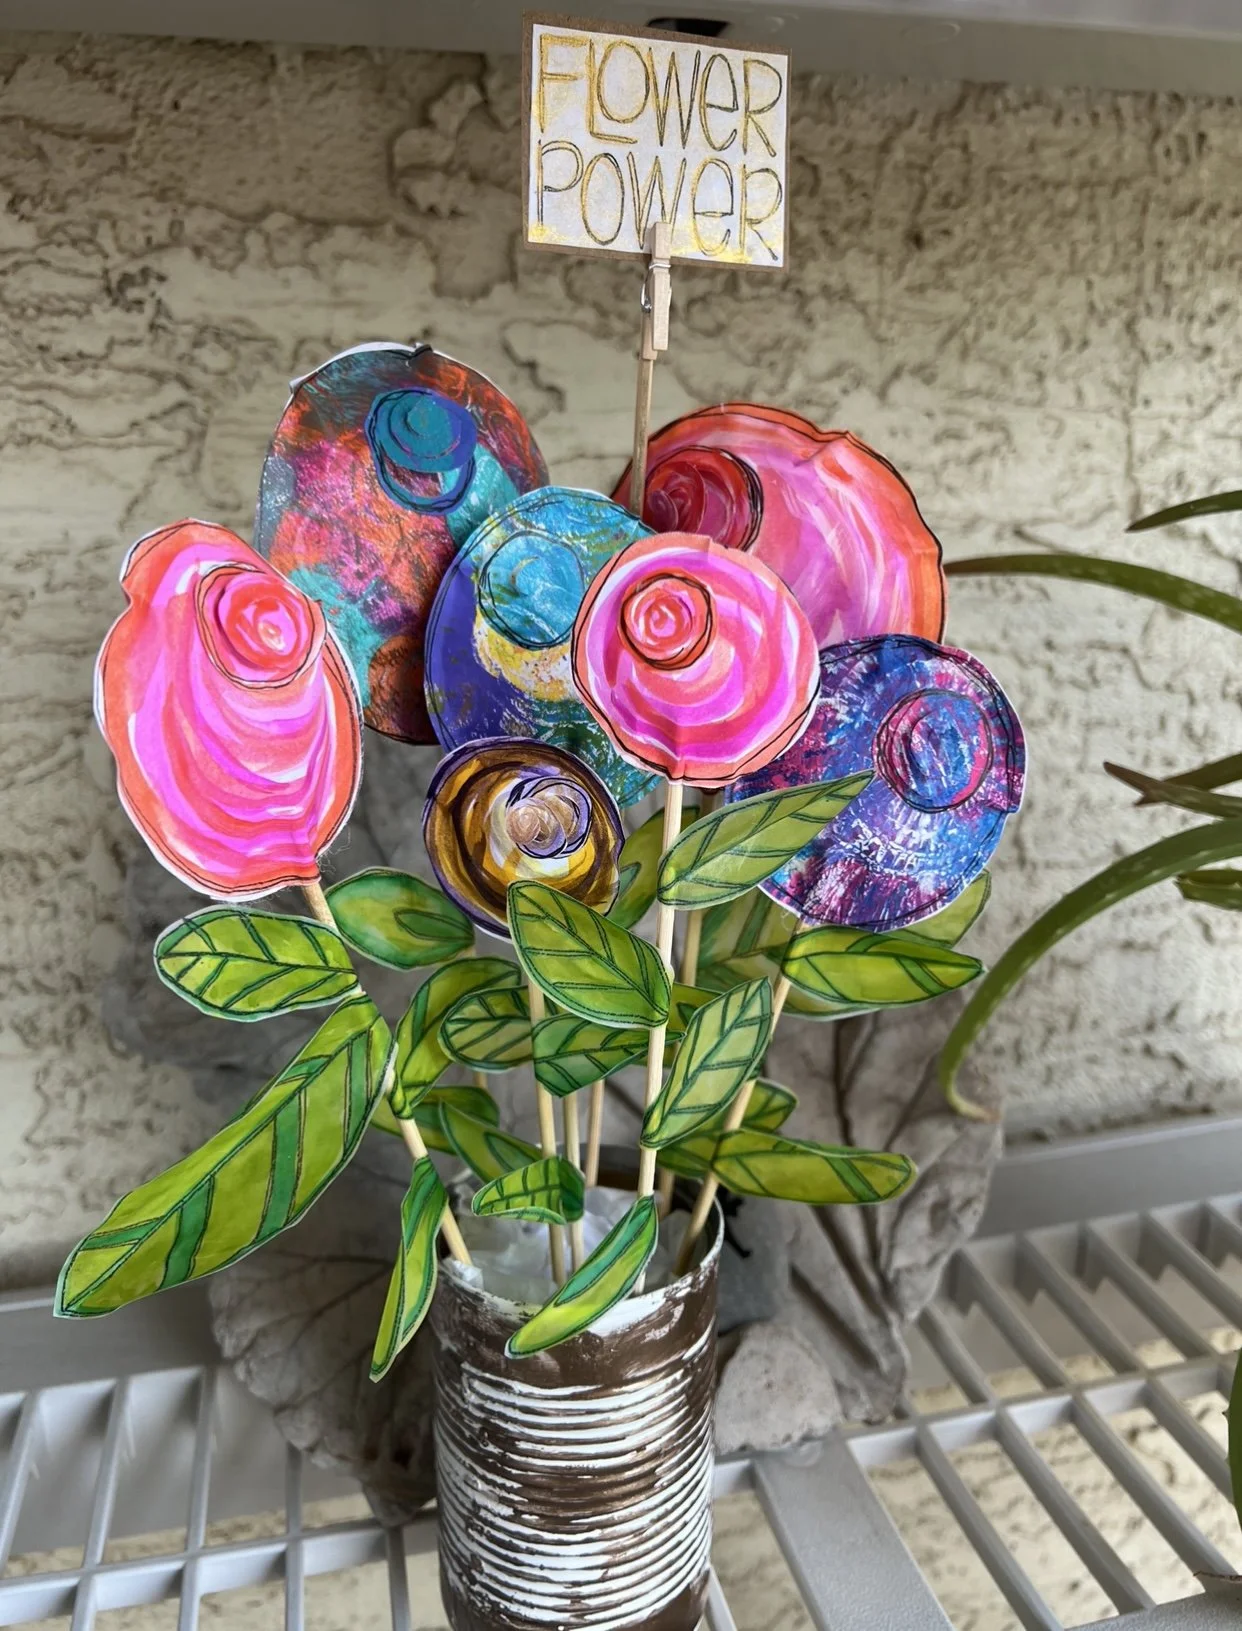
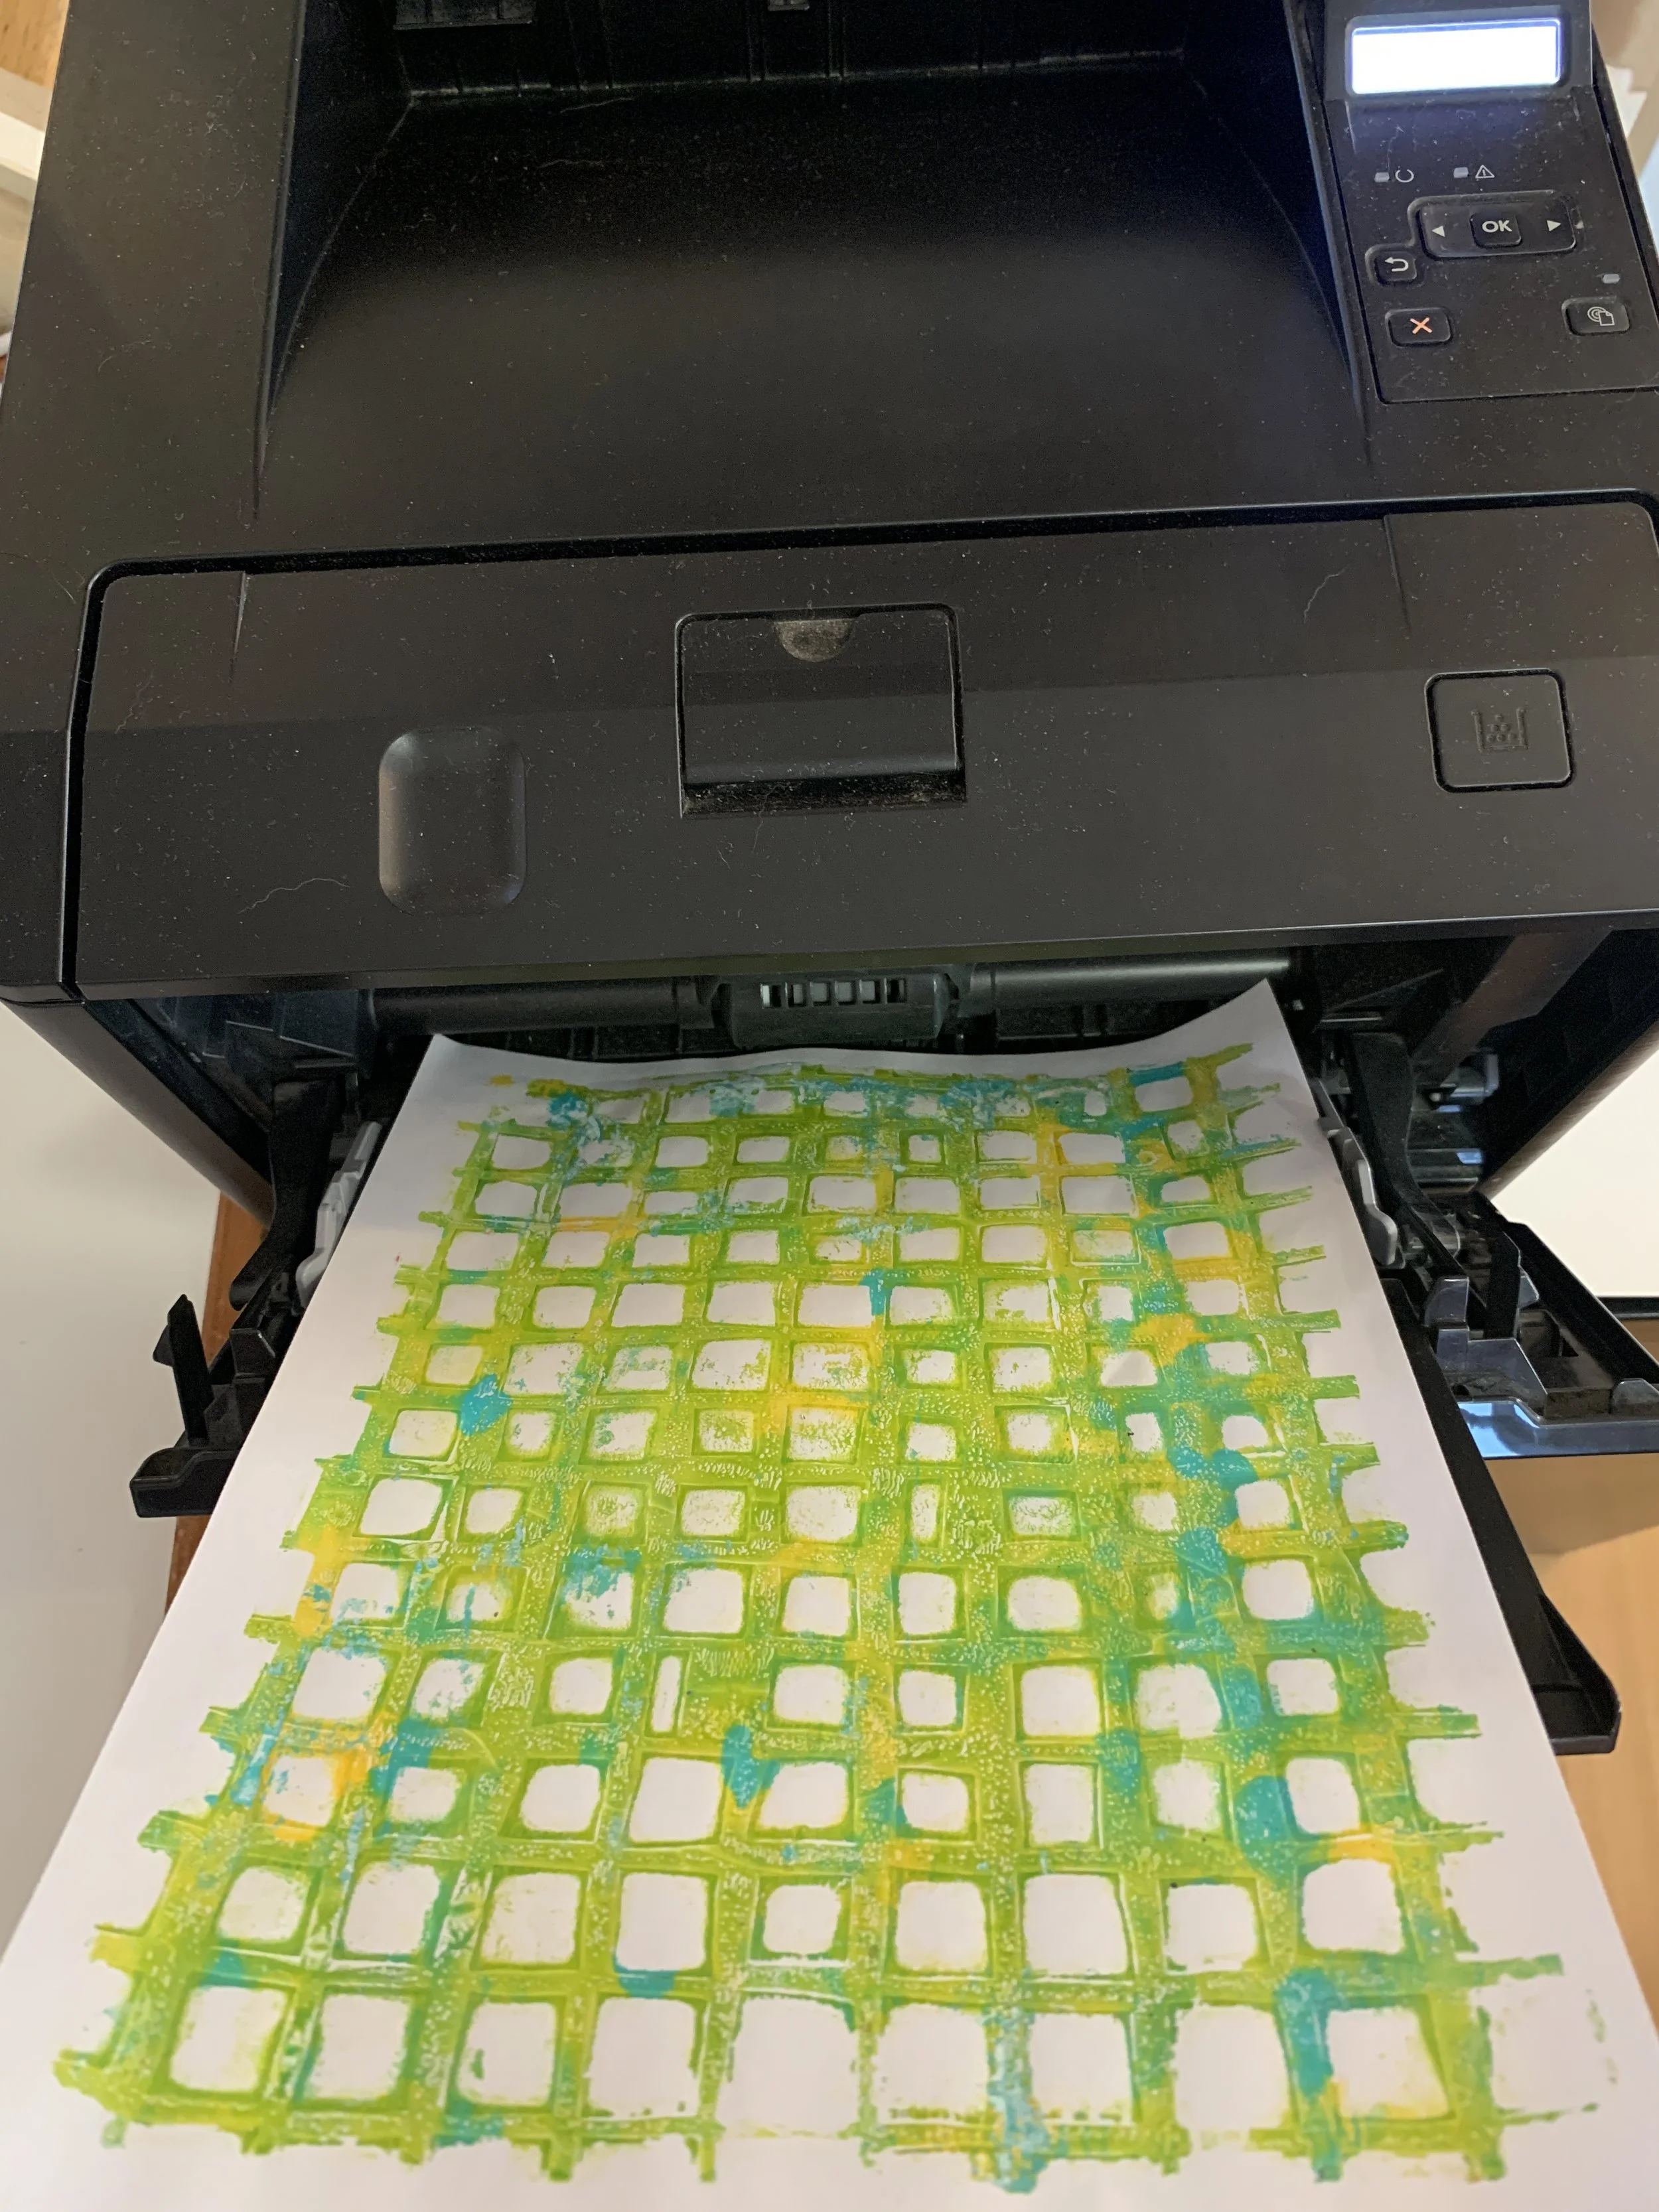
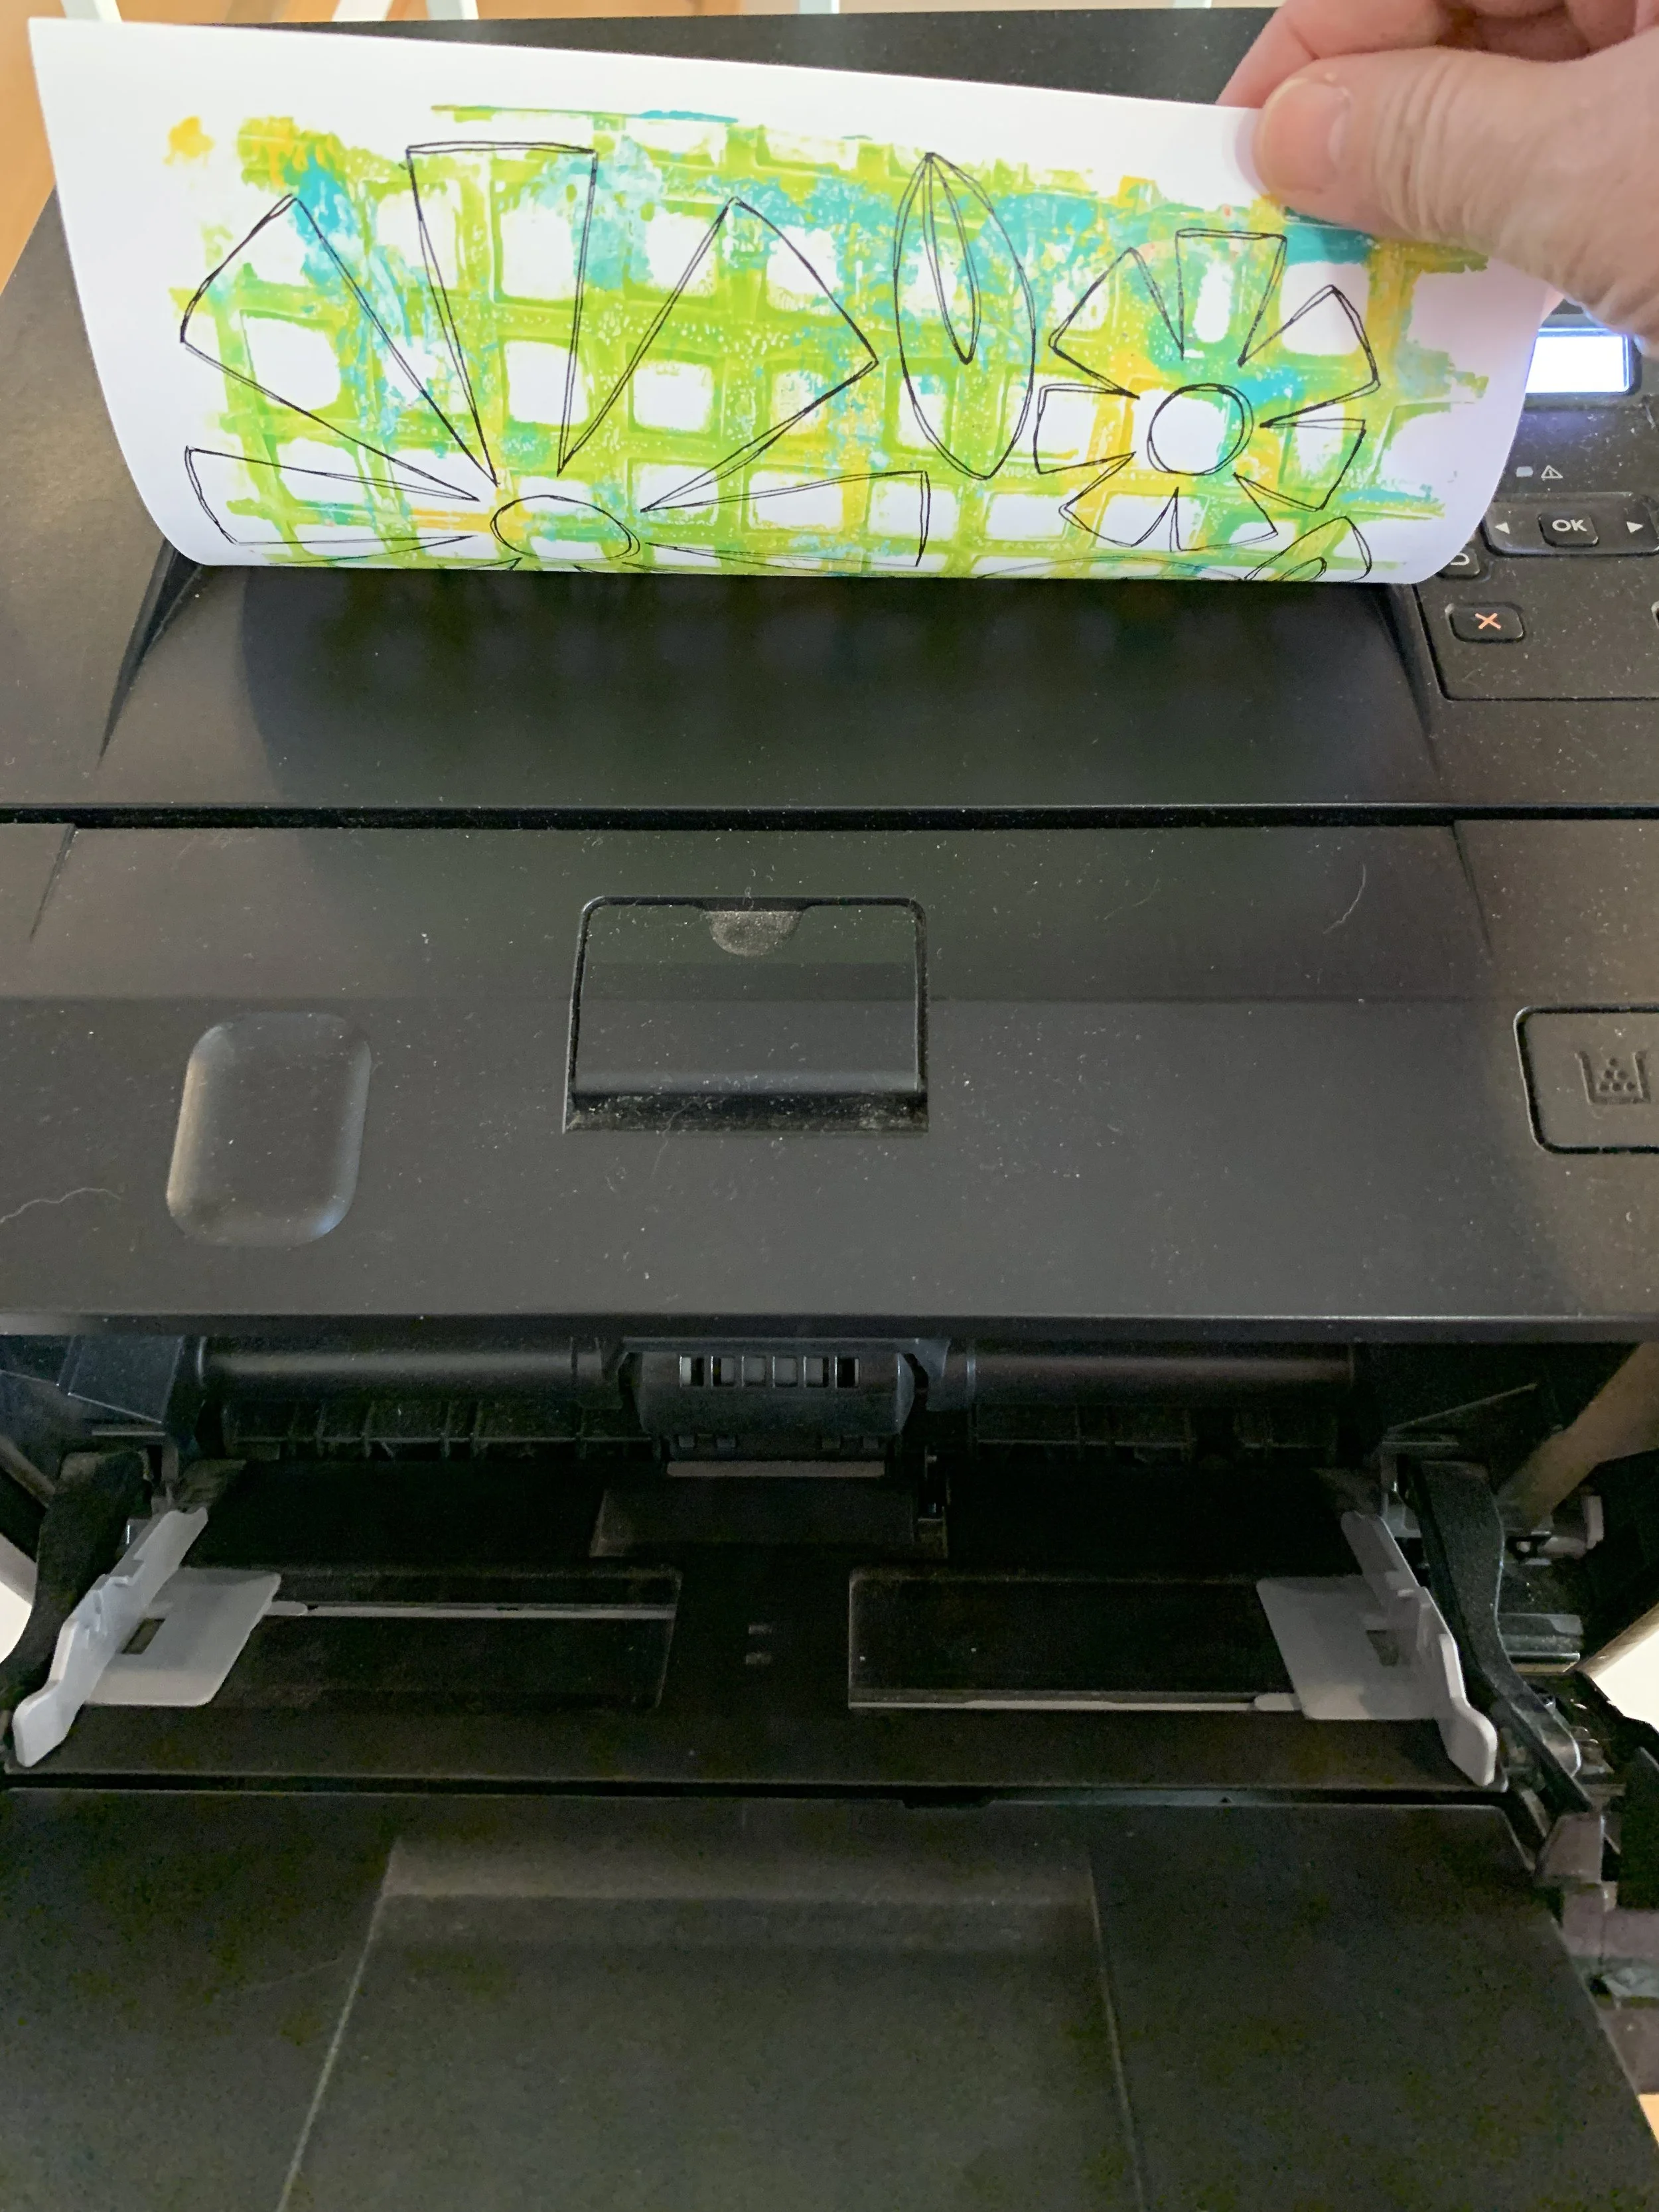
Recently, I came across a pile of gelli prints I had created during an art day with friends-I usually print on copy paper, (nice and thin) so I thought wonder if I can print my Flower Power art printable on a gelli print? That would be SO amazing! I called up Carmen and challenged her to doing the same! Holy Smokes the results were more magnificent than we ever imagined! I just knew we needed to share with you!!!
Here is Carmen’s version of the gelli print posey bouquet! She added some spiral bits for some added dimension and fun to the centers of her flowers.
The creative possibilities are endless!
Fingers crossed!
Hip Hip Hooray-SUCCESS!!!
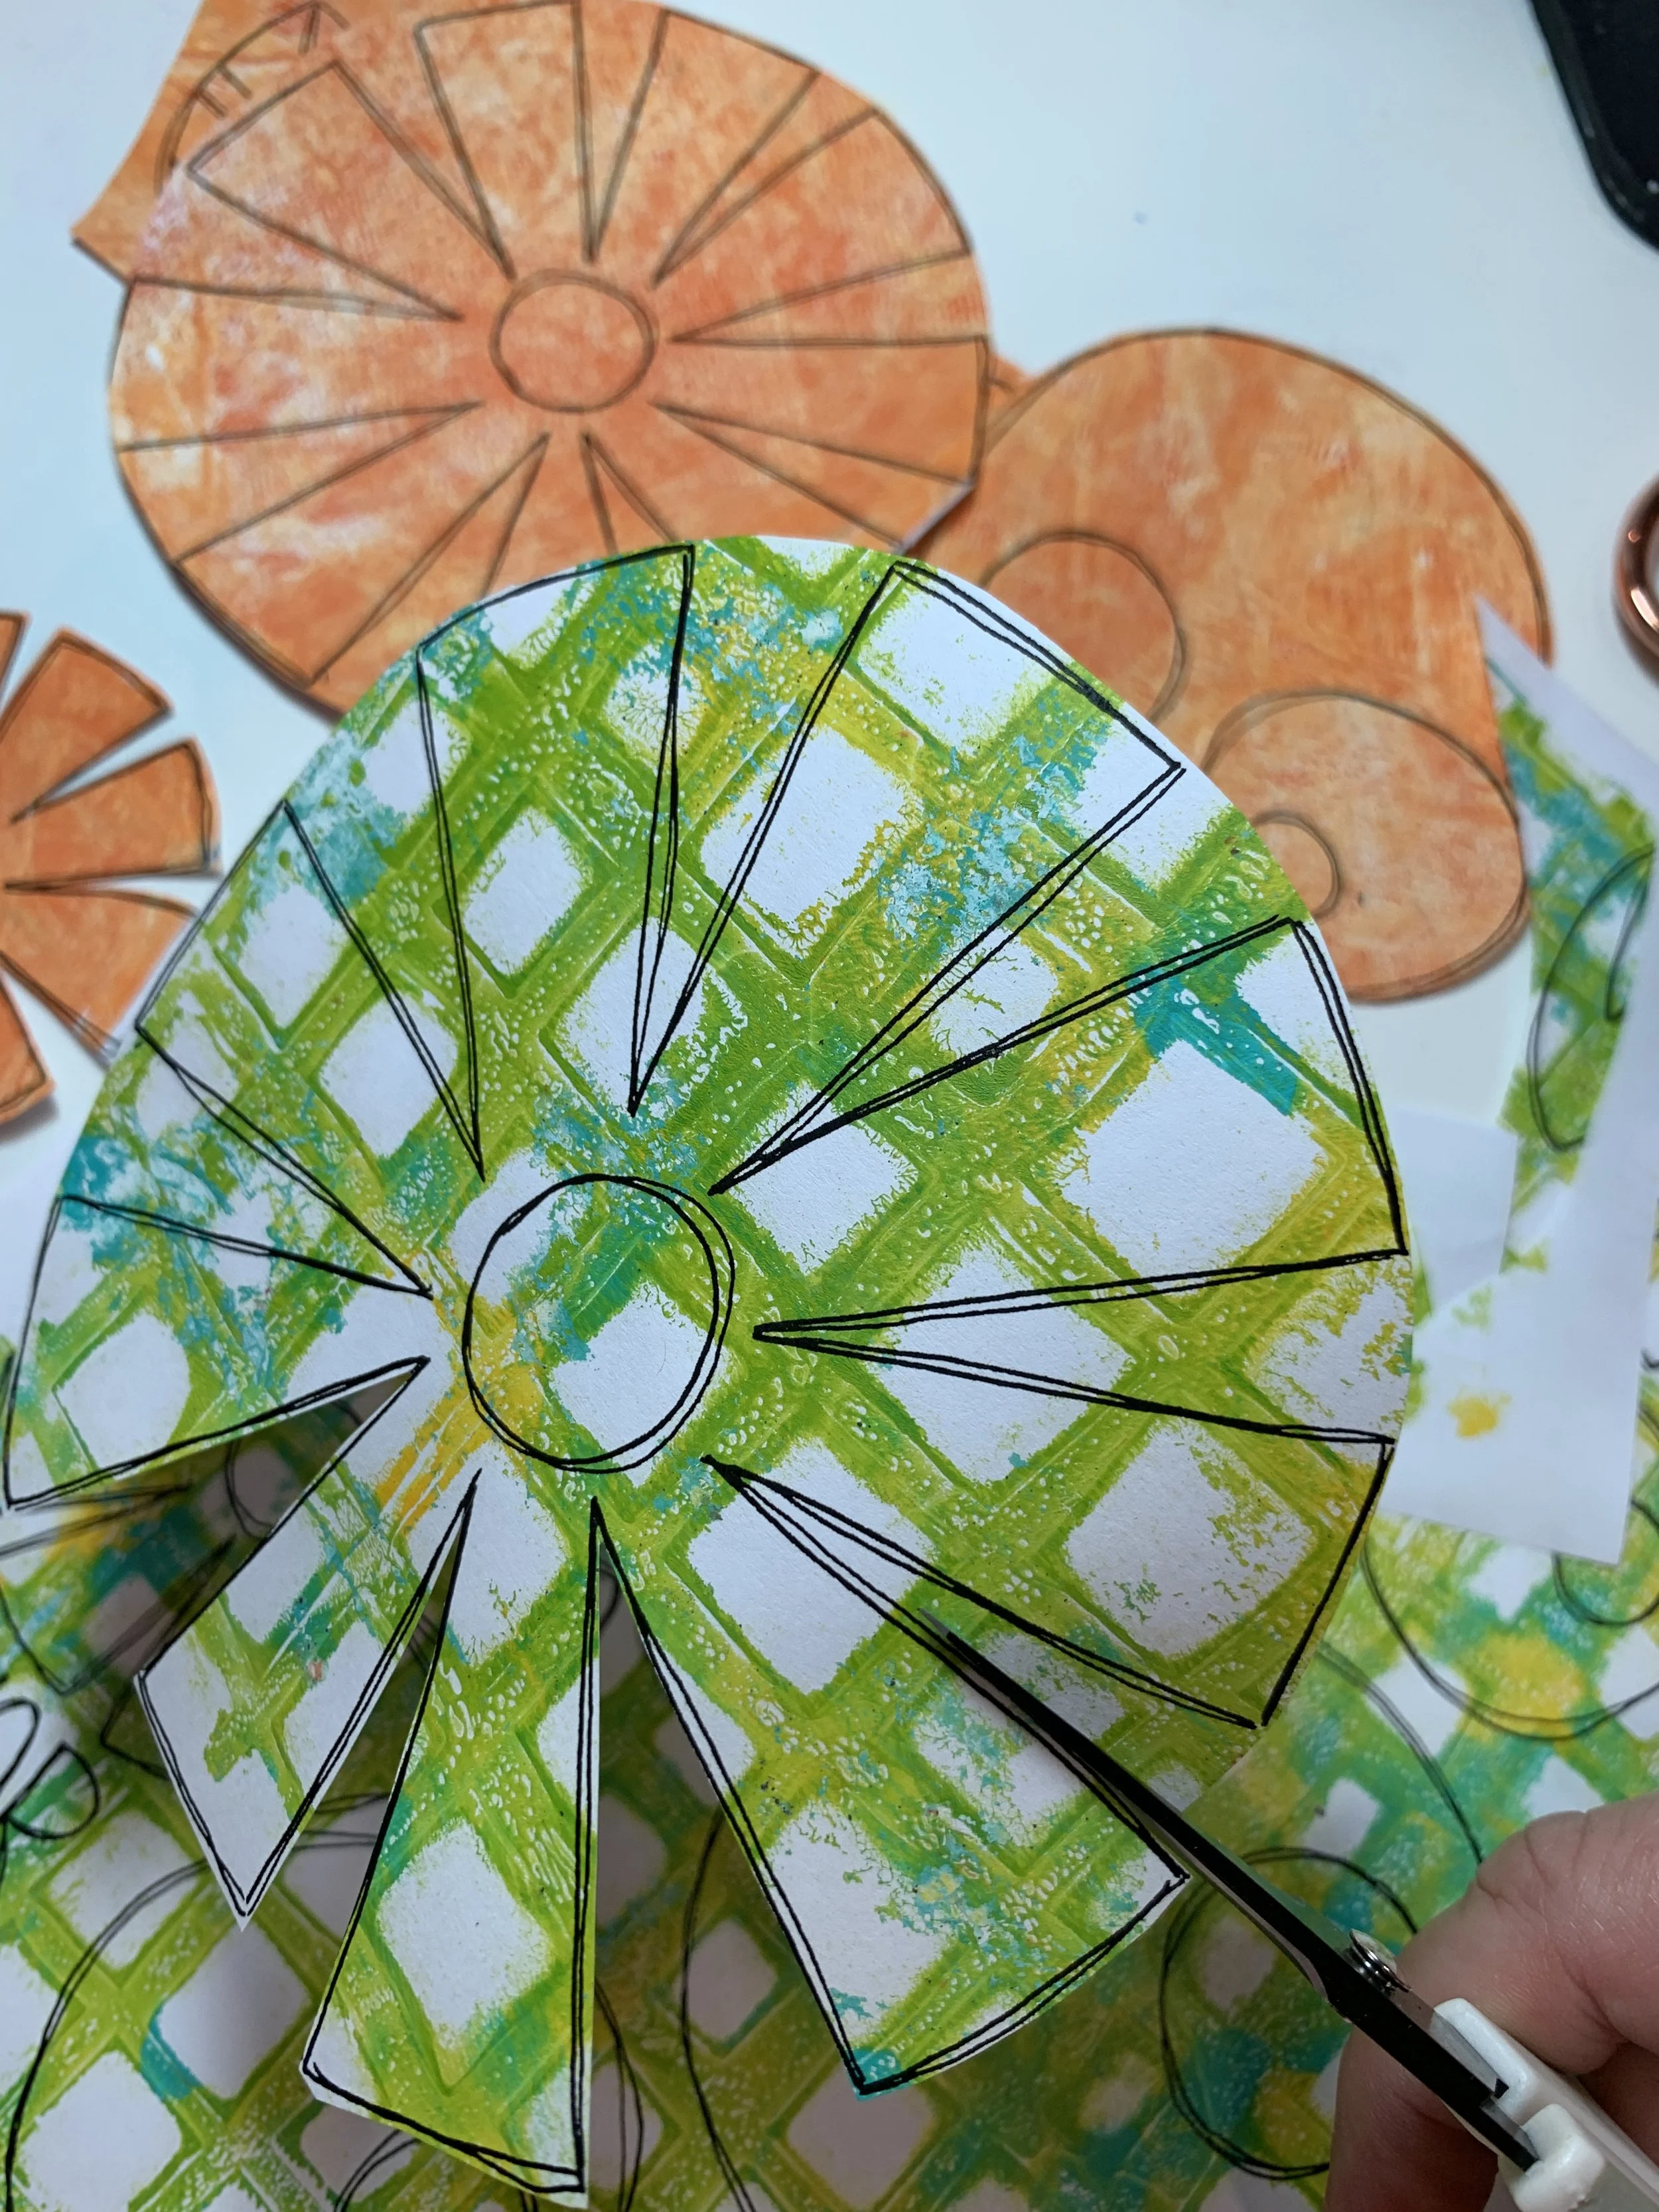
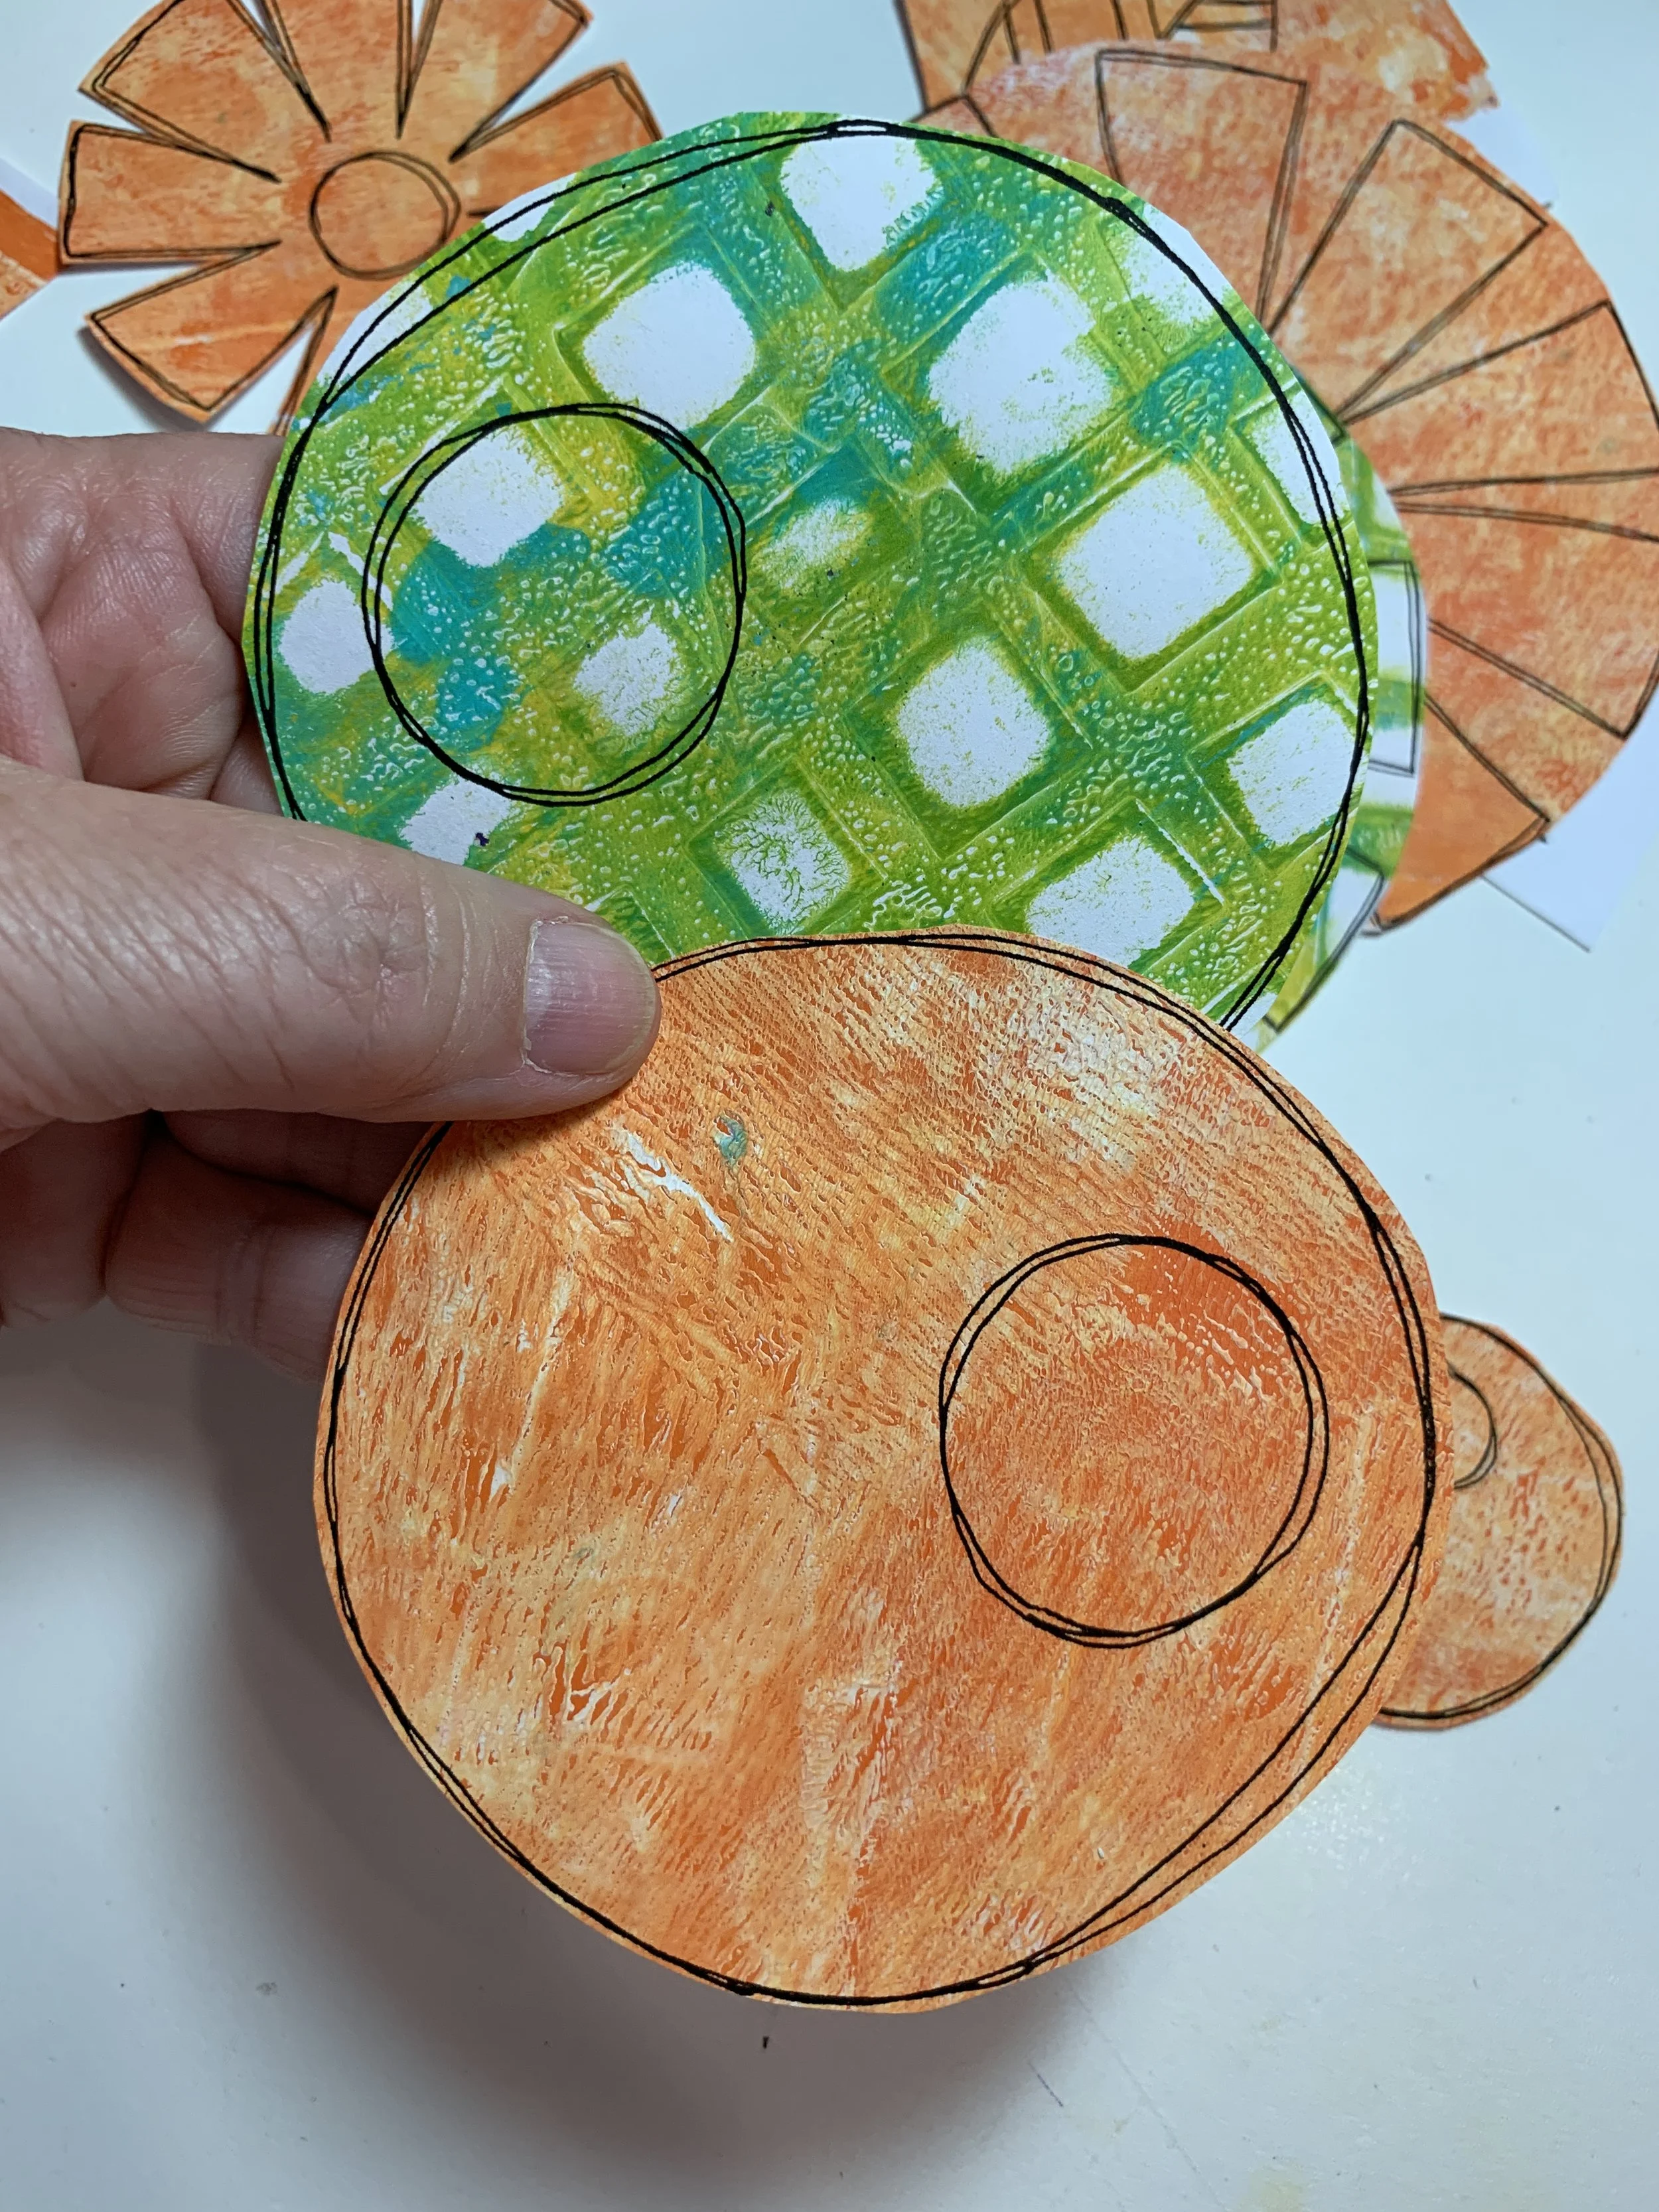
Cut out those posies!
Cut two of the same flower from different gelli prints-we are about to make a reversable flower, of course!
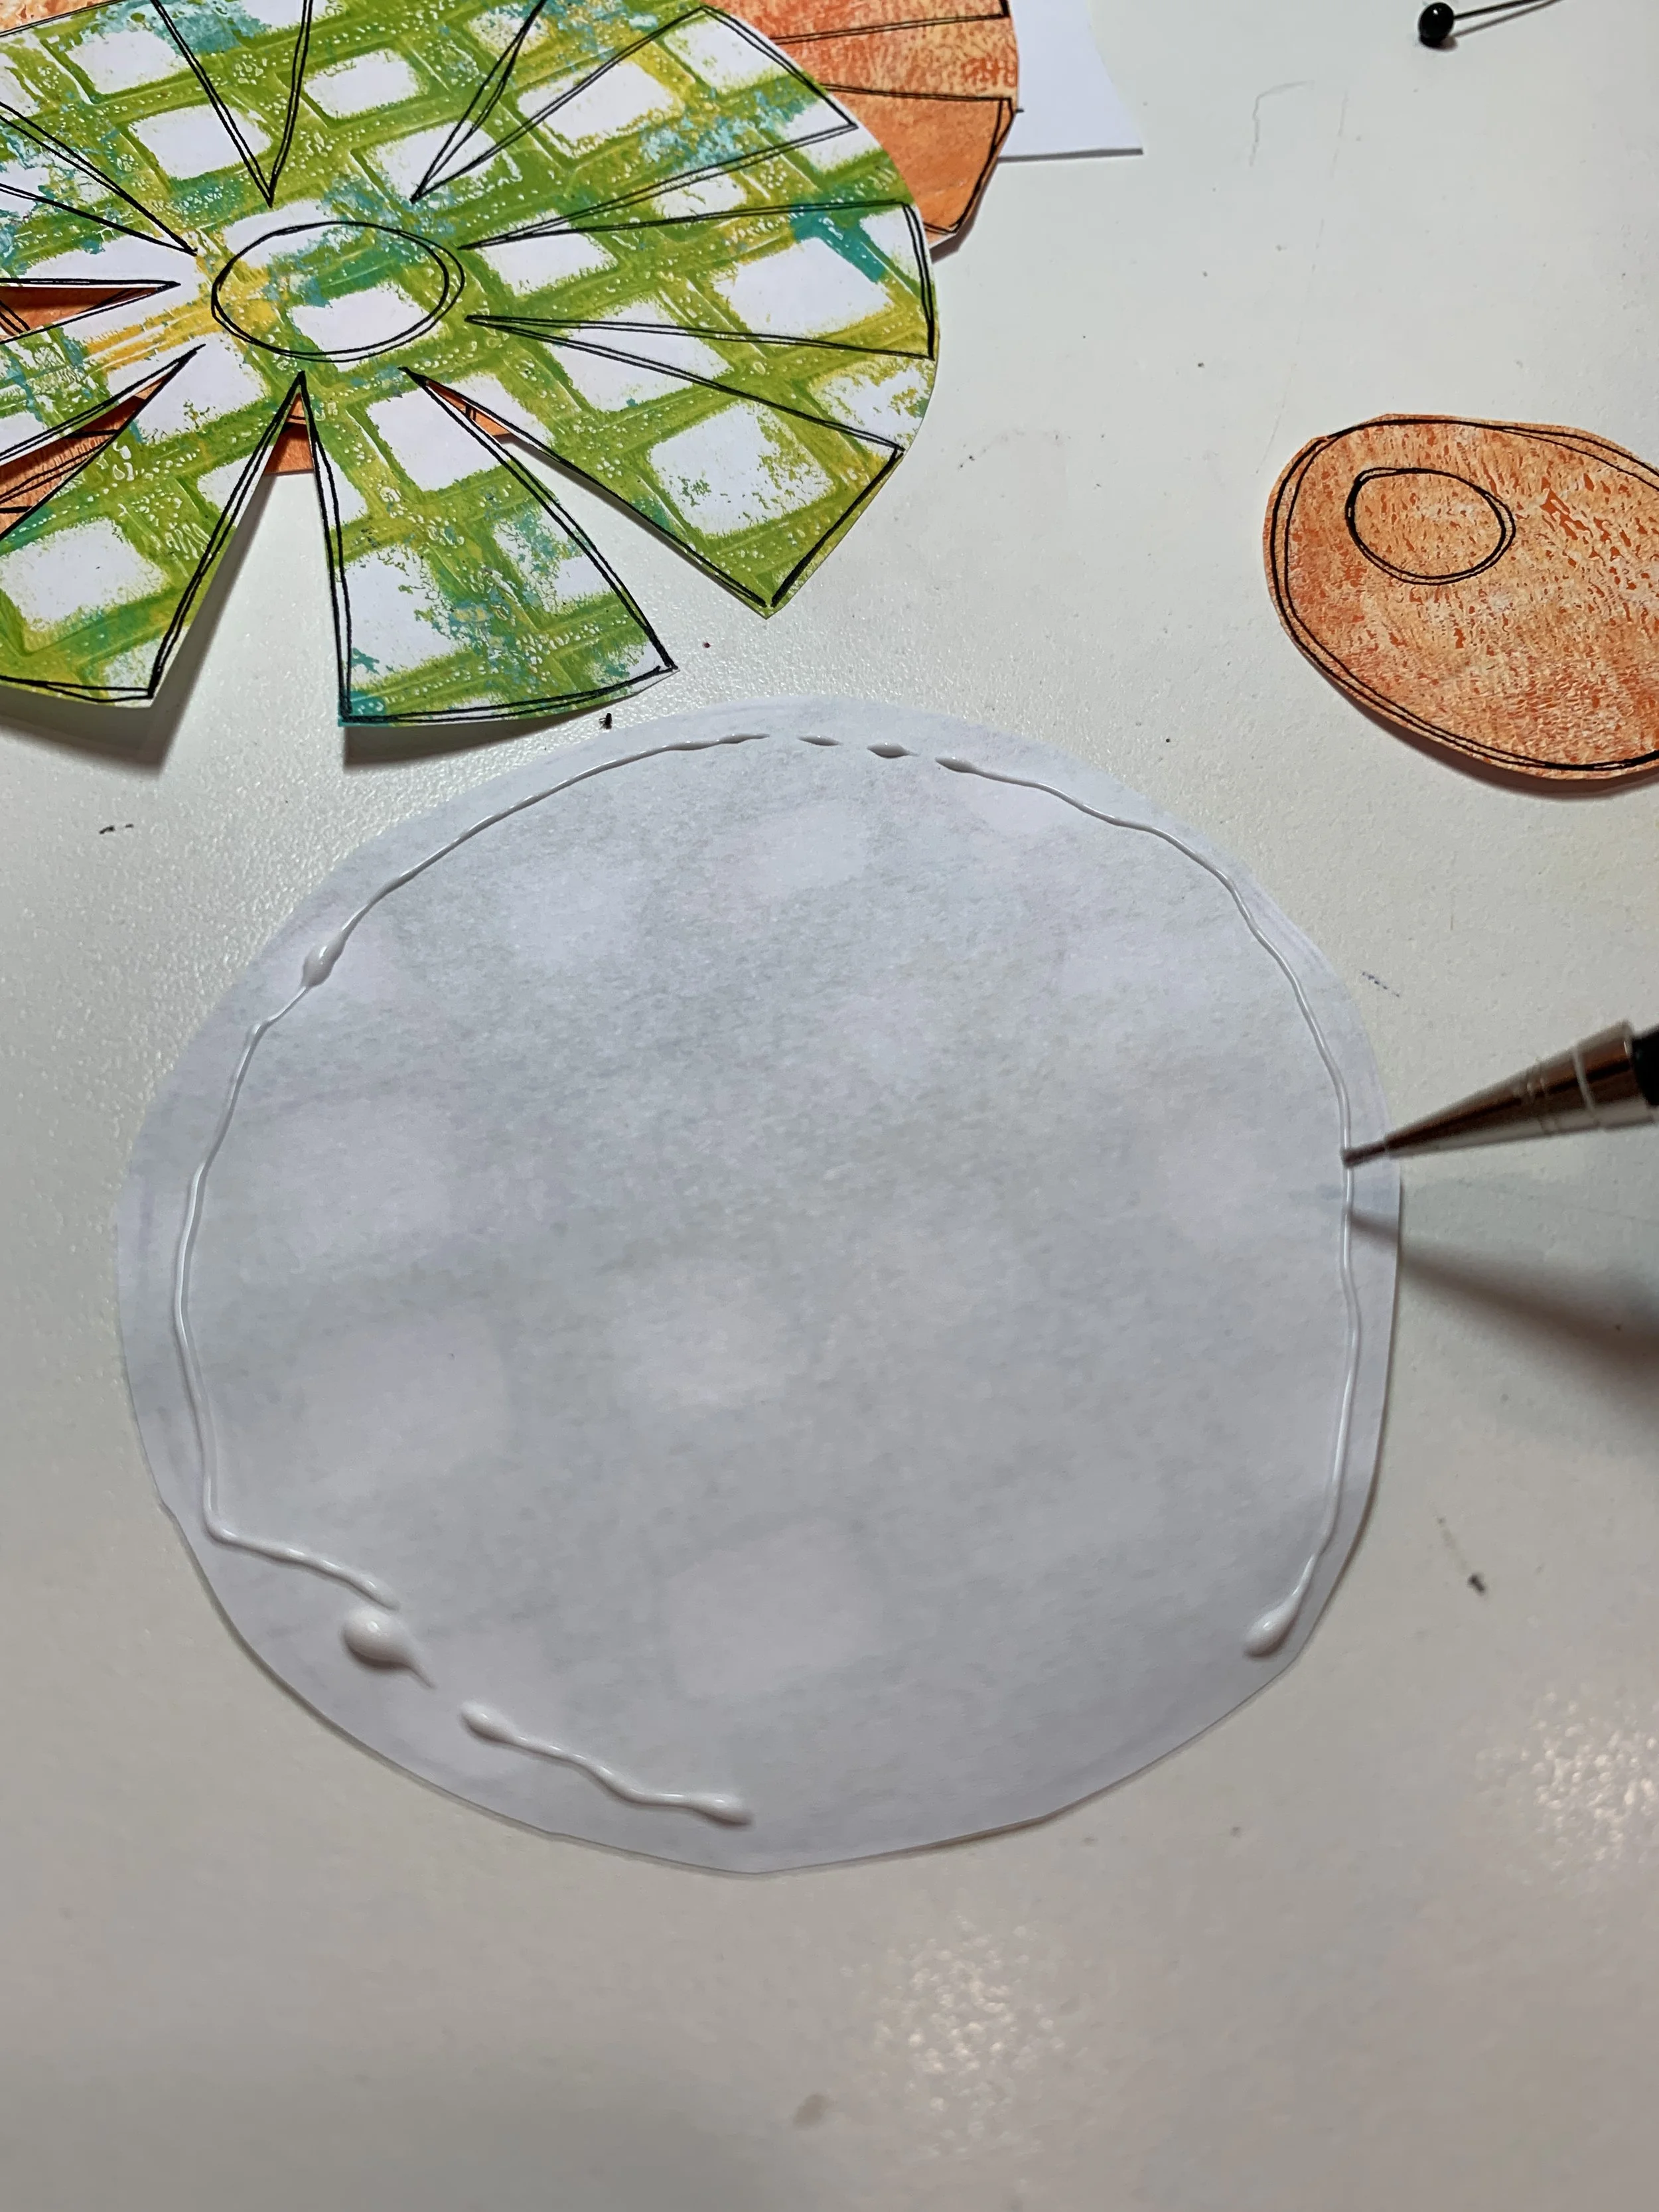
Run a bead of glue around the circumference of the flower (leaving a little opening for stuffing)
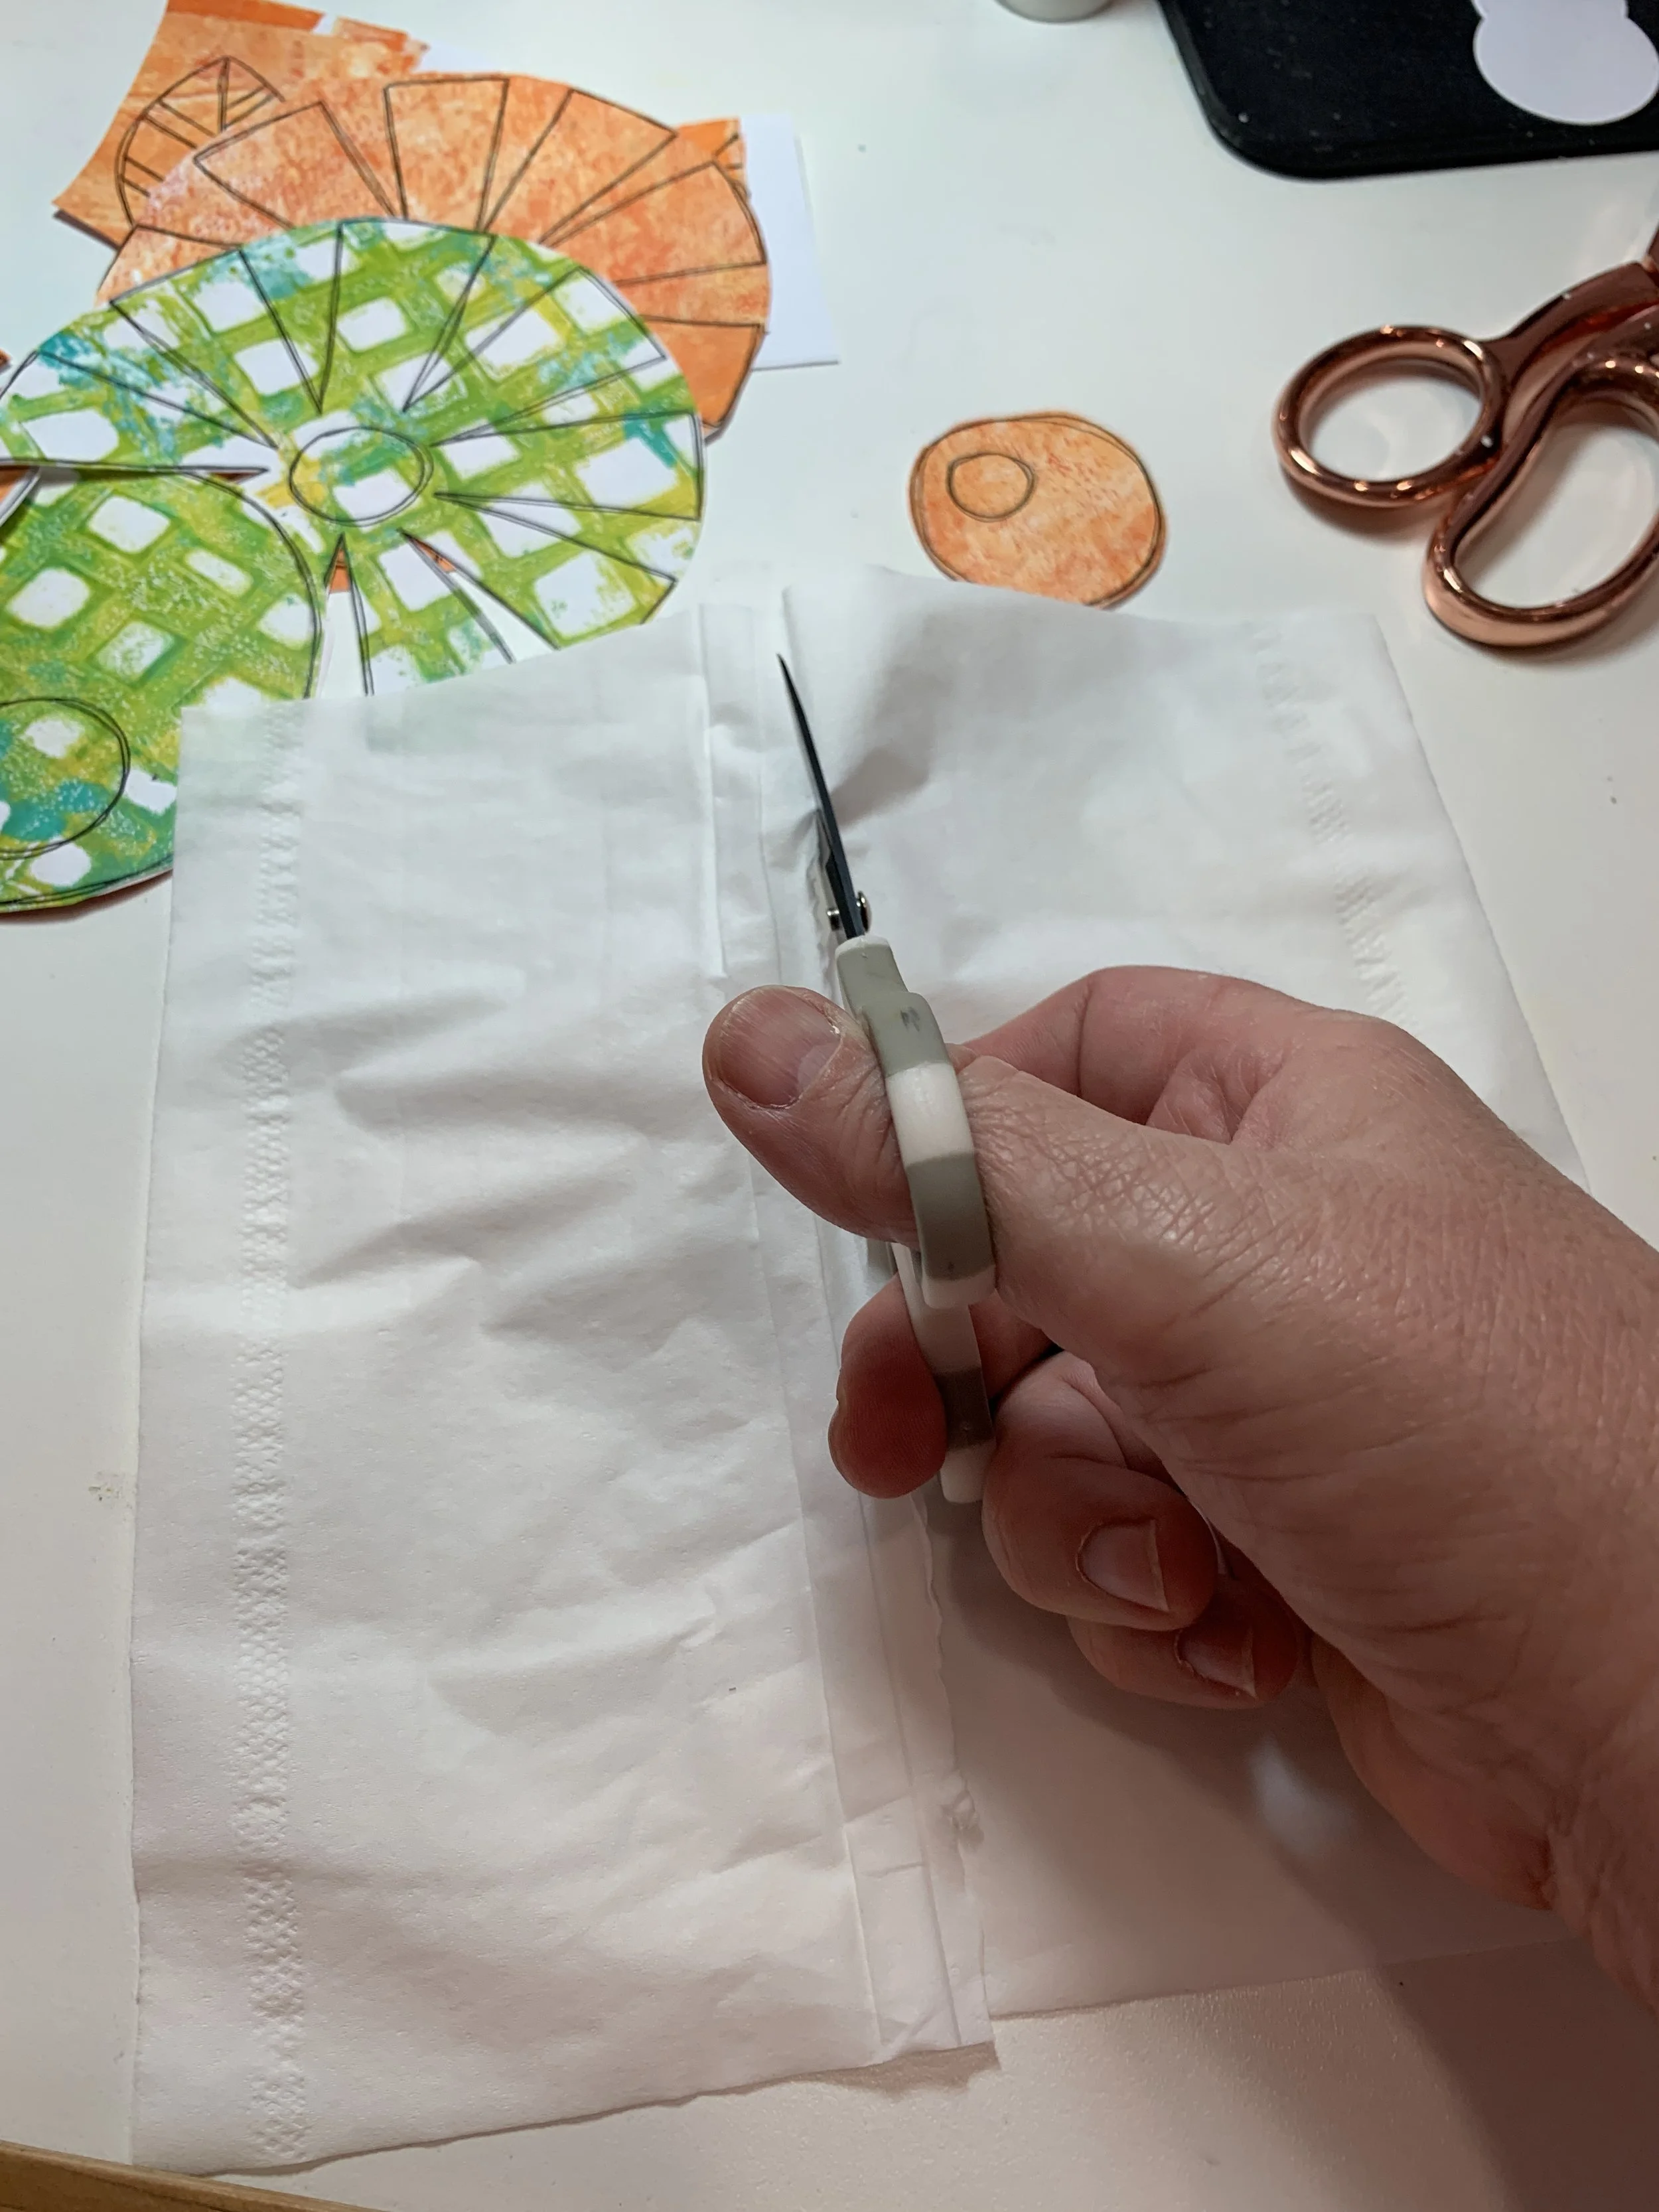
I used a Kleenex to stuff my flower-(it’s soft and pliable (I cut them in half-you don’t need much to provide dimension
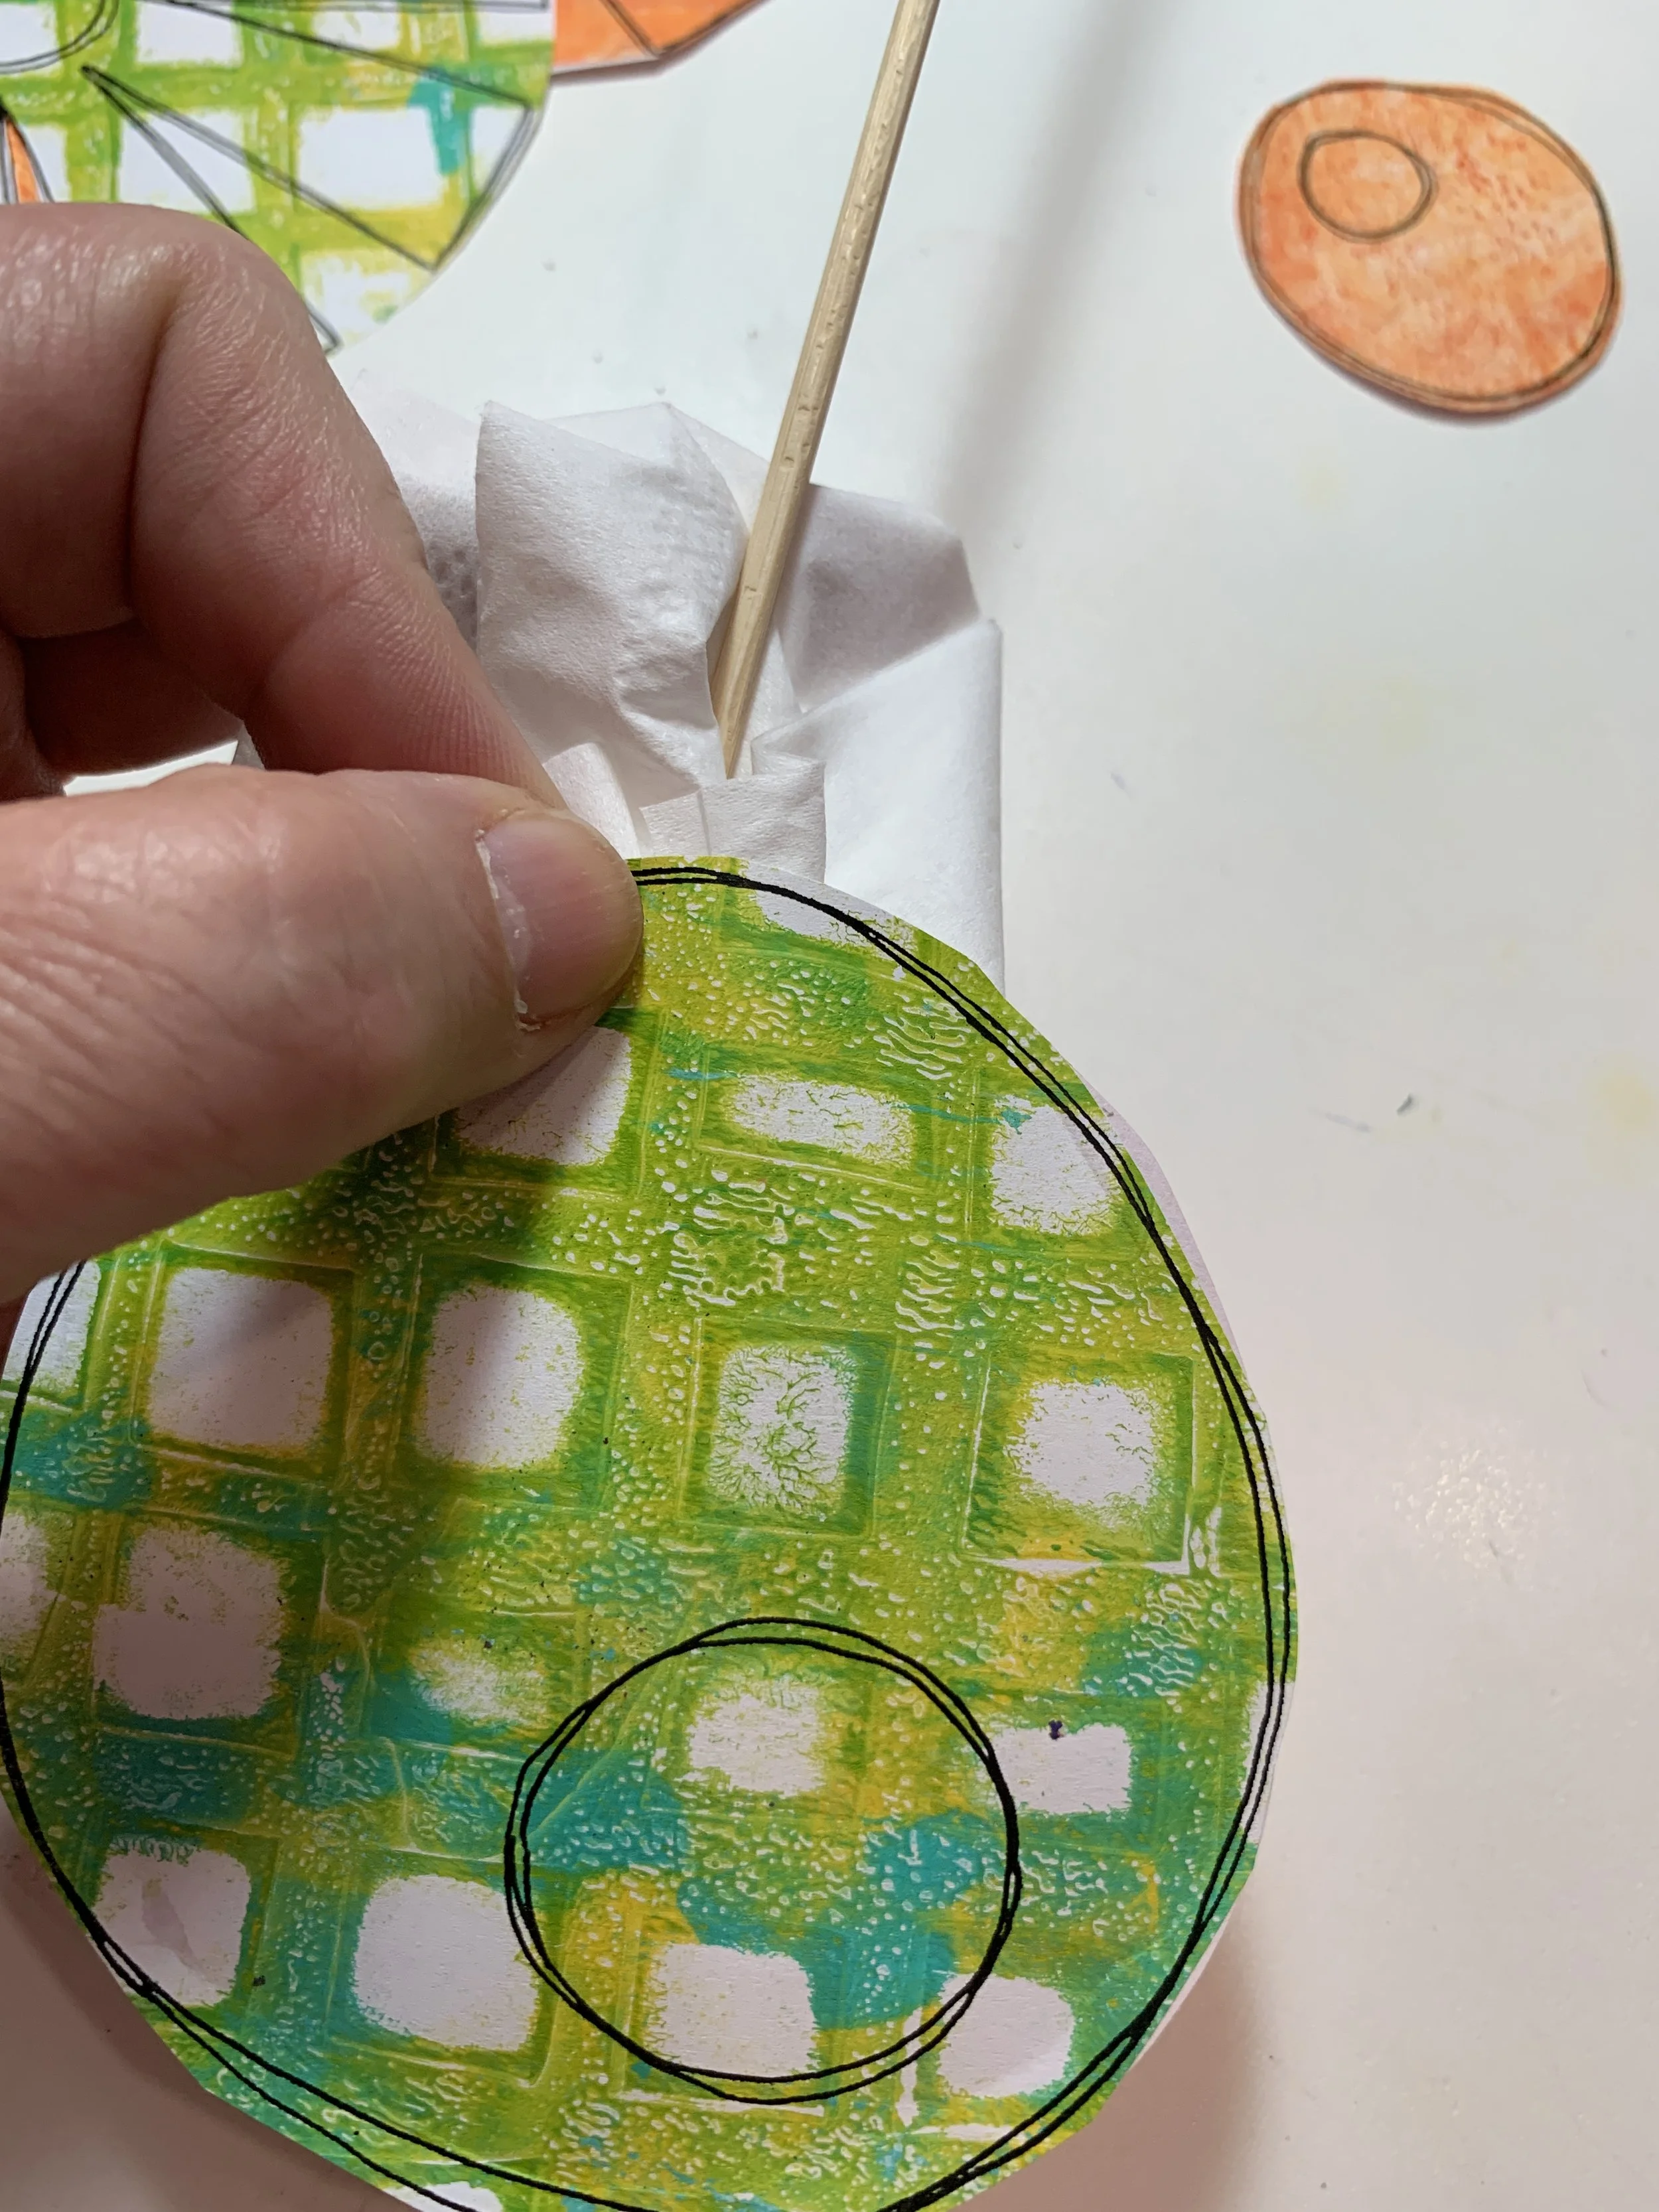
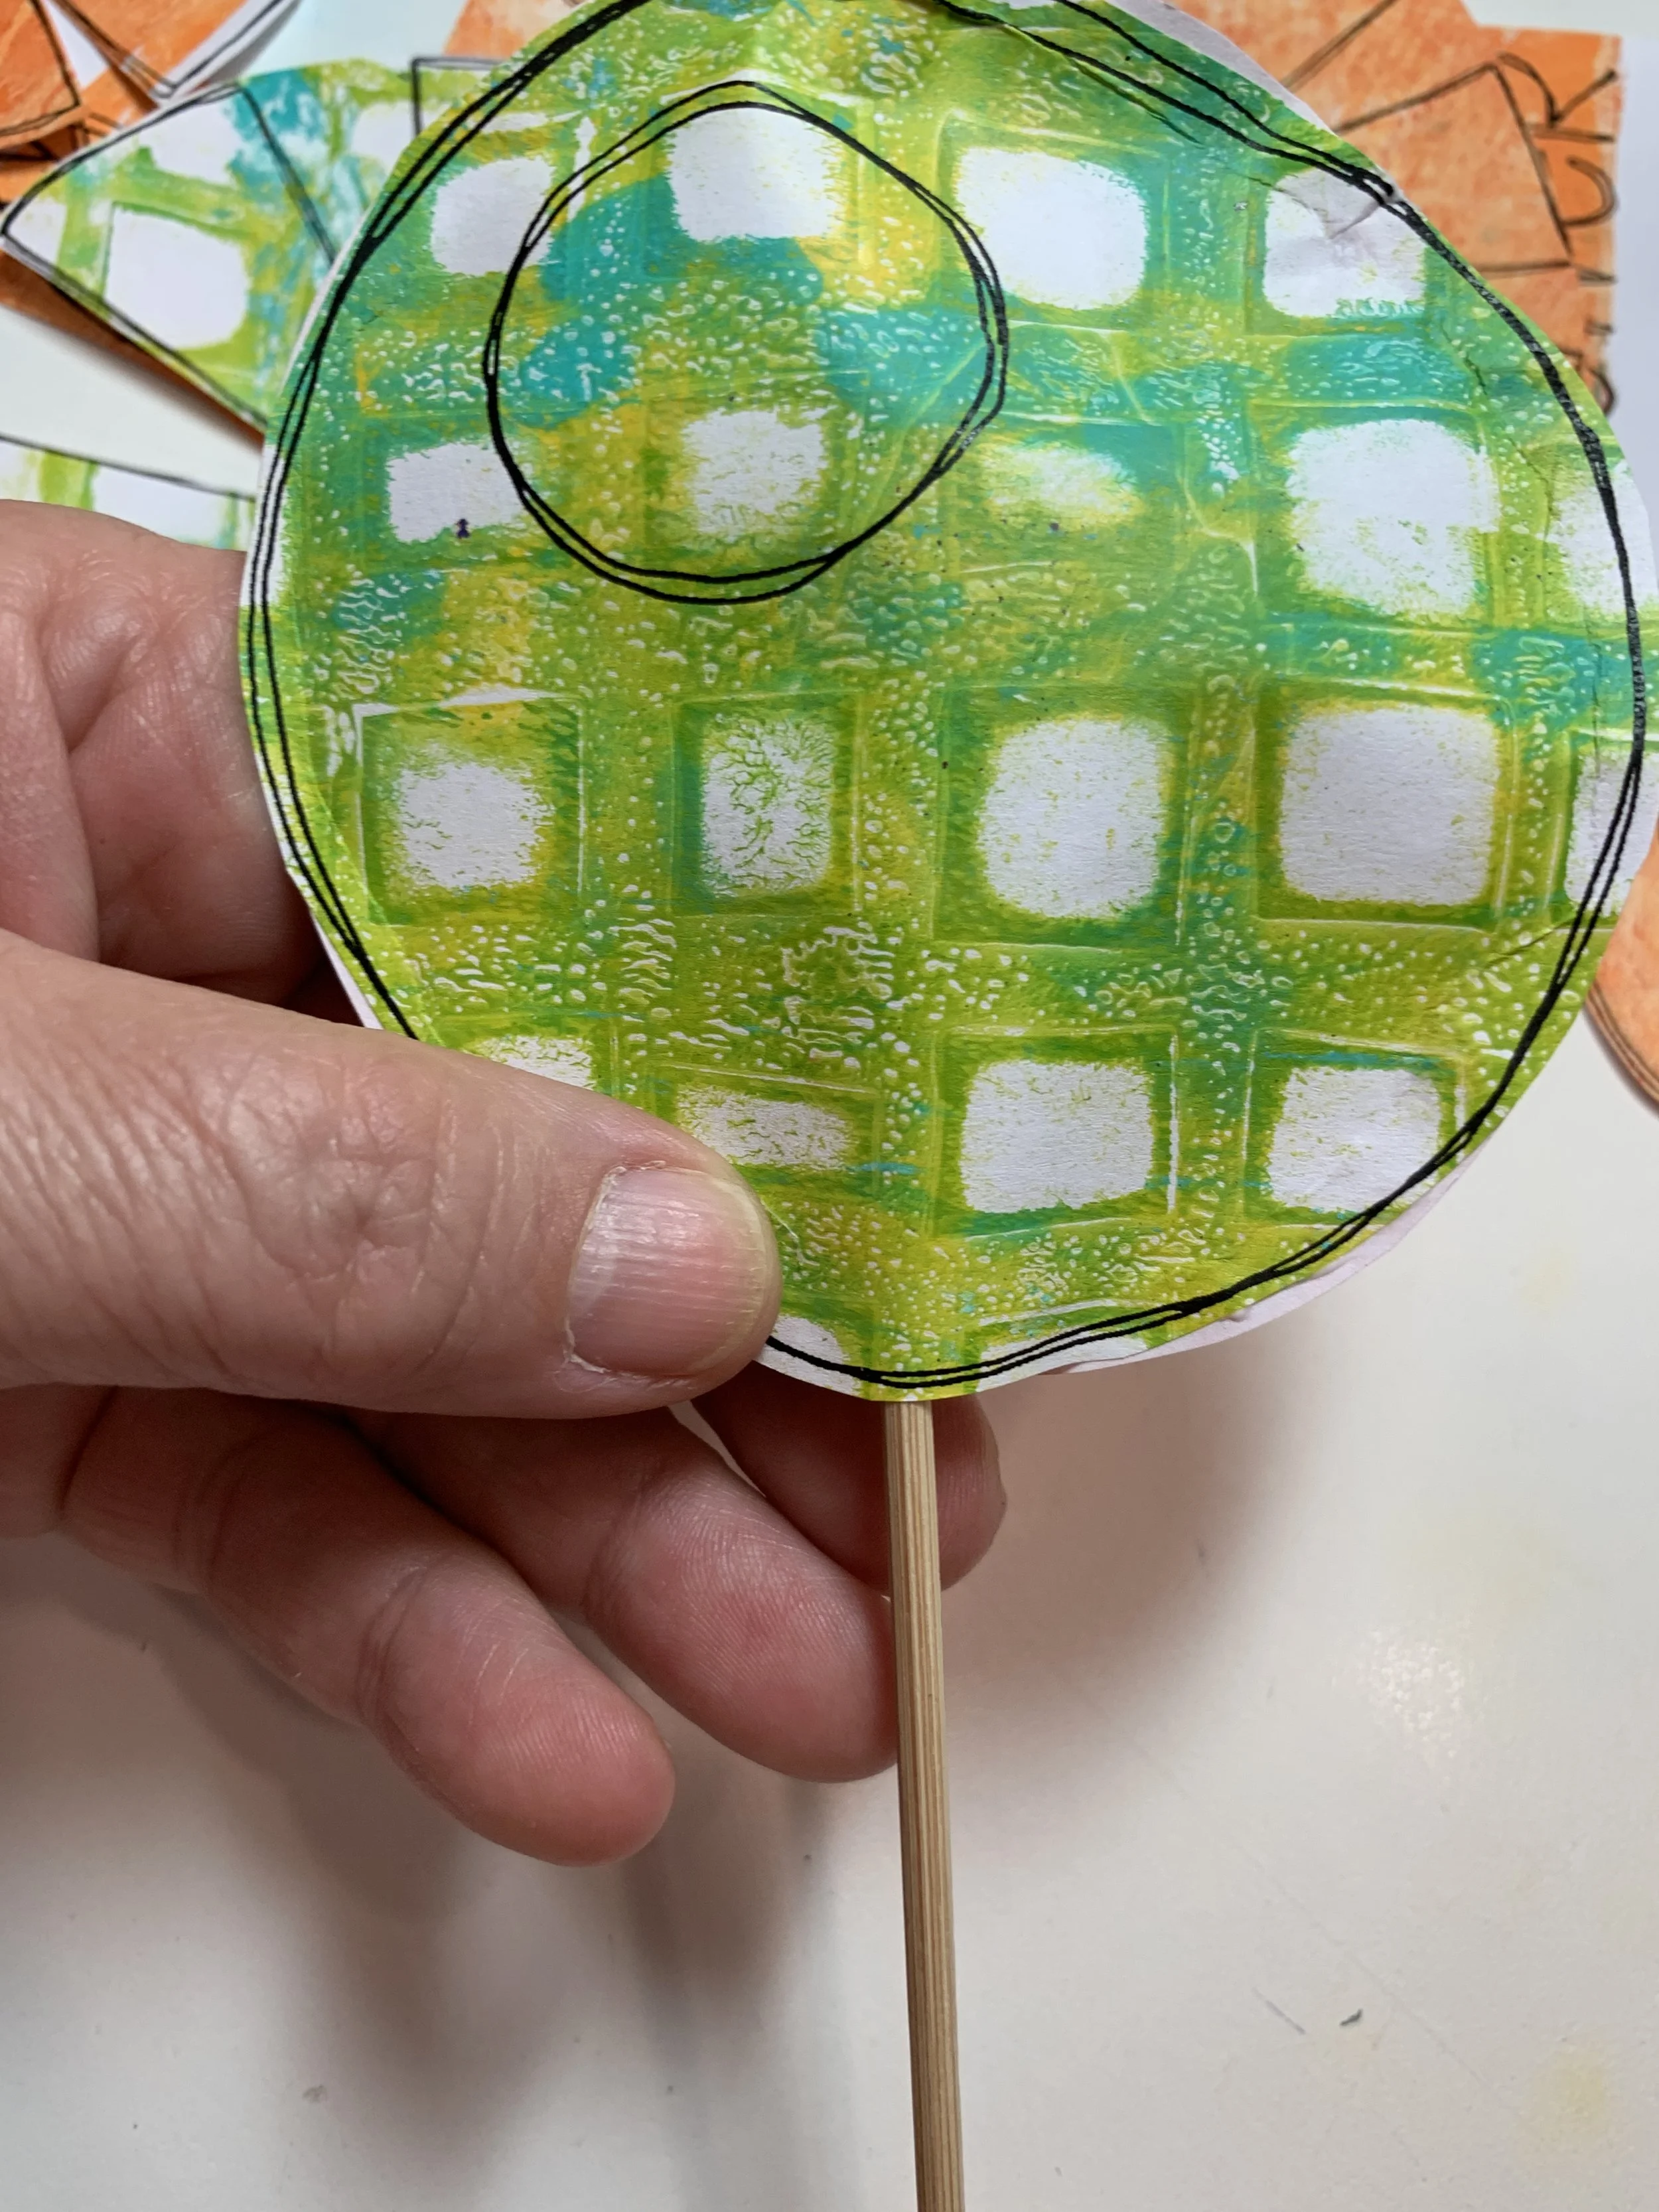
With a bamboo skewer, gently push the stuffing into the flower opening
gently push the bamboo skewer (stem) into the center of the flower, next add a bit more glue on either side of the bamboo skewer to secure-TAA DAA!!!
now repeat until you have an entire artsy bouquet!
If you have never gelli printed the quick sign up for Artsy Alchemy 2 as we will be doing just that in this Sunday’s class!
https://www.anncorbierescottdesigns.com/featured-classes/p/art-alchemy-2
IT”S SO FUN!!!!!
Finger painting
Yep, you read that correctly! Finger-painting!
if you know me, you know that my hands almost always have some sort of art supply covering them! And I am here for it! I love getting messy with color, experimenting with it, putting a new medium through it’s paces, getting to know it and it’s capabilities! I am SUPER excited to share a cool card base background with you, featuring a fun fingerpainting technique and TCW Ocean Blue Stencil Butter
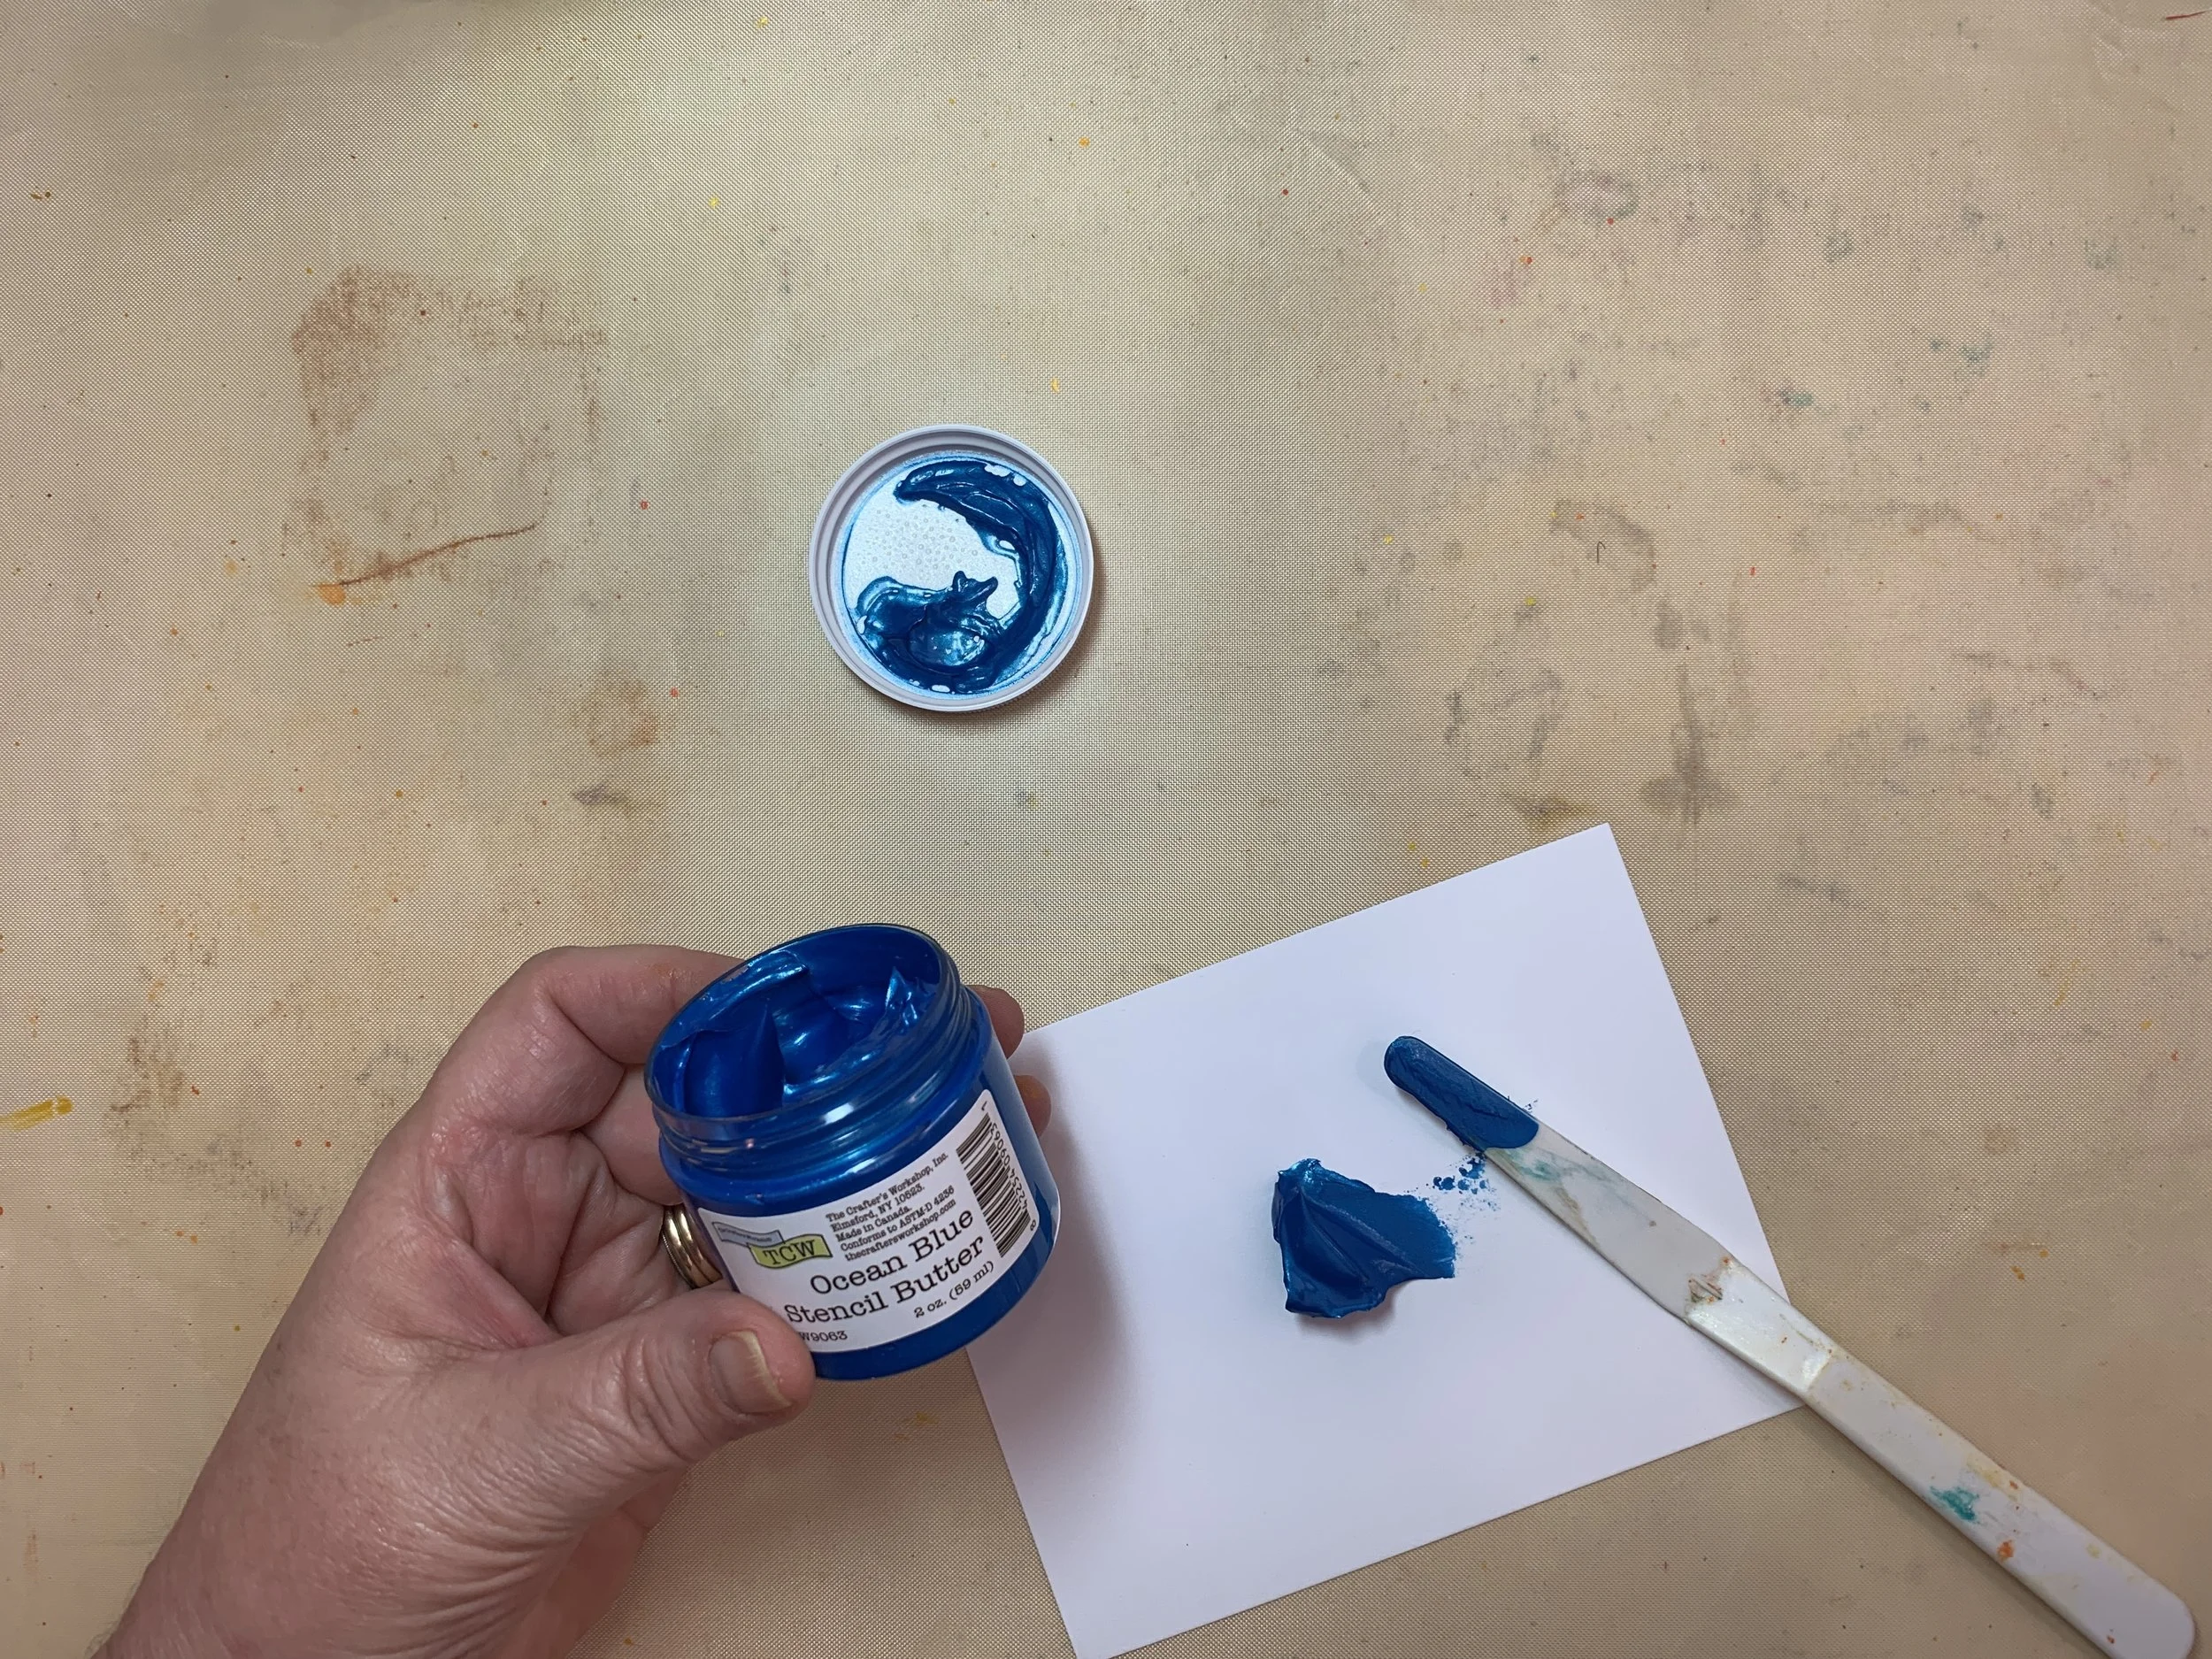
I start with a pre-cut piece of white cardstock, a palette knife and some Ocean Blue stencil butter. I add a bit of stencil butter to my cardstock with my palette knife, scrapping off excess back into the jar. (never waste color)
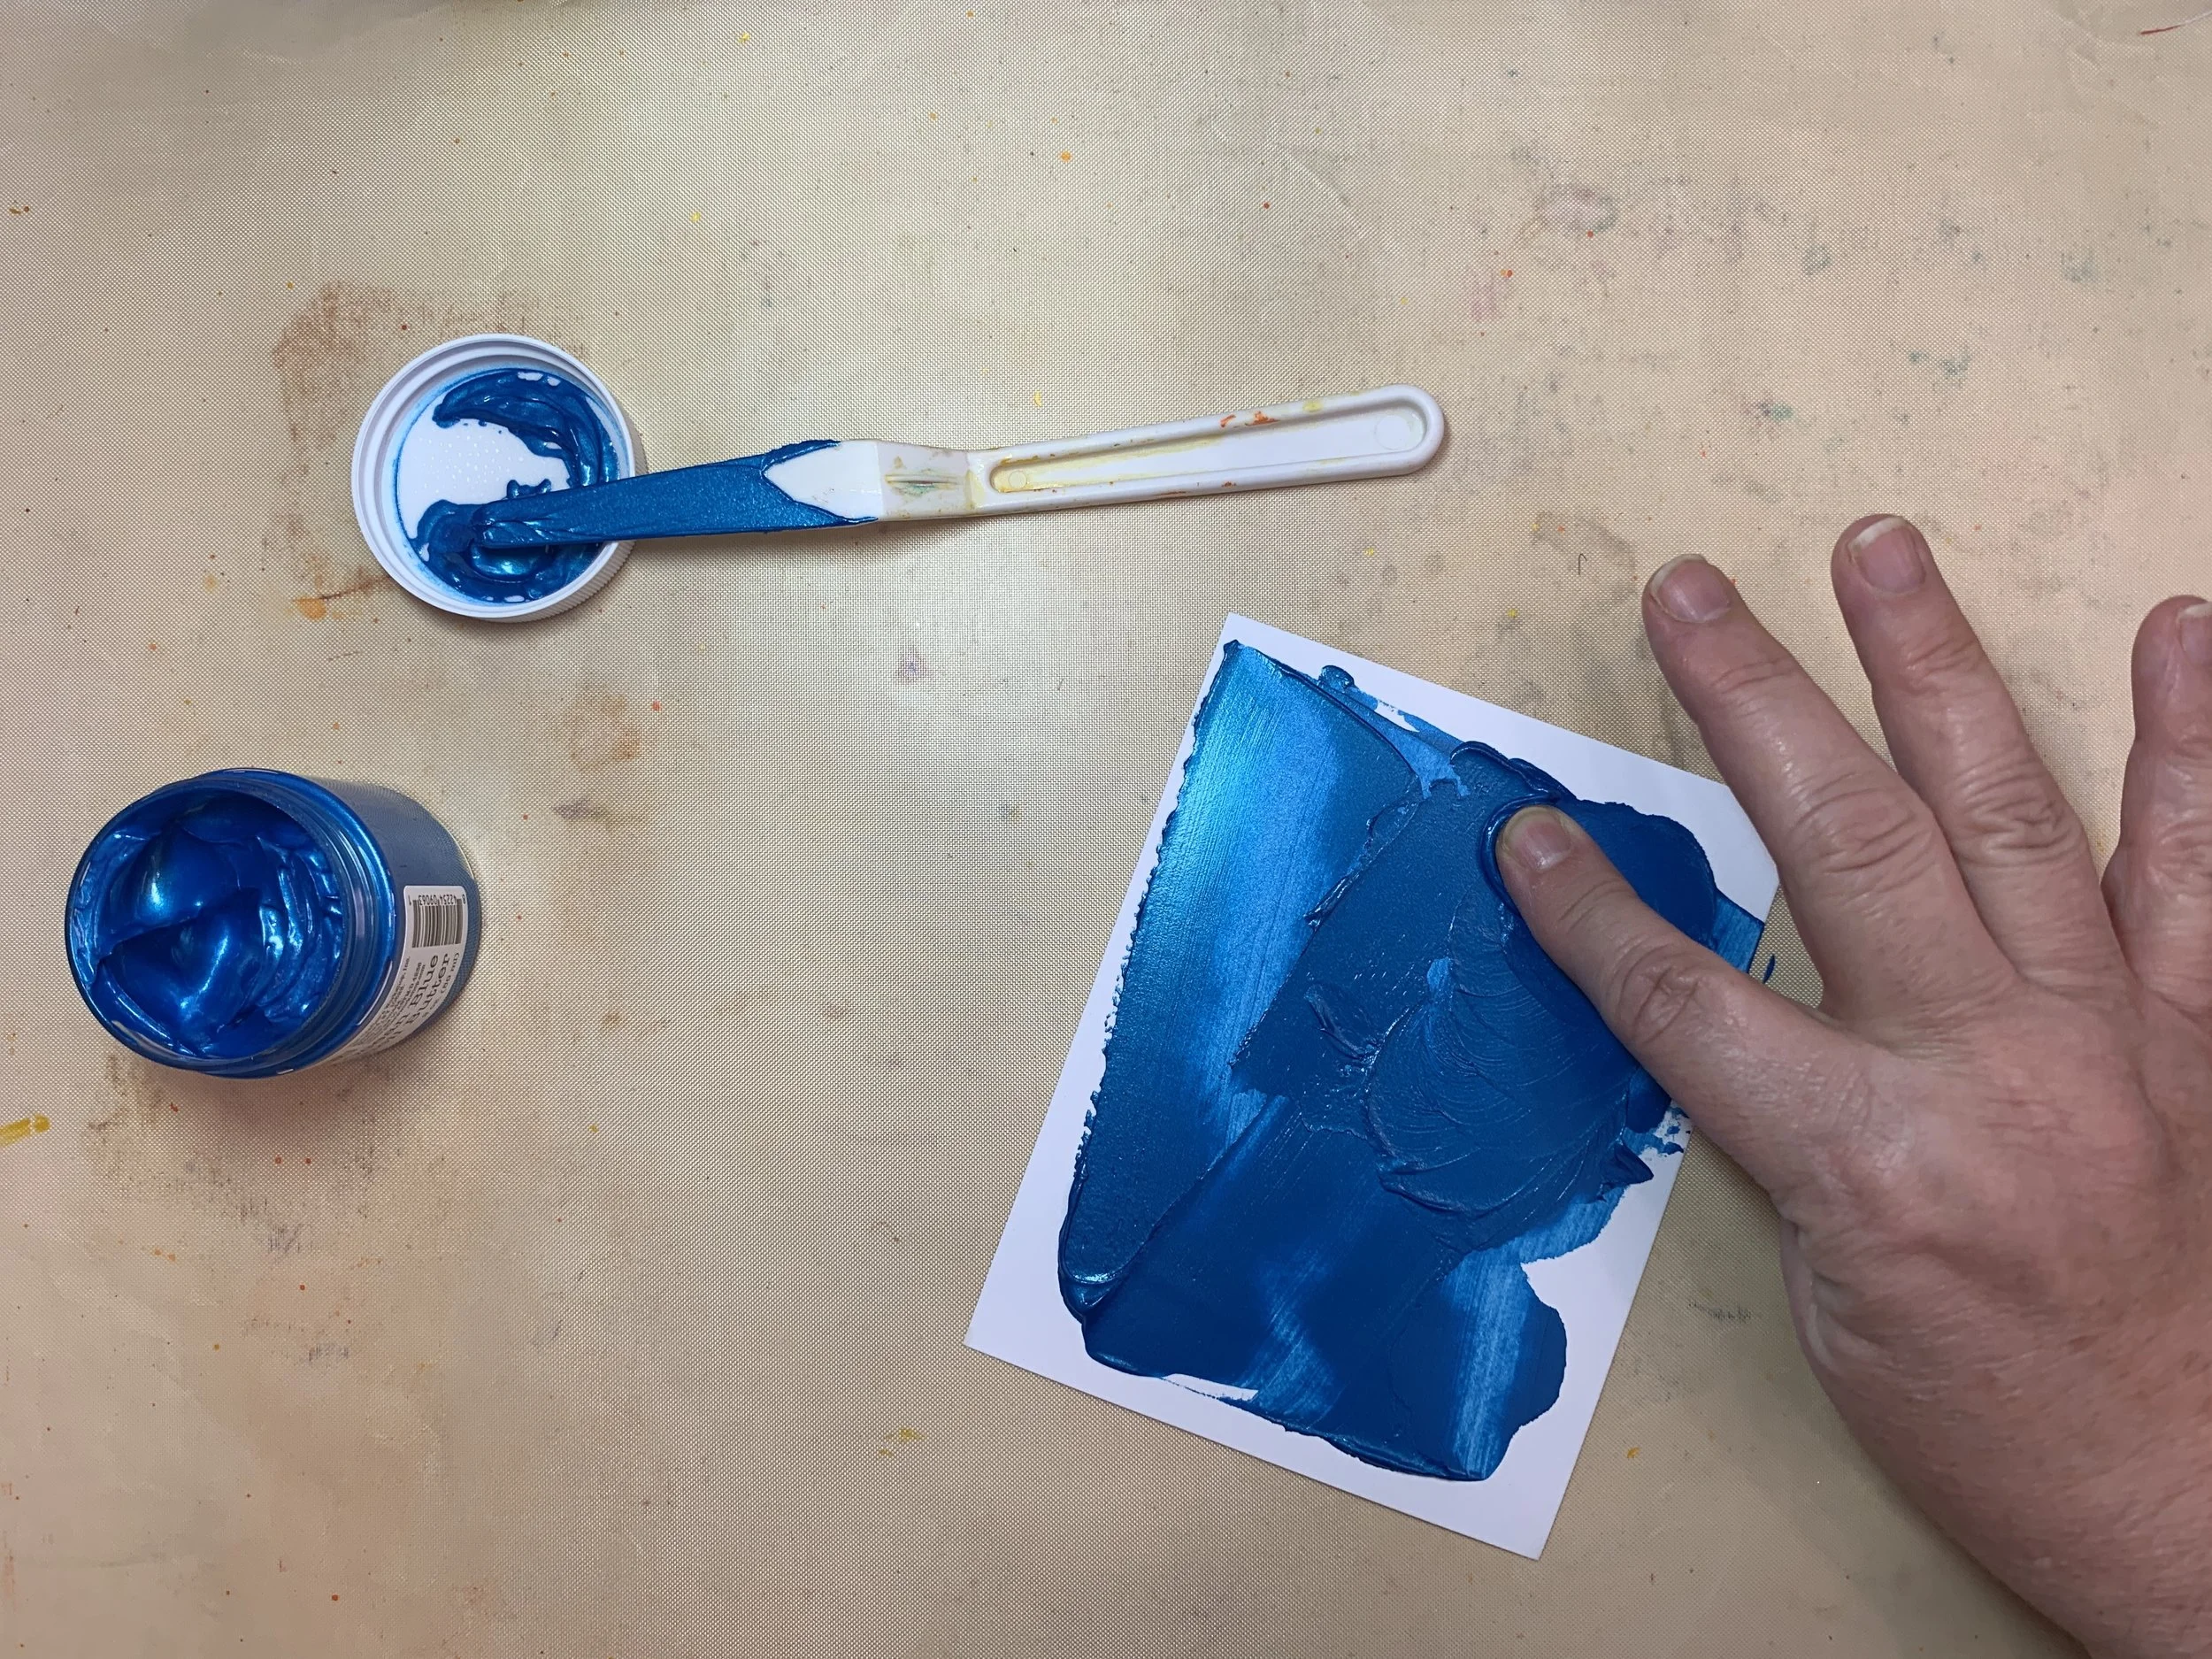
Next step is the absolute most fun! Spread that creamy dreamy stencil butter across the entire piece of cardstock! I love the fact that I get lots of organic dimension with this technique. Lots of subtle lights and darks and some cool texture. Stencil butters dry lickety split!
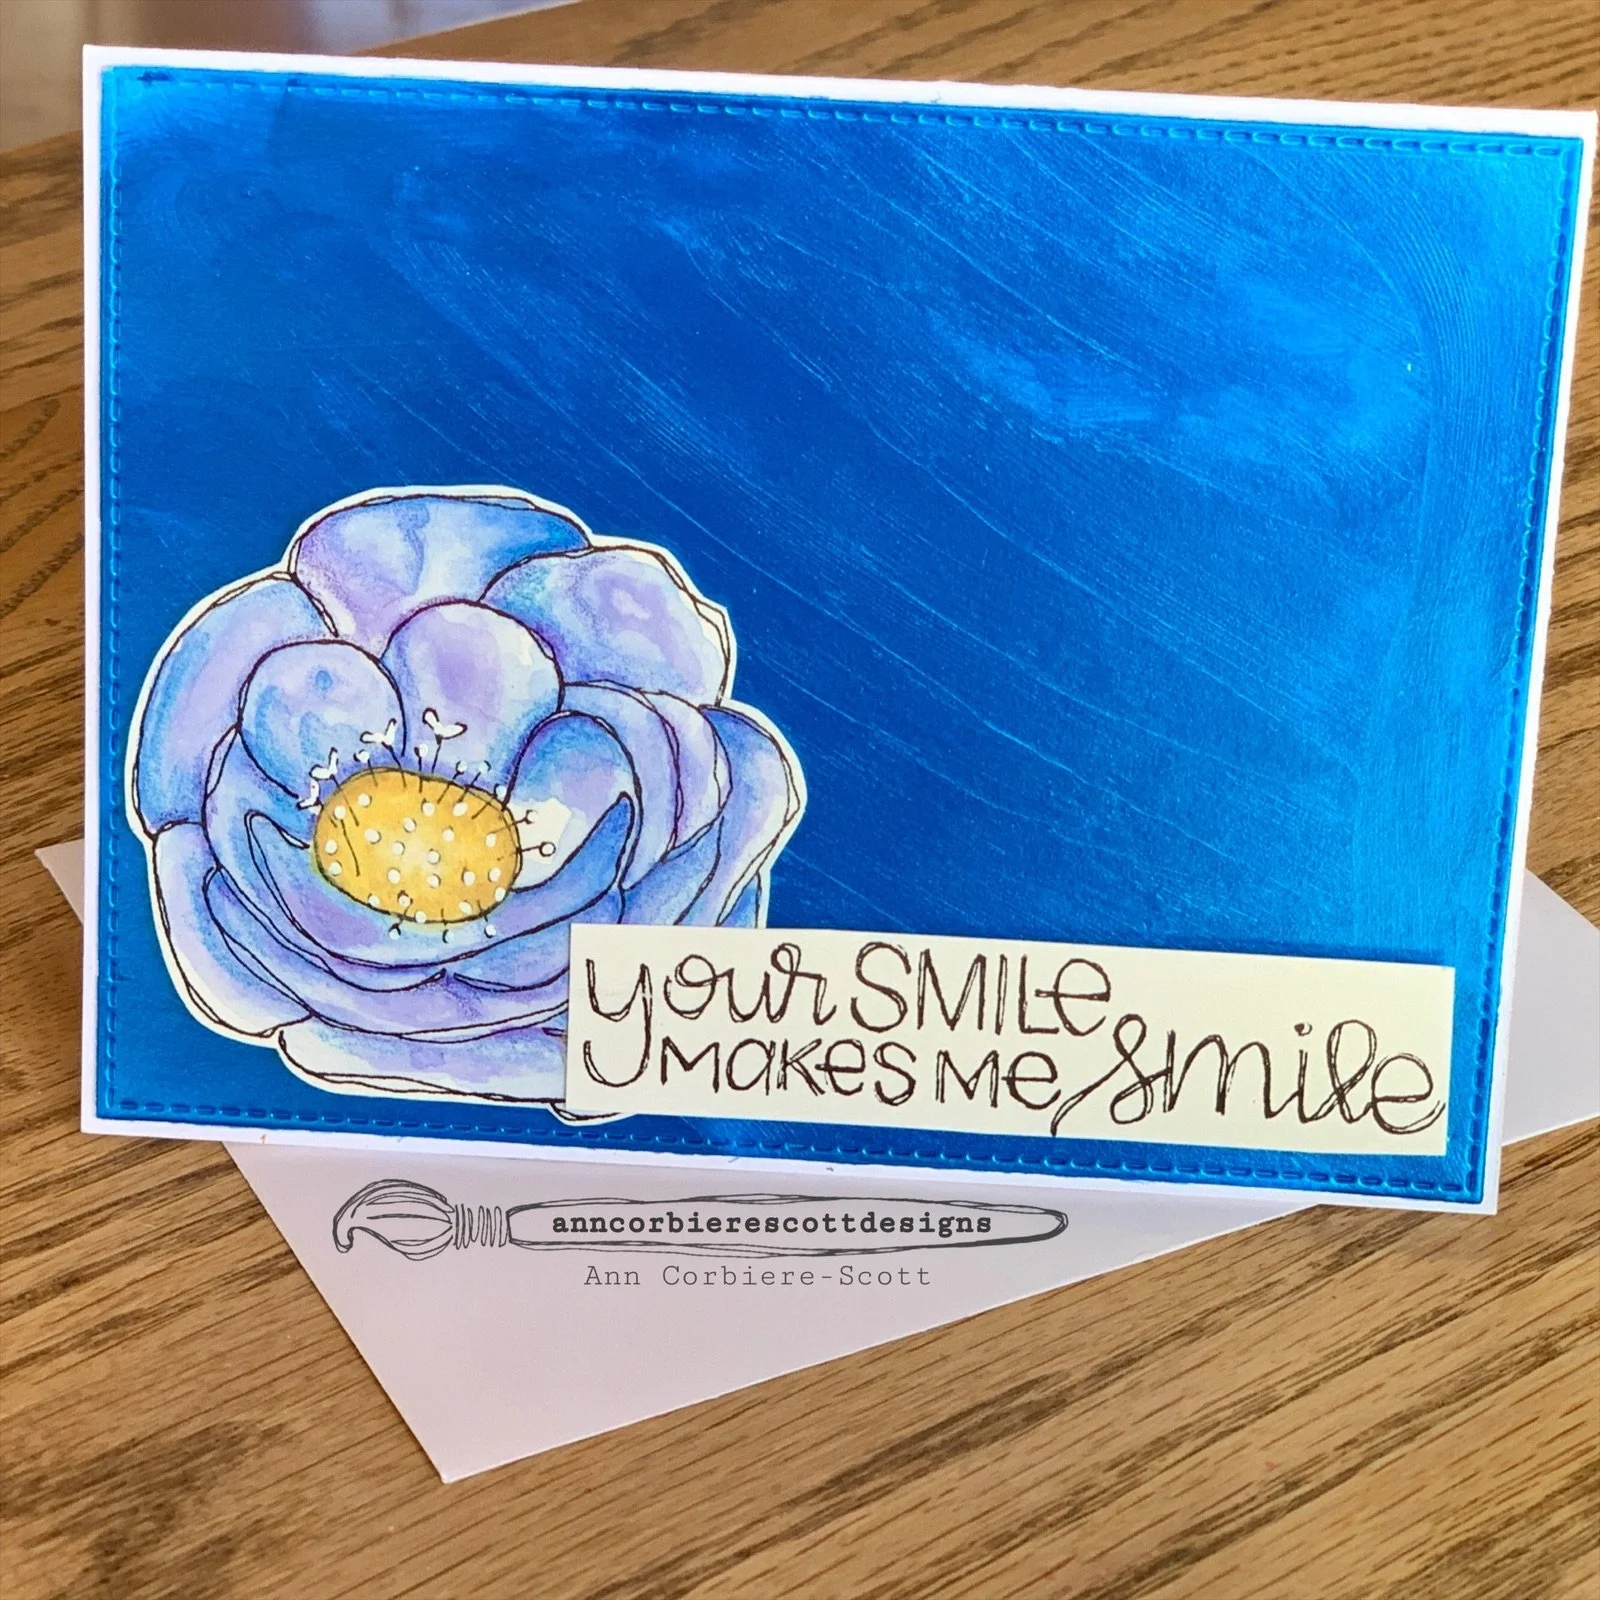
Once my smooth beauty was dry, I die cut it with a stitched rectangle die. Next, I watercolored the individual cactus flower from the Tricia art printable (printed on my favorite watercolor paper), then added colored pencil depth and detail. I added some foam tape behind the cactus flower and adhered it to the lower left corner, following up with foam tape on the right side of the sentiment (from the Joyce McCoy art printable) and adhesive tape on the left side.
Watch for more upcoming card base background inspiration right here!
Carmen’s Artsy Wildflower Art Journal
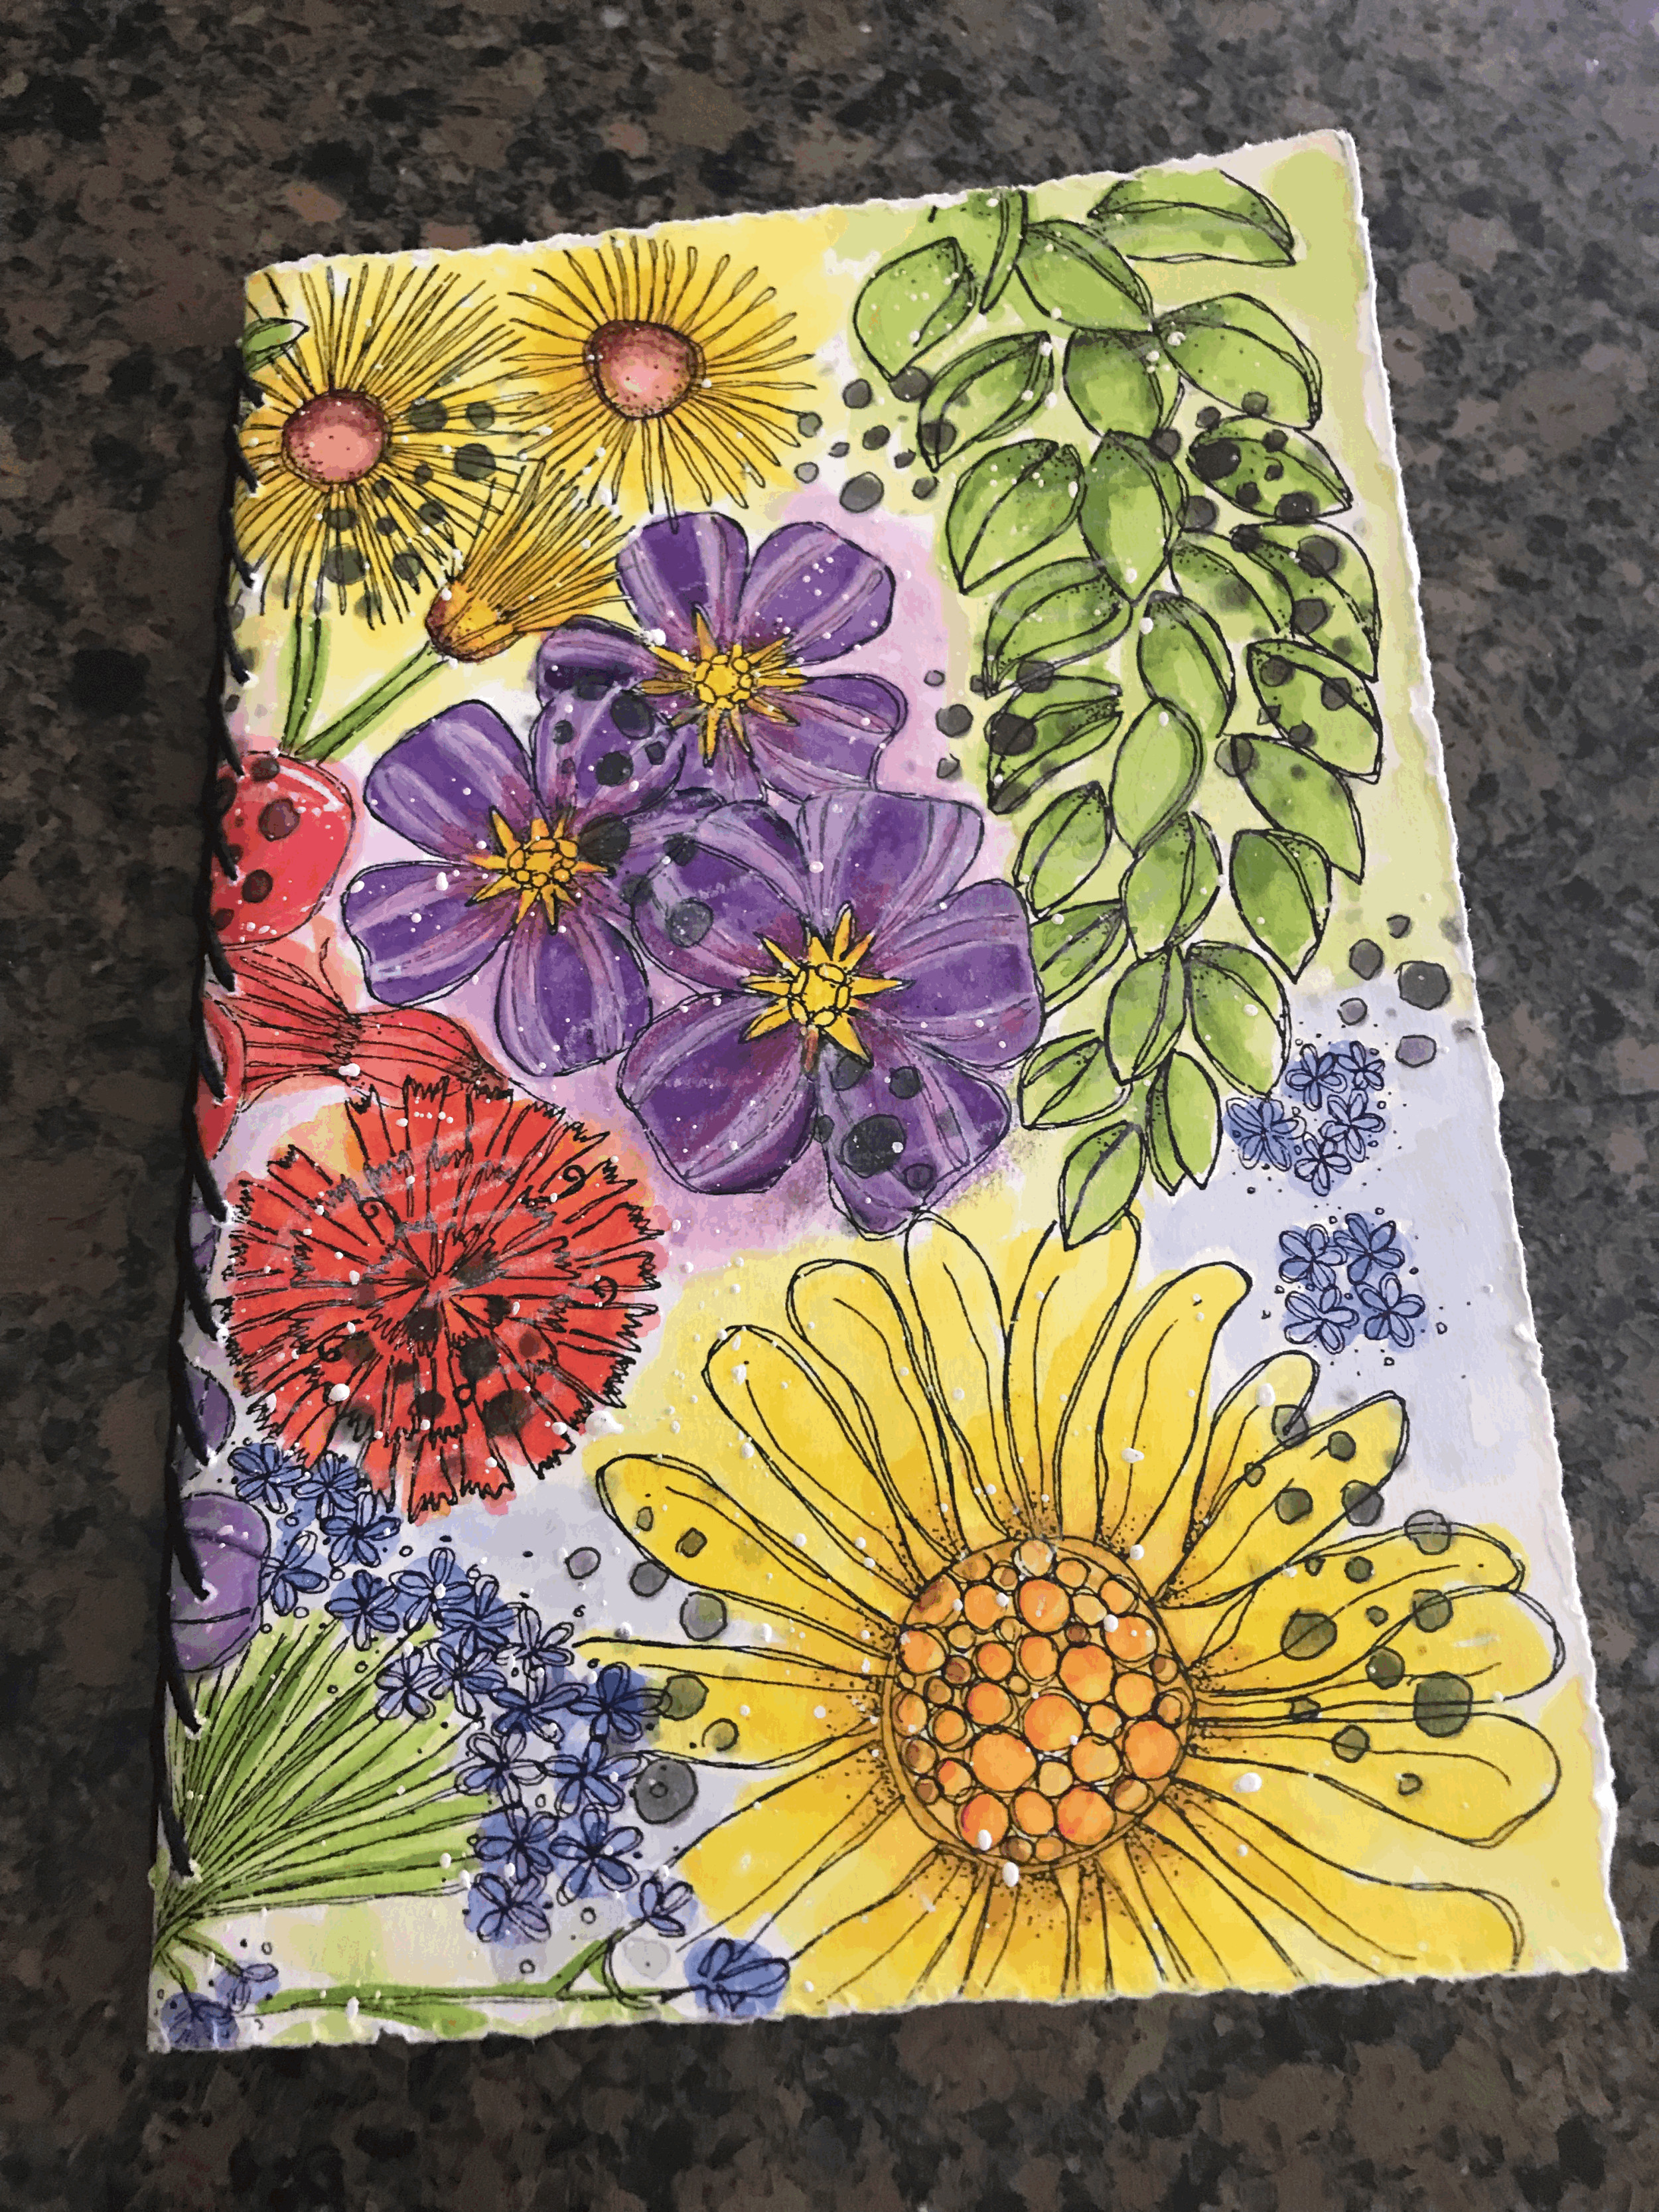
There is nothing quite like creating art in an art journal you’ve created. Carmen has designed the most lovely art journal featuring my Aunt Marie art printable as the cover, then filling it with 3 signatures full of watercolor paper, just waiting for some artsy play!
Lucky us, she is sharing her process!
Thank you Carmen for sharing your great big imagination and creativity with us!
To begin print https://www.anncorbierescottdesigns.com/printables/p/aunt-marie and fill those Sugar Island wildflowers with your favorite color palette.
Cut another piece of watercolor paper 1/4” smaller than the cover art (8 1/2 x 11) and adhere to the backside of your cover art sheet, creating a more substantial cover.
Carmen uses a book binding adhesive from Lineco.
Cut another piece of watercolor paper 1/4” smaller than the cover art (8 1/2 x 11) and adhere to the backside of your cover art sheet, creating a more substantial cover.
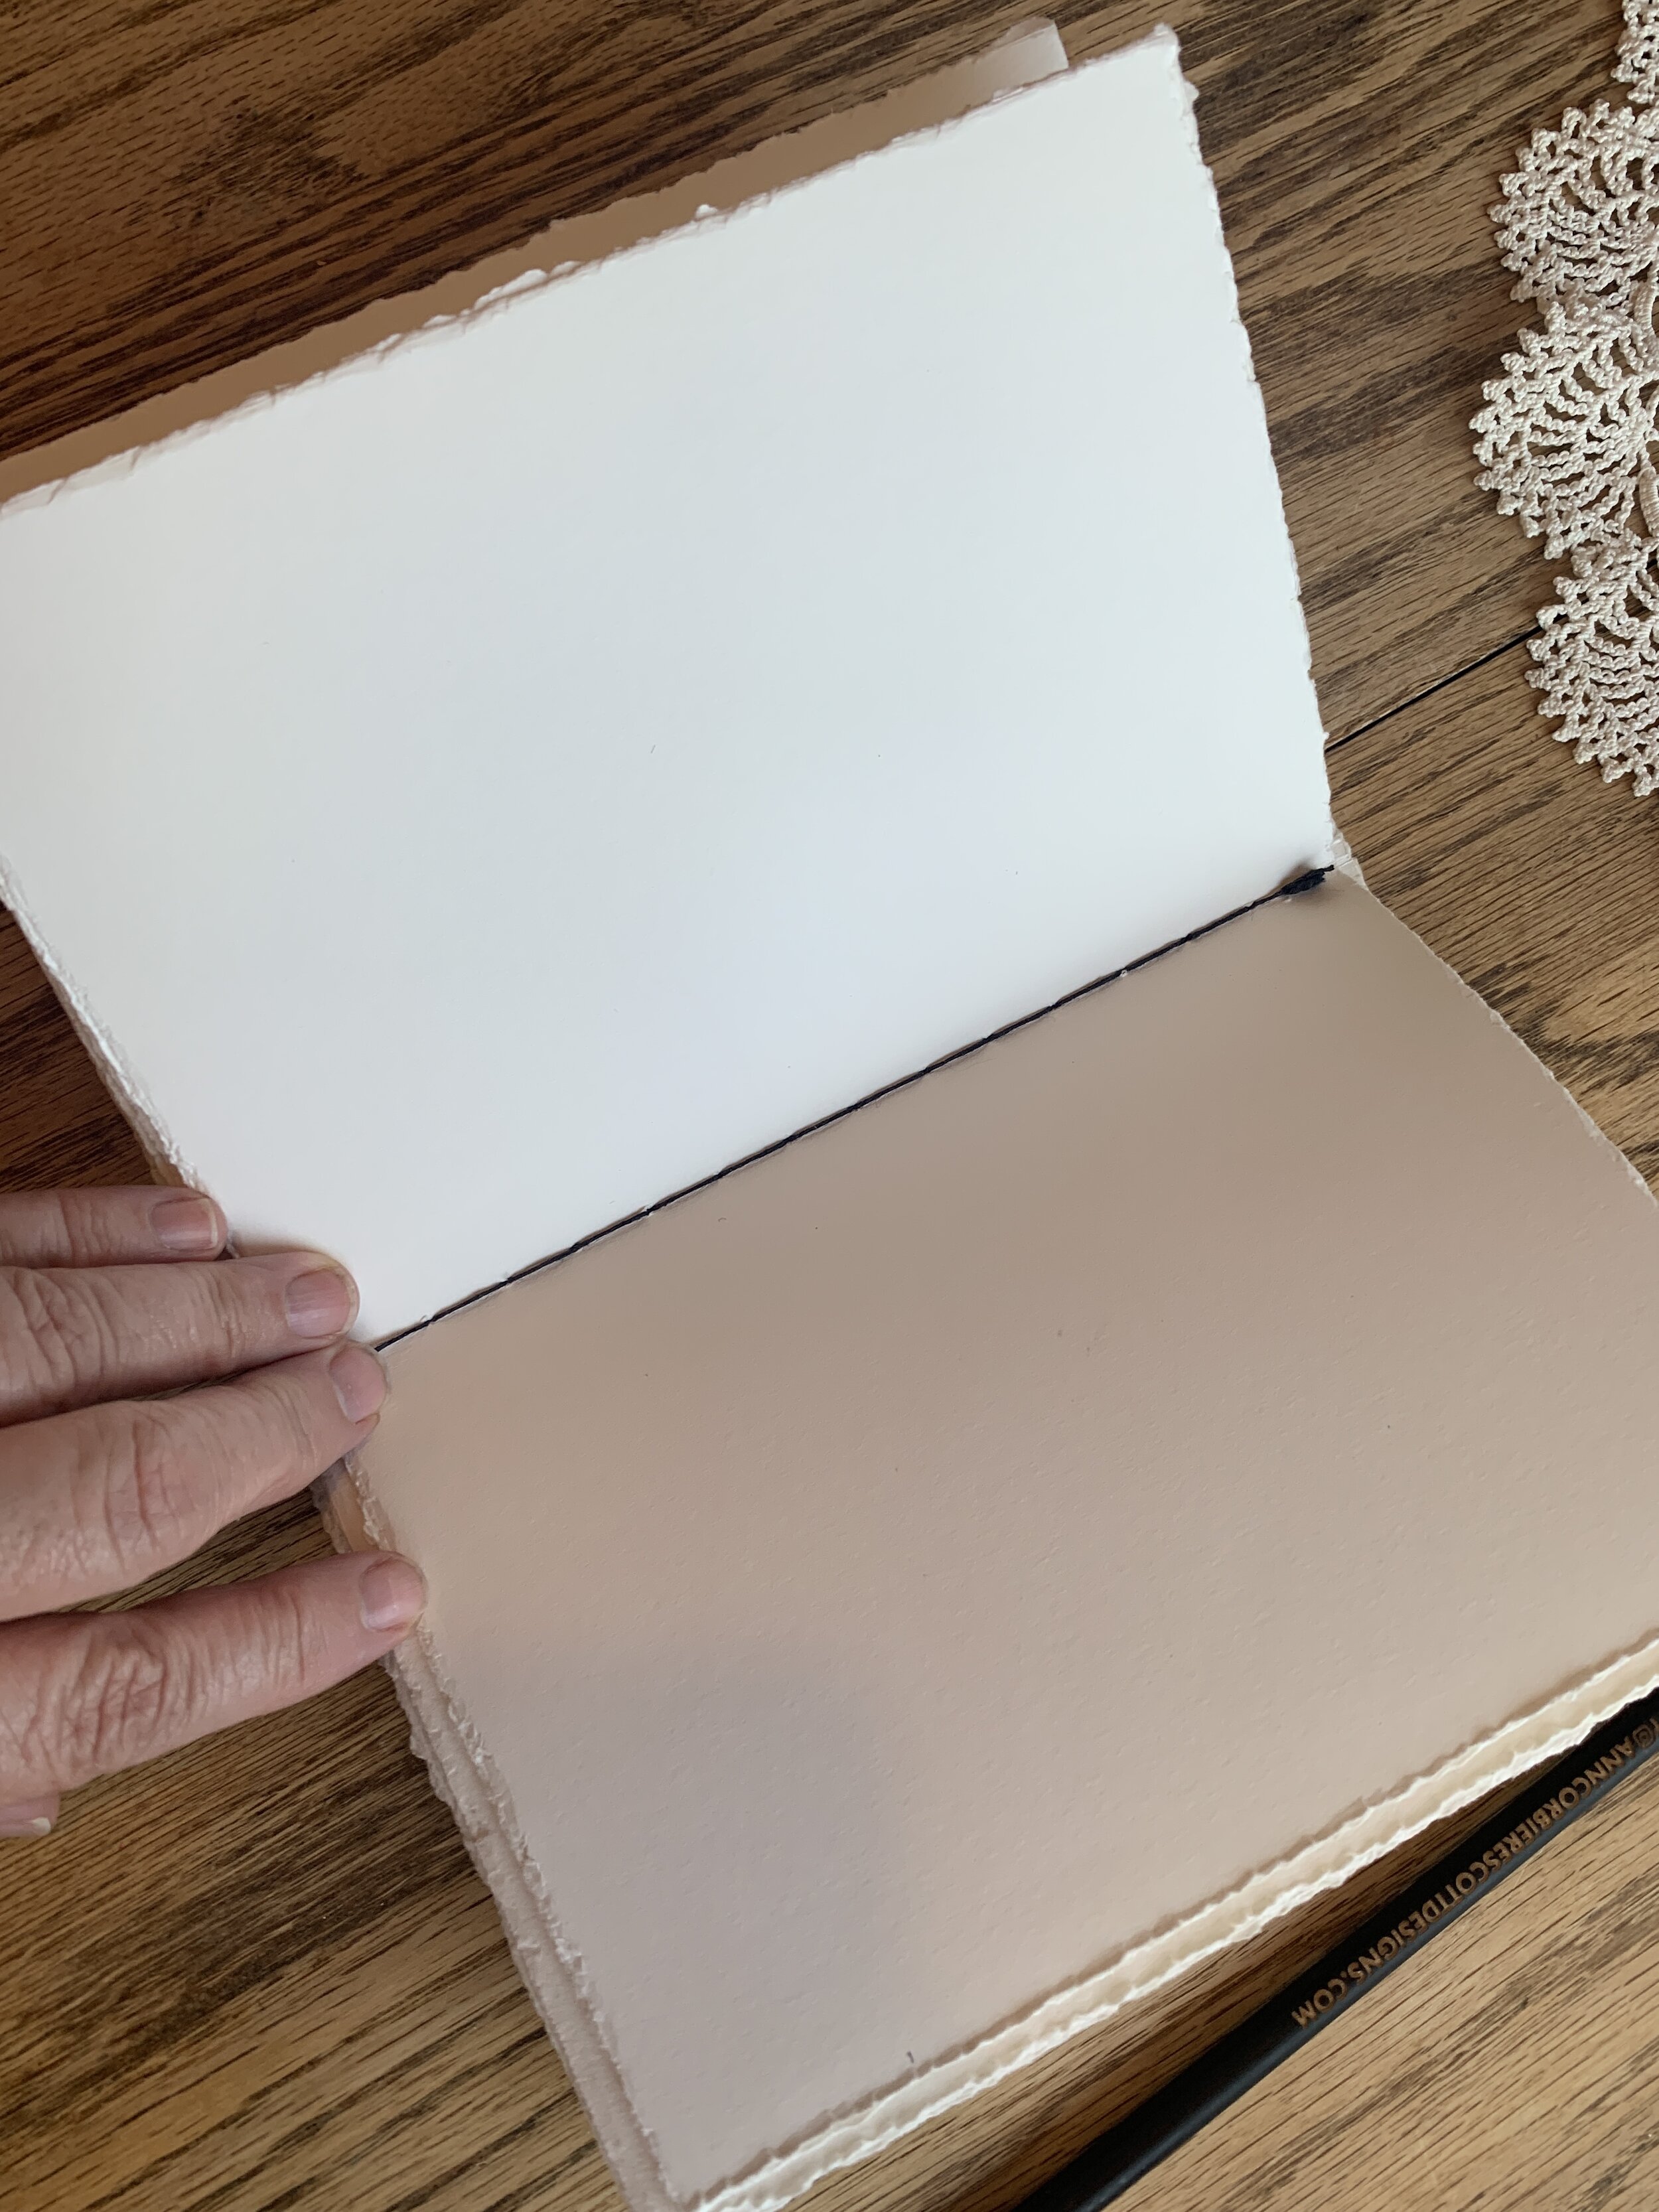
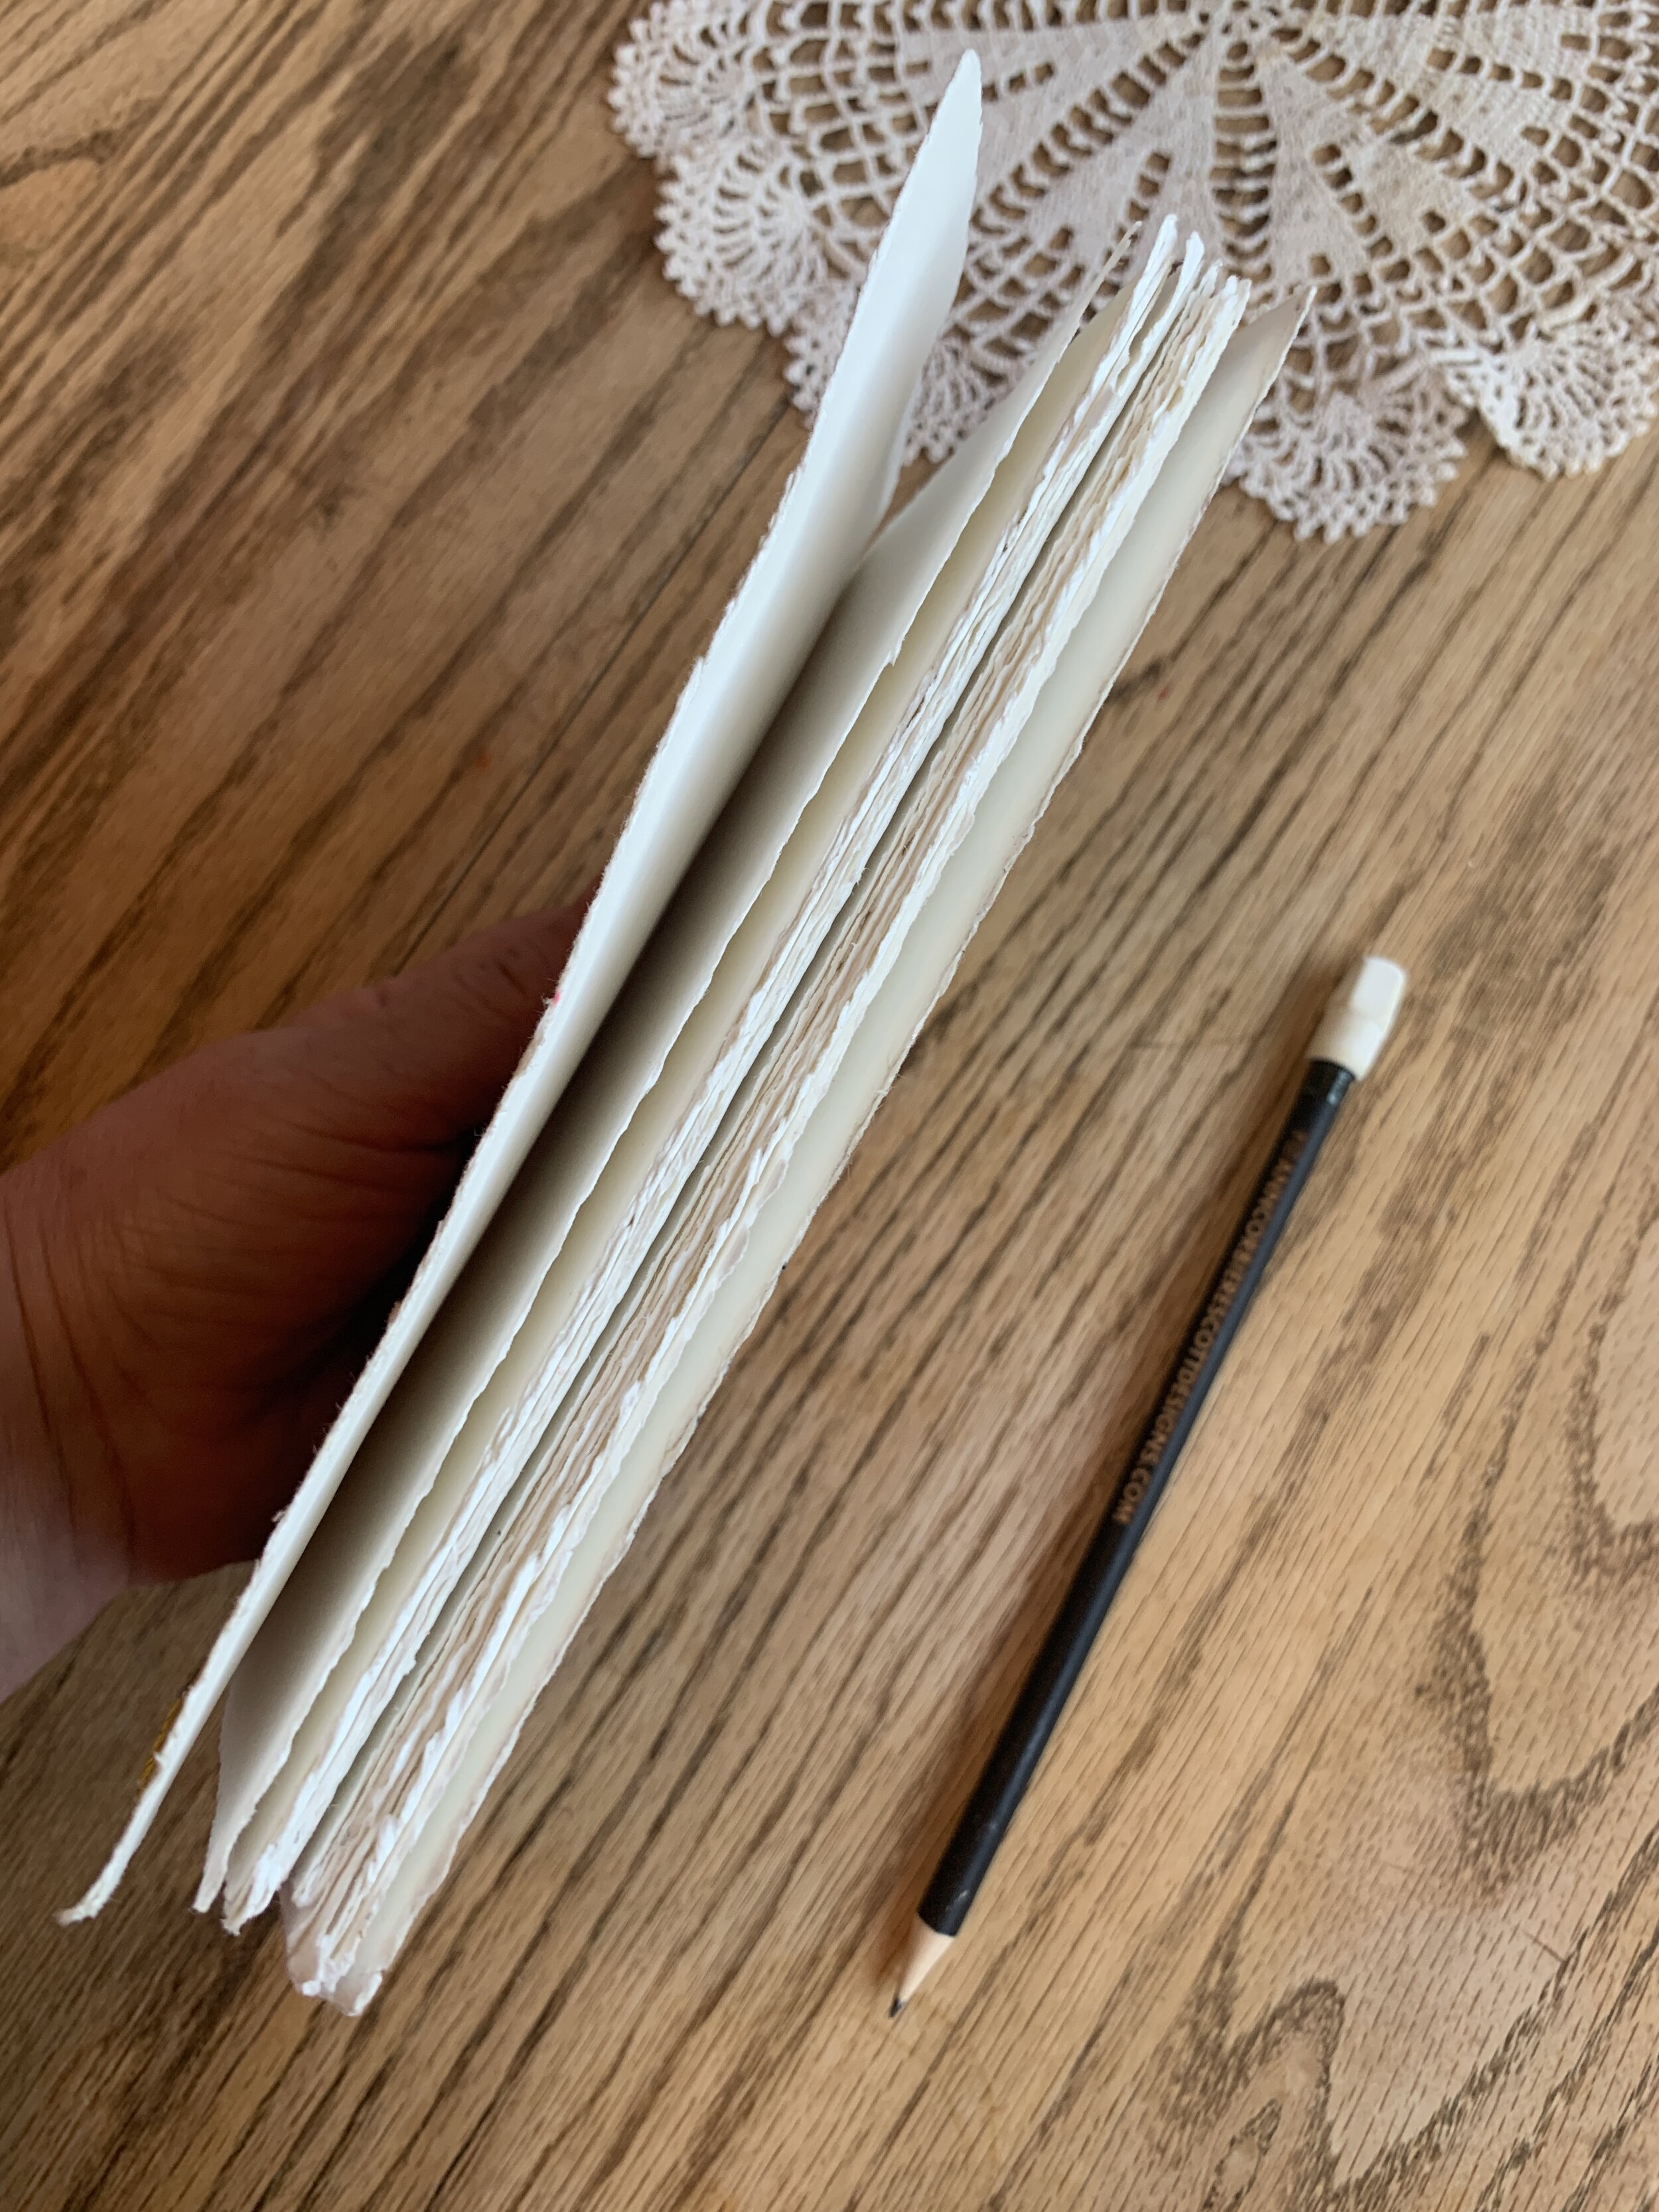
Next-create 3 watercolor paper signatures (a group of sheets that are folded and stitched together)
for each signature-
*cut 3 sheets of watercolor paper slightly smaller than the cover art ( 1/4” smaller width and length) per signature
fold and burnish with a bone folder each sheet, then stack all 3 sheets and fold together as a book
repeat 2 more times so you end up with 3 signatures
To bind your art journal together-follow the following video tutorial
Carmen found sharing a fantastic binding technique by Vintage Page Designs (follow her step by step instructions and it is quite easy-if I can do it, so can you!)
https://www.youtube.com/watch?v=ct1bw8hB04k
Once you have completed the process, let us know, and share your art journal with us! We’d love to see and get Artsy together!
Meet Donna
anncorbierescottdesigns guest designer for the month of August!
Donna’s work is AHHHHHHMAZING!!!!
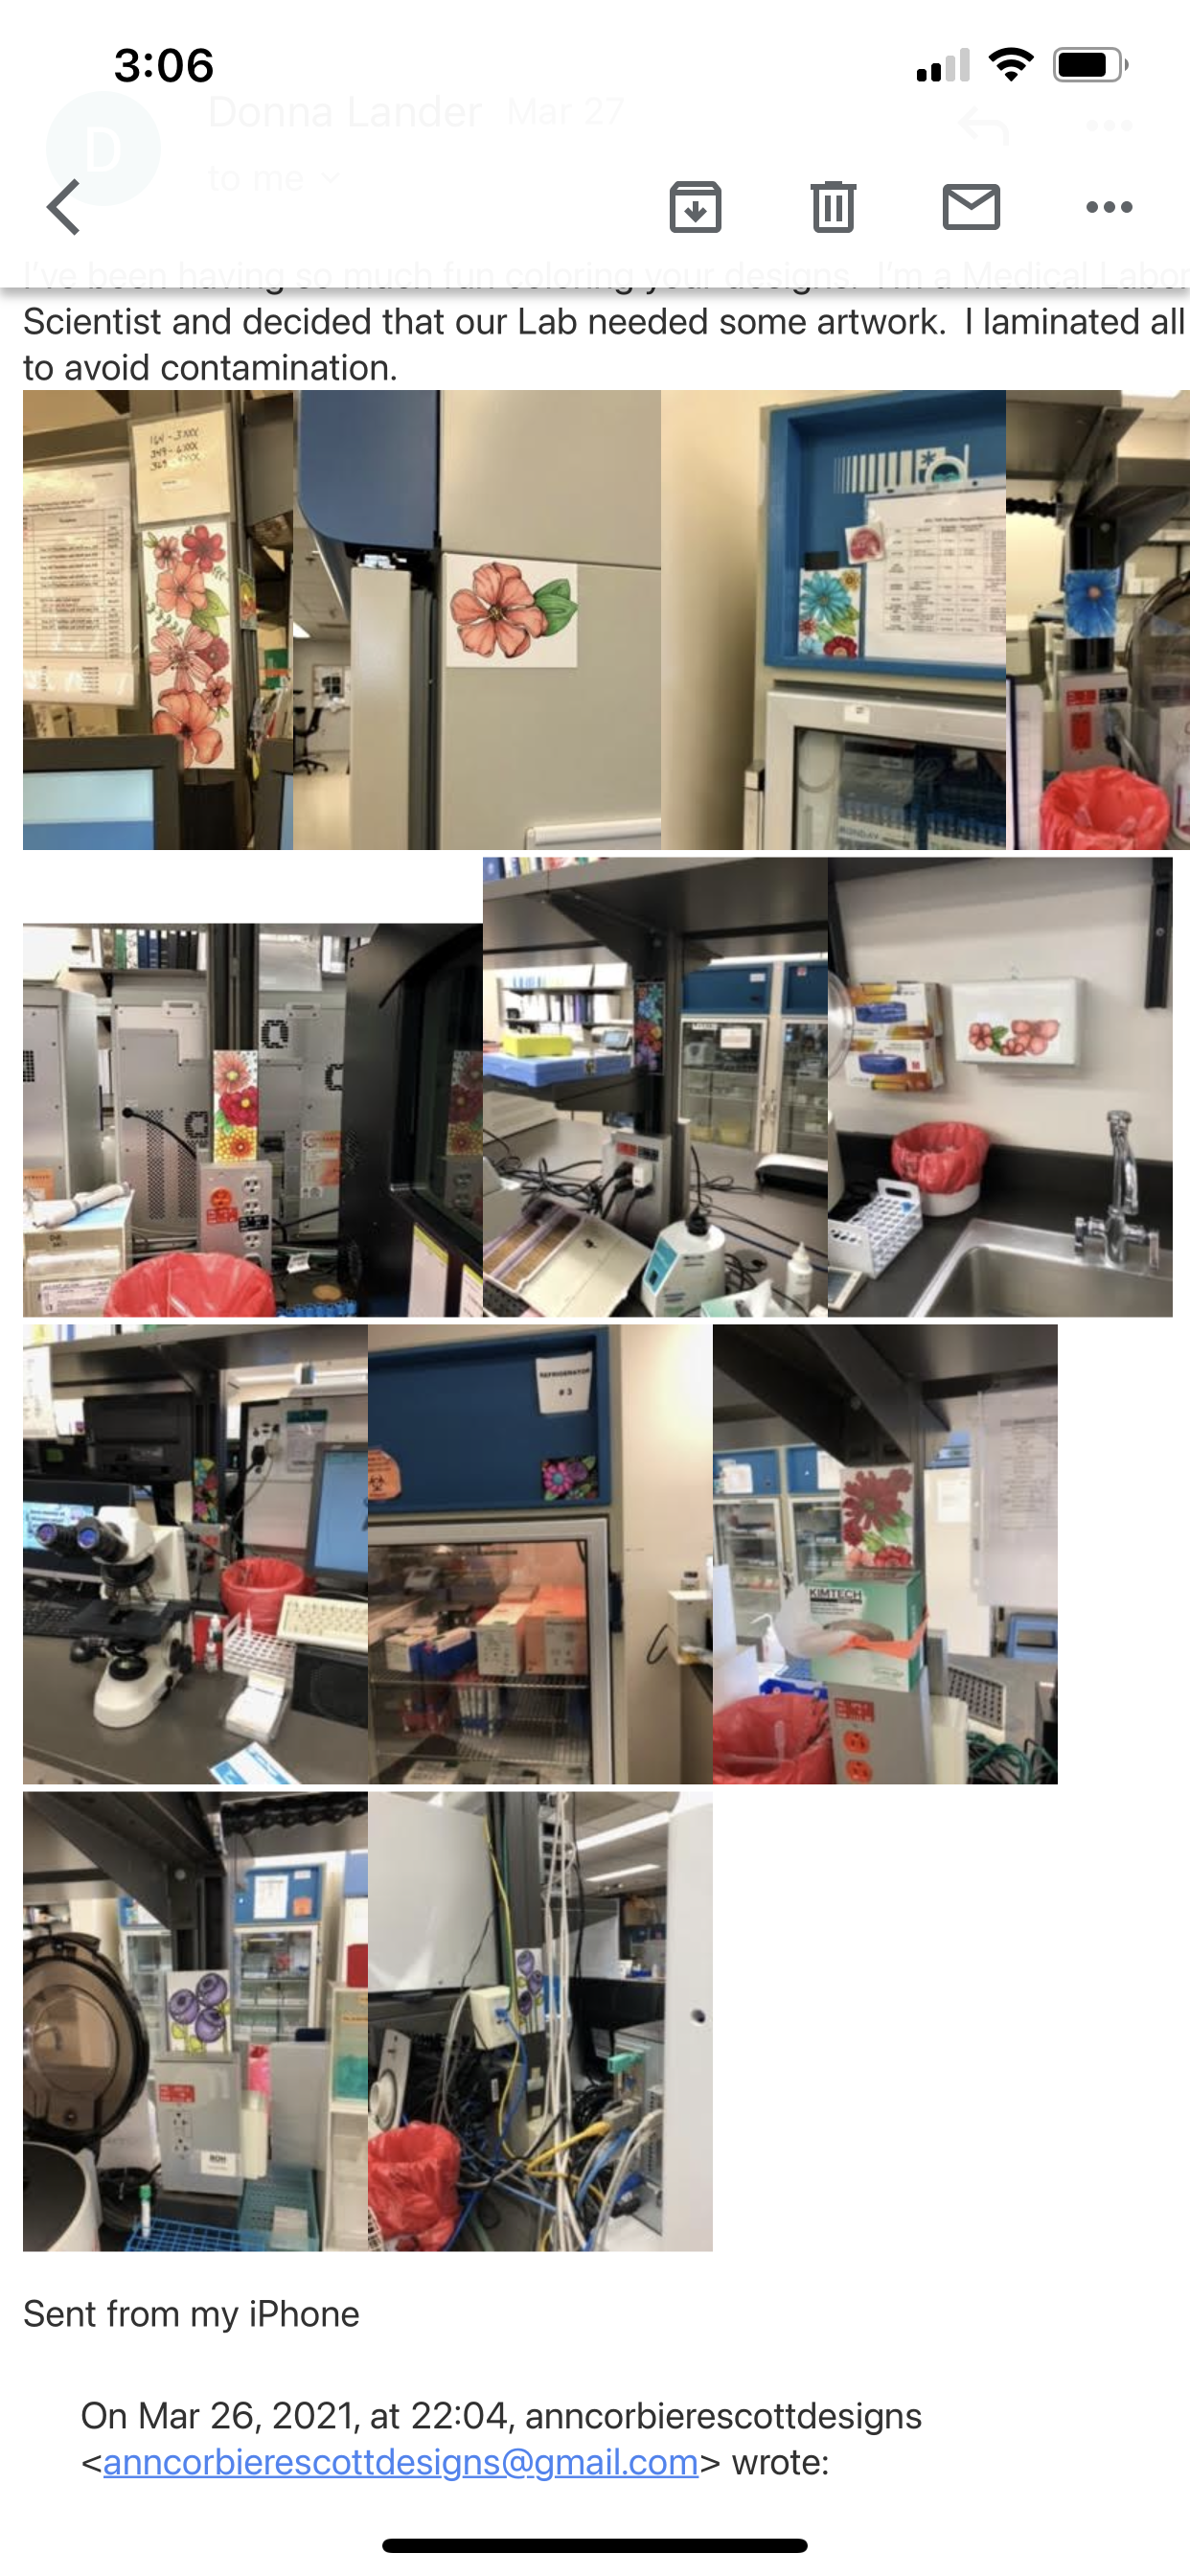
Donna is a Medical Laboratory Scientist, she sent me some photos a little while back of my artwork she colored and displayed in the laboratory she works in! I was SO honoured and delighted that my art might bring a smile to someone’s face during some medical labwork! Check it out below!
Ever since that day, I have been blown away by her command of color and exemplary execution!
I have told you all before, that I love to find out what makes people who they are-so here we go!
Here’s a little bit about her-She has been a Medical Laboratory Scientist for 42 years! She claims to have taken only one semester of Art in Middle school and loved it, so I am thinking her talent is all natural! She is a music aficionado, confirmed by her getting to at Carnegie Hall in February 2020! Right before the pandemic changed all of our lives. She happened upon me through Michelle’s Copic in the Classroom-and fell in love with my art printables. Then she caught one of my Let’s get Artsy together apart class (the Alma Thomas class) and then she says she fell in love with me too! (the feeling is mutual Donna!) The rest is, as they say, history. I am SO proud to have Donna creating art with my art!!!!
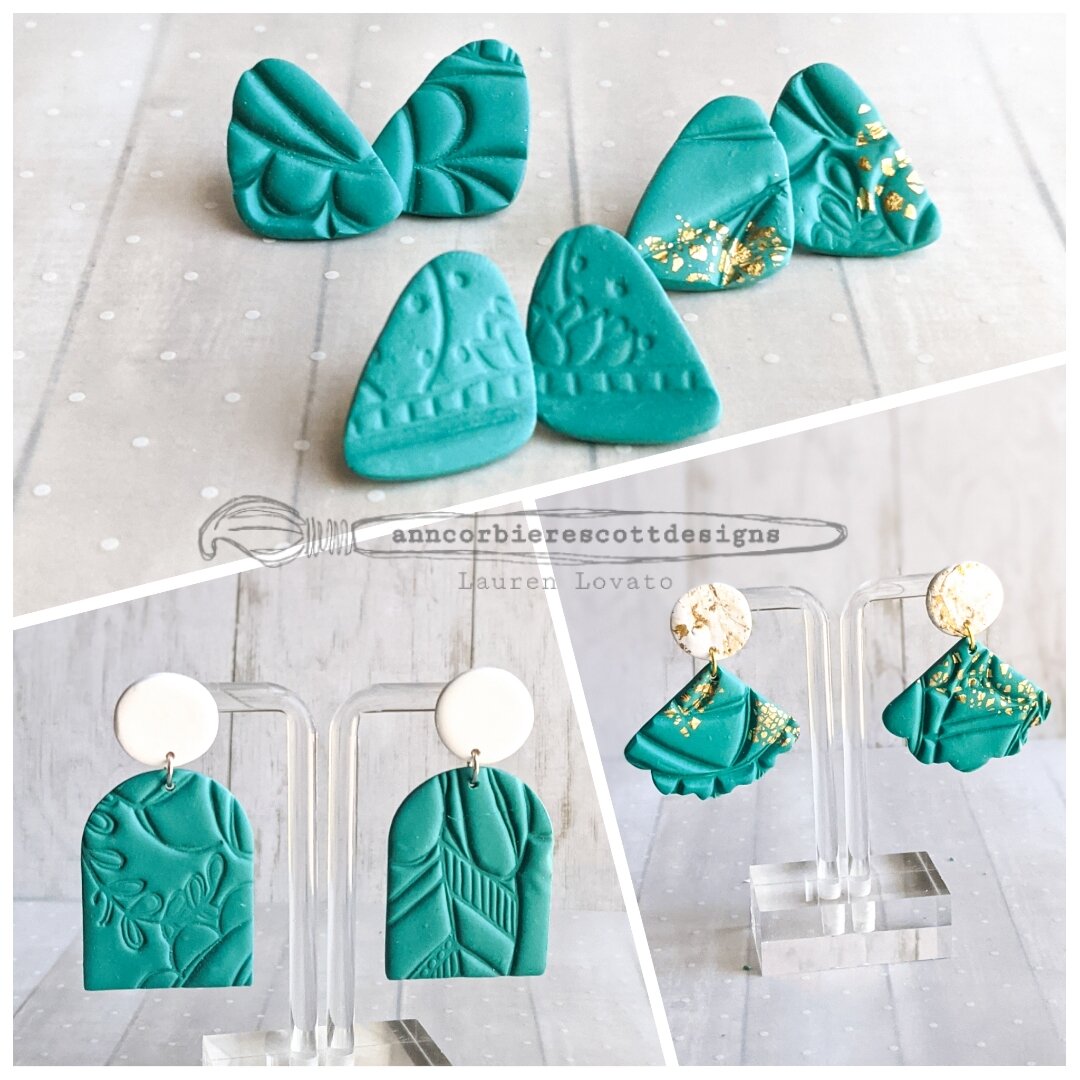
Polymer Clay Earrings With Rubber Stamps
Hello crafty friends! Design team member Lauren here, bringing you a tutorial for using some of Ann's designs to make cute polymer clay earrings! I promise you, it's not very hard, and you can use a lot of things you already have in your crafty arsenal! I have a video tutorial for you to show you how I made these:
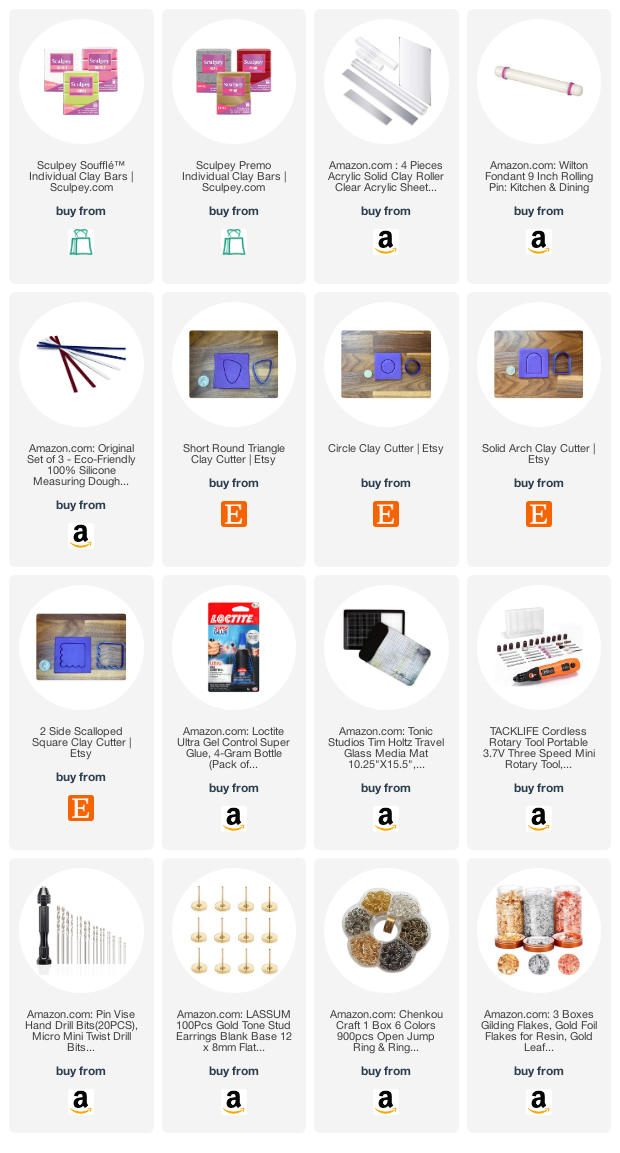
I'm going to talk about the tools I used in the video, but below I'm also going to give you some alternatives so that you don't have to buy much if you'd like to try this out. I am not a clay expert by any means, and there are many tutorials out there for clay jewelry, but I'll share what I have researched and tried so far. Bear with me, as the post is a little lengthy, but I promise it's worth it to try this fun technique!
First things first, CLAY:
In the video I'm using Sculpey Premo clay. Sculpey is usually available in major craft stores and online, as well as directly from the Sculpey website. Unfortunately at the moment, it's a little bit hard to get all the colors because of COVID. Sculpey Premo and Sculpey Souffle are the two best types for Jewelry making; they bake to a nice flexible finish and don't break easily. Sculpey III is a little more readily available in the stores at the moment but a lot of people who make and sell clay jewelry say it breaks more easily. If you are just starting out, and you're only making a little bit of jewelry for yourself, there's no reason you can't try it. I used it when I was starting out months, and so far the pieces I made for myself haven't broken!
There are a few other brands that are good for jewelry as well, like Fimo, Kato and Cernit. I do not have experience with those but you can research that information as well.
STAMPS
In this video, I show you techniques using red rubber stamps and photopolymer stamps. I much prefer the red rubber stamps for two reasons:
1) The red rubber is very deeply etched, and leaves a nice deep, clean impression in the clay
2) The red rubber does not stick to the clay, and the backing does not stick to the rolling pin. With the photopolymer stamps, you'll see me use plastic wrap between the stamp and the clay, as well as between the stamp and the roller, so that it doesn't stick. Does it work? YES. Definitely. It is simply a fussier process and a shallower impression.
BASIC TOOLS:
Rolling tool - Mine is a fondant roller from Amazon. There are a lot of choices, and you should be able to find one easily at a craft store with a coupon!
Depth Guides - I bought dough guides on Amazon, but you can also stack and adhere pieces of cardstock or playing cards together to the thickness that you want.
Cutters - I have picked up some cutters from small business independent sellers on Etsy and they're very inexpensive. Depending on the size they range from 2-5 dollars. However, if you're a papercrafter and you have die cutting supplies or a cricut, you can make your own shape templates and cut around them with a craft knife!
Clay slicing blade - I would recommend this, as it is used for slicing/chopping/unsticking the clay, but you could also try running some fishing line or thread underneath it for unsticking it or cutting slices.
Glass Mat - I already had a glass mat for papercrafting, but many people like to use ceramic tiles from a home improvement store; they're very cheap and you can actually stick the tile right in the oven without moving the pieces when you are ready to bake.
ASSEMBLING TOOLS:
Sanding - In the video I am using a mini dremel with felt attachments to sand down the edges of my earrings. You can use regular sand paper, but be sure to use WET sanding paper, because if you dry sand you will grind white residue into the clay, so anything other than white clay will not look nice.
Drilling - In the video, I am using a small hand drill to make the holes after the clay is baked. If you have a dremel, you can use the drill bits to make your holes (I forgot to fully charge my dremel before the video so the battery was dying!) You can very easily use a craft pick or a toothpick to make the hole before you bake the clay, and there will be no need for any additional tools.
Glue - If you are going to glue earring posts or anything else to your pieces, the polymer clay world recommends the Loctite Gel superglue. I know many crafters love the E6000 glue but it isn't recommended in this case.
JEWELRY FINDINGS
You can use any findings that you want to assemble your jewelry! In the video I'm using blank earring posts from Amazon, as well as 8mm jump rings from Amazon. If you have old jewelry at home that you don't wear, or earrings missing a match, you can even disassemble them and use the pieces with the clay. If you have plain hoop earrings, you can make your hole in the clay piece and slide it on the hoop!
EXTRA FUN:
If you are a papercrafter, there are a lot of other supplies that you might have that work well with polymer clay!
Stencils - Stencils are fabulous to use; once you roll out your clay, lie the stencil on top and gently roller over it to leave an impression in the clay.
Alcohol ink - Alcohol inks are very popular with polymer clay artists! They are frequently used to tint the clay, and you can even use them on the surface of the clay with similar techniques that you might use on paper. They work especially well when tinting translucent clay.
Gilding Flakes - In the video you will see me use gilding flakes! There are lots of great techniques with gilding flakes and they bake very well in the clay.
I hope you enjoyed this tutorial and you try making some wearable art with your stamps and papercrafting supplies! Post your beautiful creations on social media and be sure to tag Ann Corbiere-Scott Designs so we can see what you make!
SUPPLY LIST:
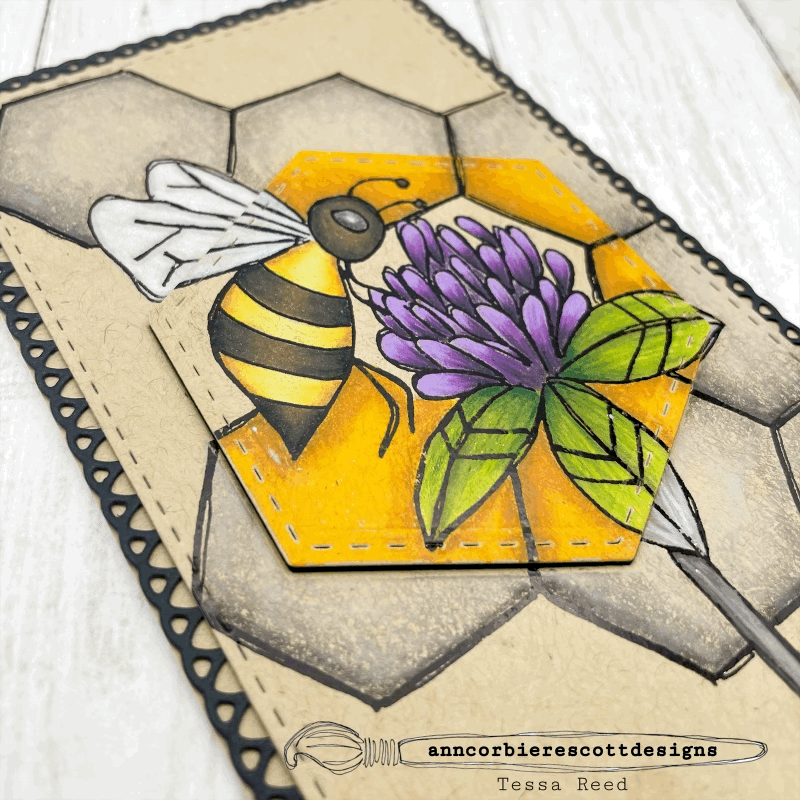
Tessa’s Buzzworthy slimline!
Artsy Arsenal to recreate-
*Aunt Judy art printable by @anncorbierescottdesigns
*Stitched hexagon dies by Tutti designs
*Stitched slimline dies by Trinity stampsllc
*Loopy slimline dies by Ginamariedesignproduct
*black foil by Thermoweb
*colored pencils by prismacolor
*Black and Kraft cardstock by Bazzillbasicspaper
*foamtape by 3M
Process-
I started out by die cutting the hexagon out of the slimline panel on the Aunt Judy art printable, framing the bee and flower. I then, colored the images inside the hexagon using full color. Next, I turned my attention to the remaining image on the slimline panel. I used a few shades of grey colored pencils to color the remaining hexagons. I then taped the hexagon into the hole, and ran it through a mini machine with black foil. After foiling, I used a stitched rectangle die to cut the main panel out. To finish this card, I cut out a Kraft card base, a loopy slimline rectangle, and layered the colored panel on top (popping it up with foam tape)
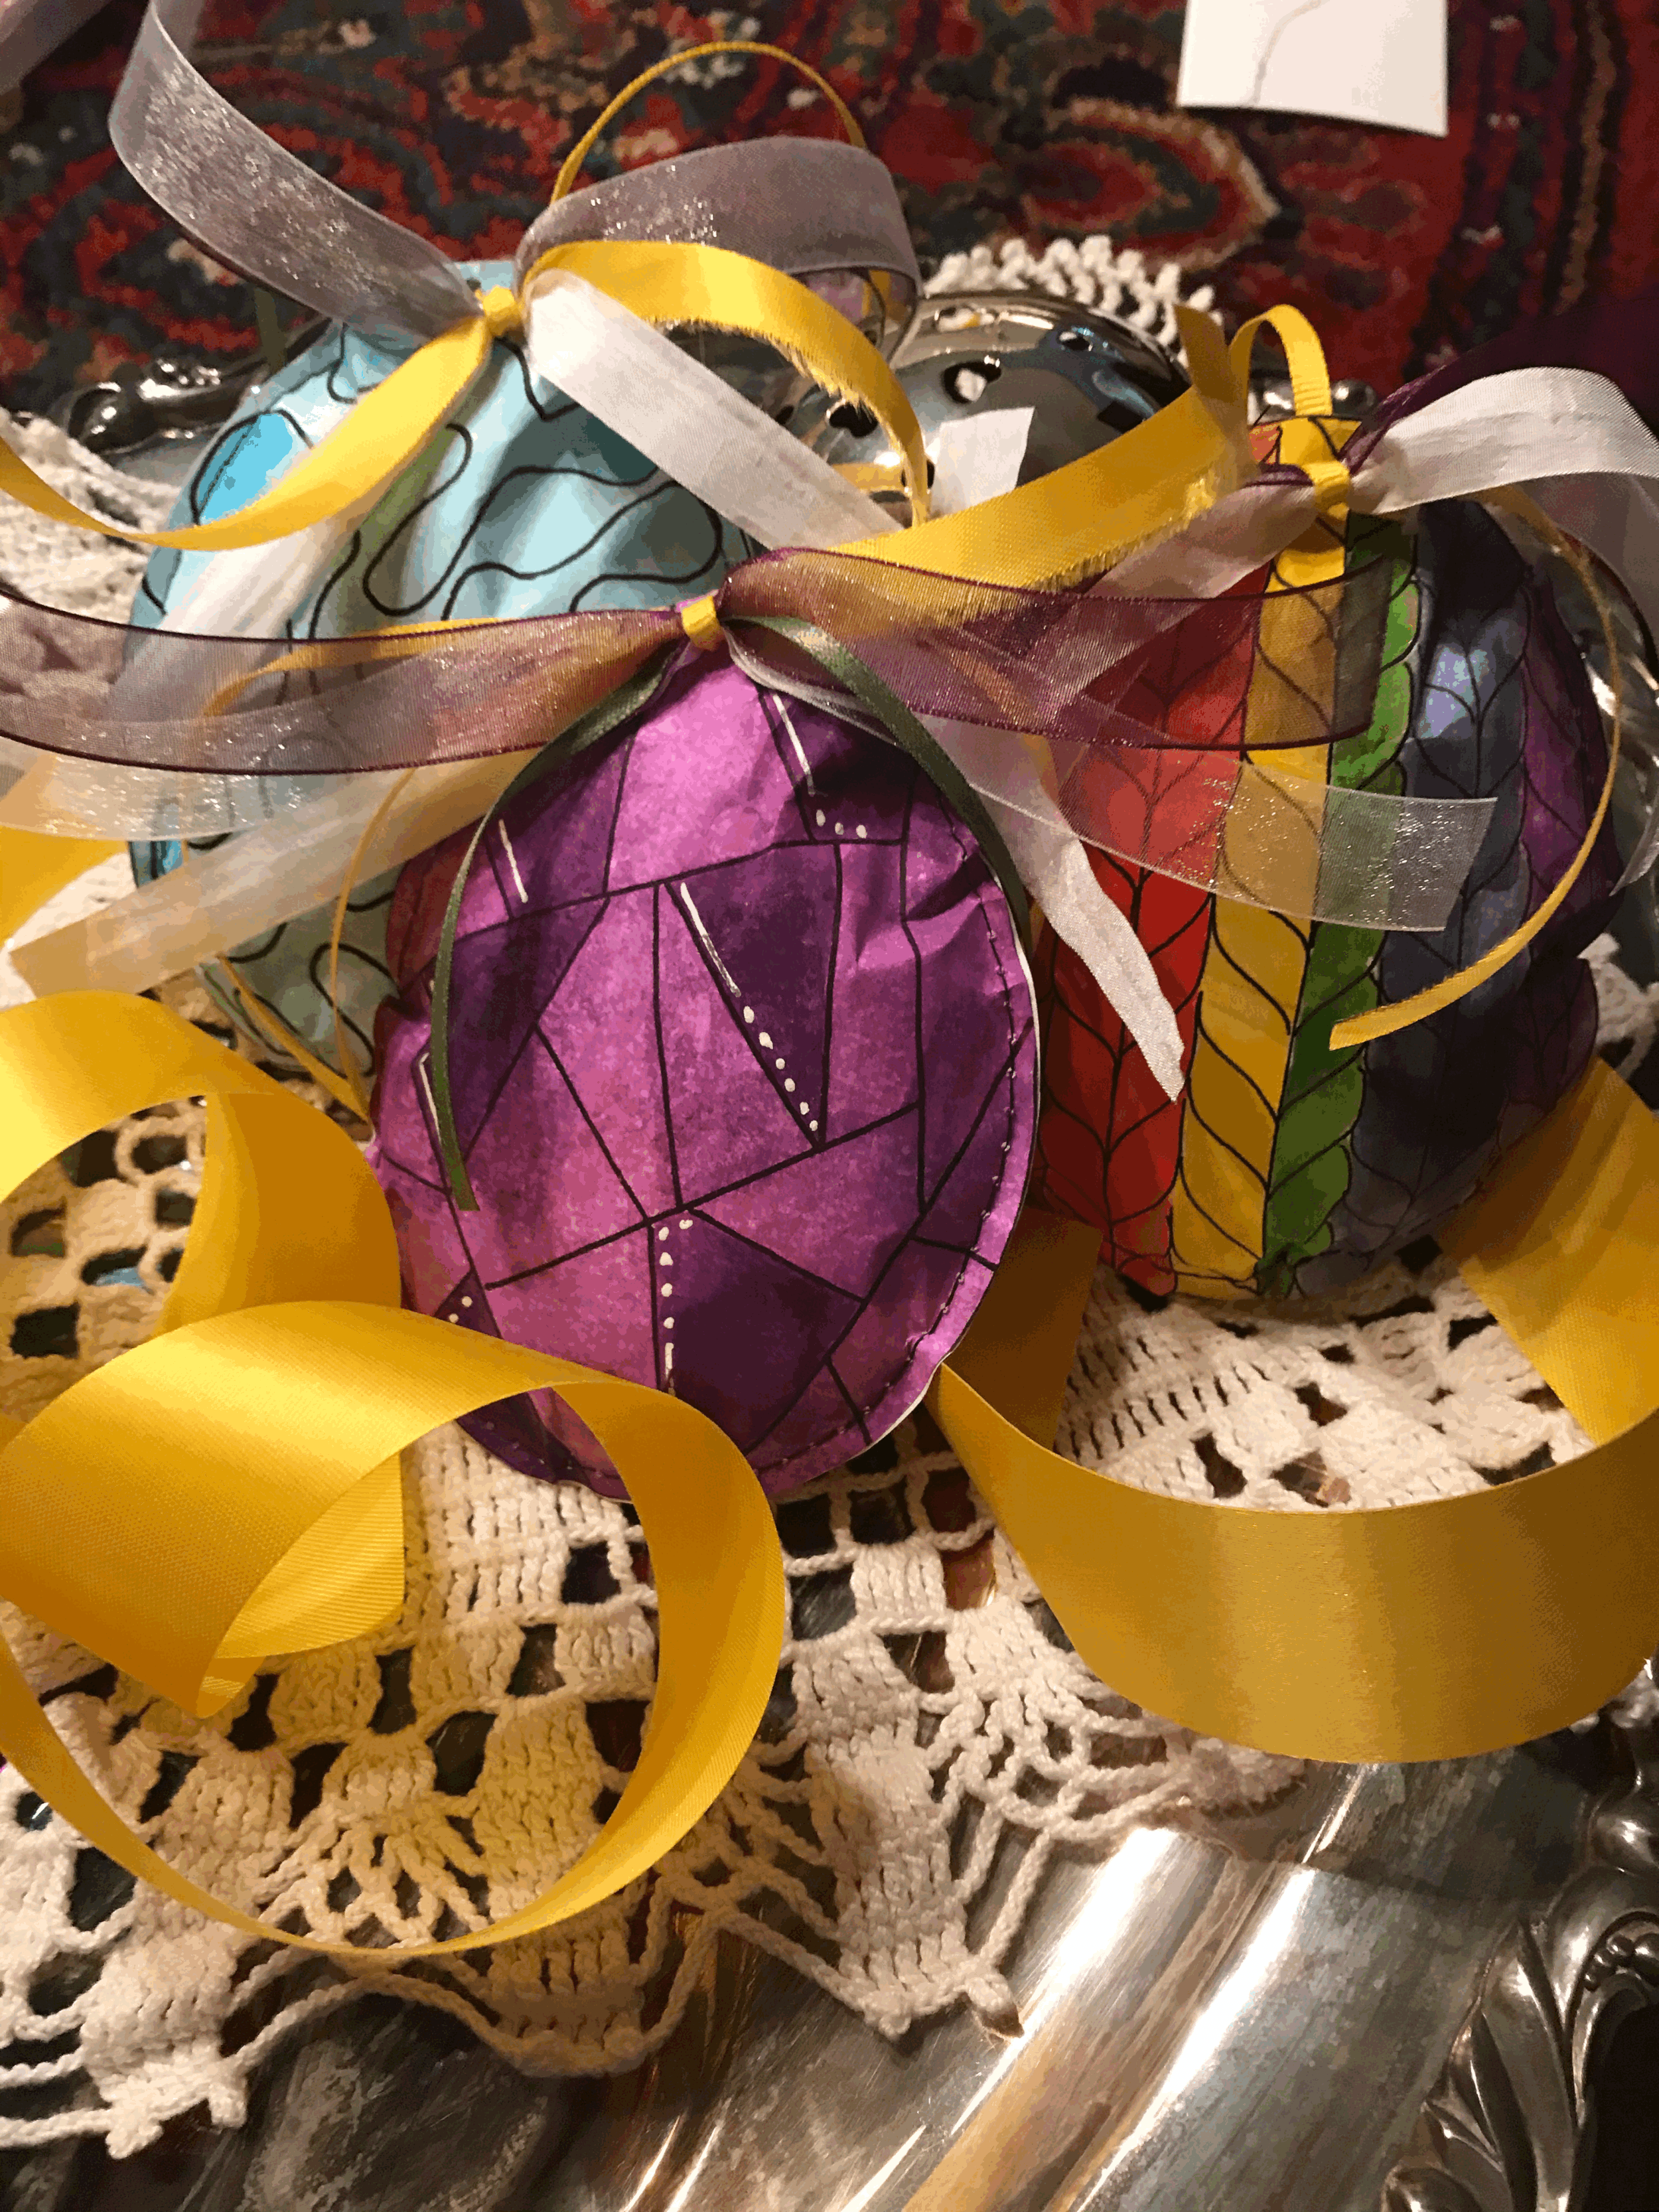
Dimensional Easter egg bowl fillers
Looking for fun, inexpensive Easter table decor, that you can create this afternoon?
Take some inspiration from anncorbierescottdesigns team member, Carmen.
Purchase and print our ‘Aunt Linda’ art printable onto copy paper.
paint as desired, sew around edges leaving an opening and stuff with crinkled up copy paper, then sew shut. Punch a hole in top of egg with a office hole punch and tie a variety of ribbons from your ribbon stash.
Artsy Arsenal-Aunt Linda art printable, Josie Lewis watercolors, copy paper, assorted ribbons
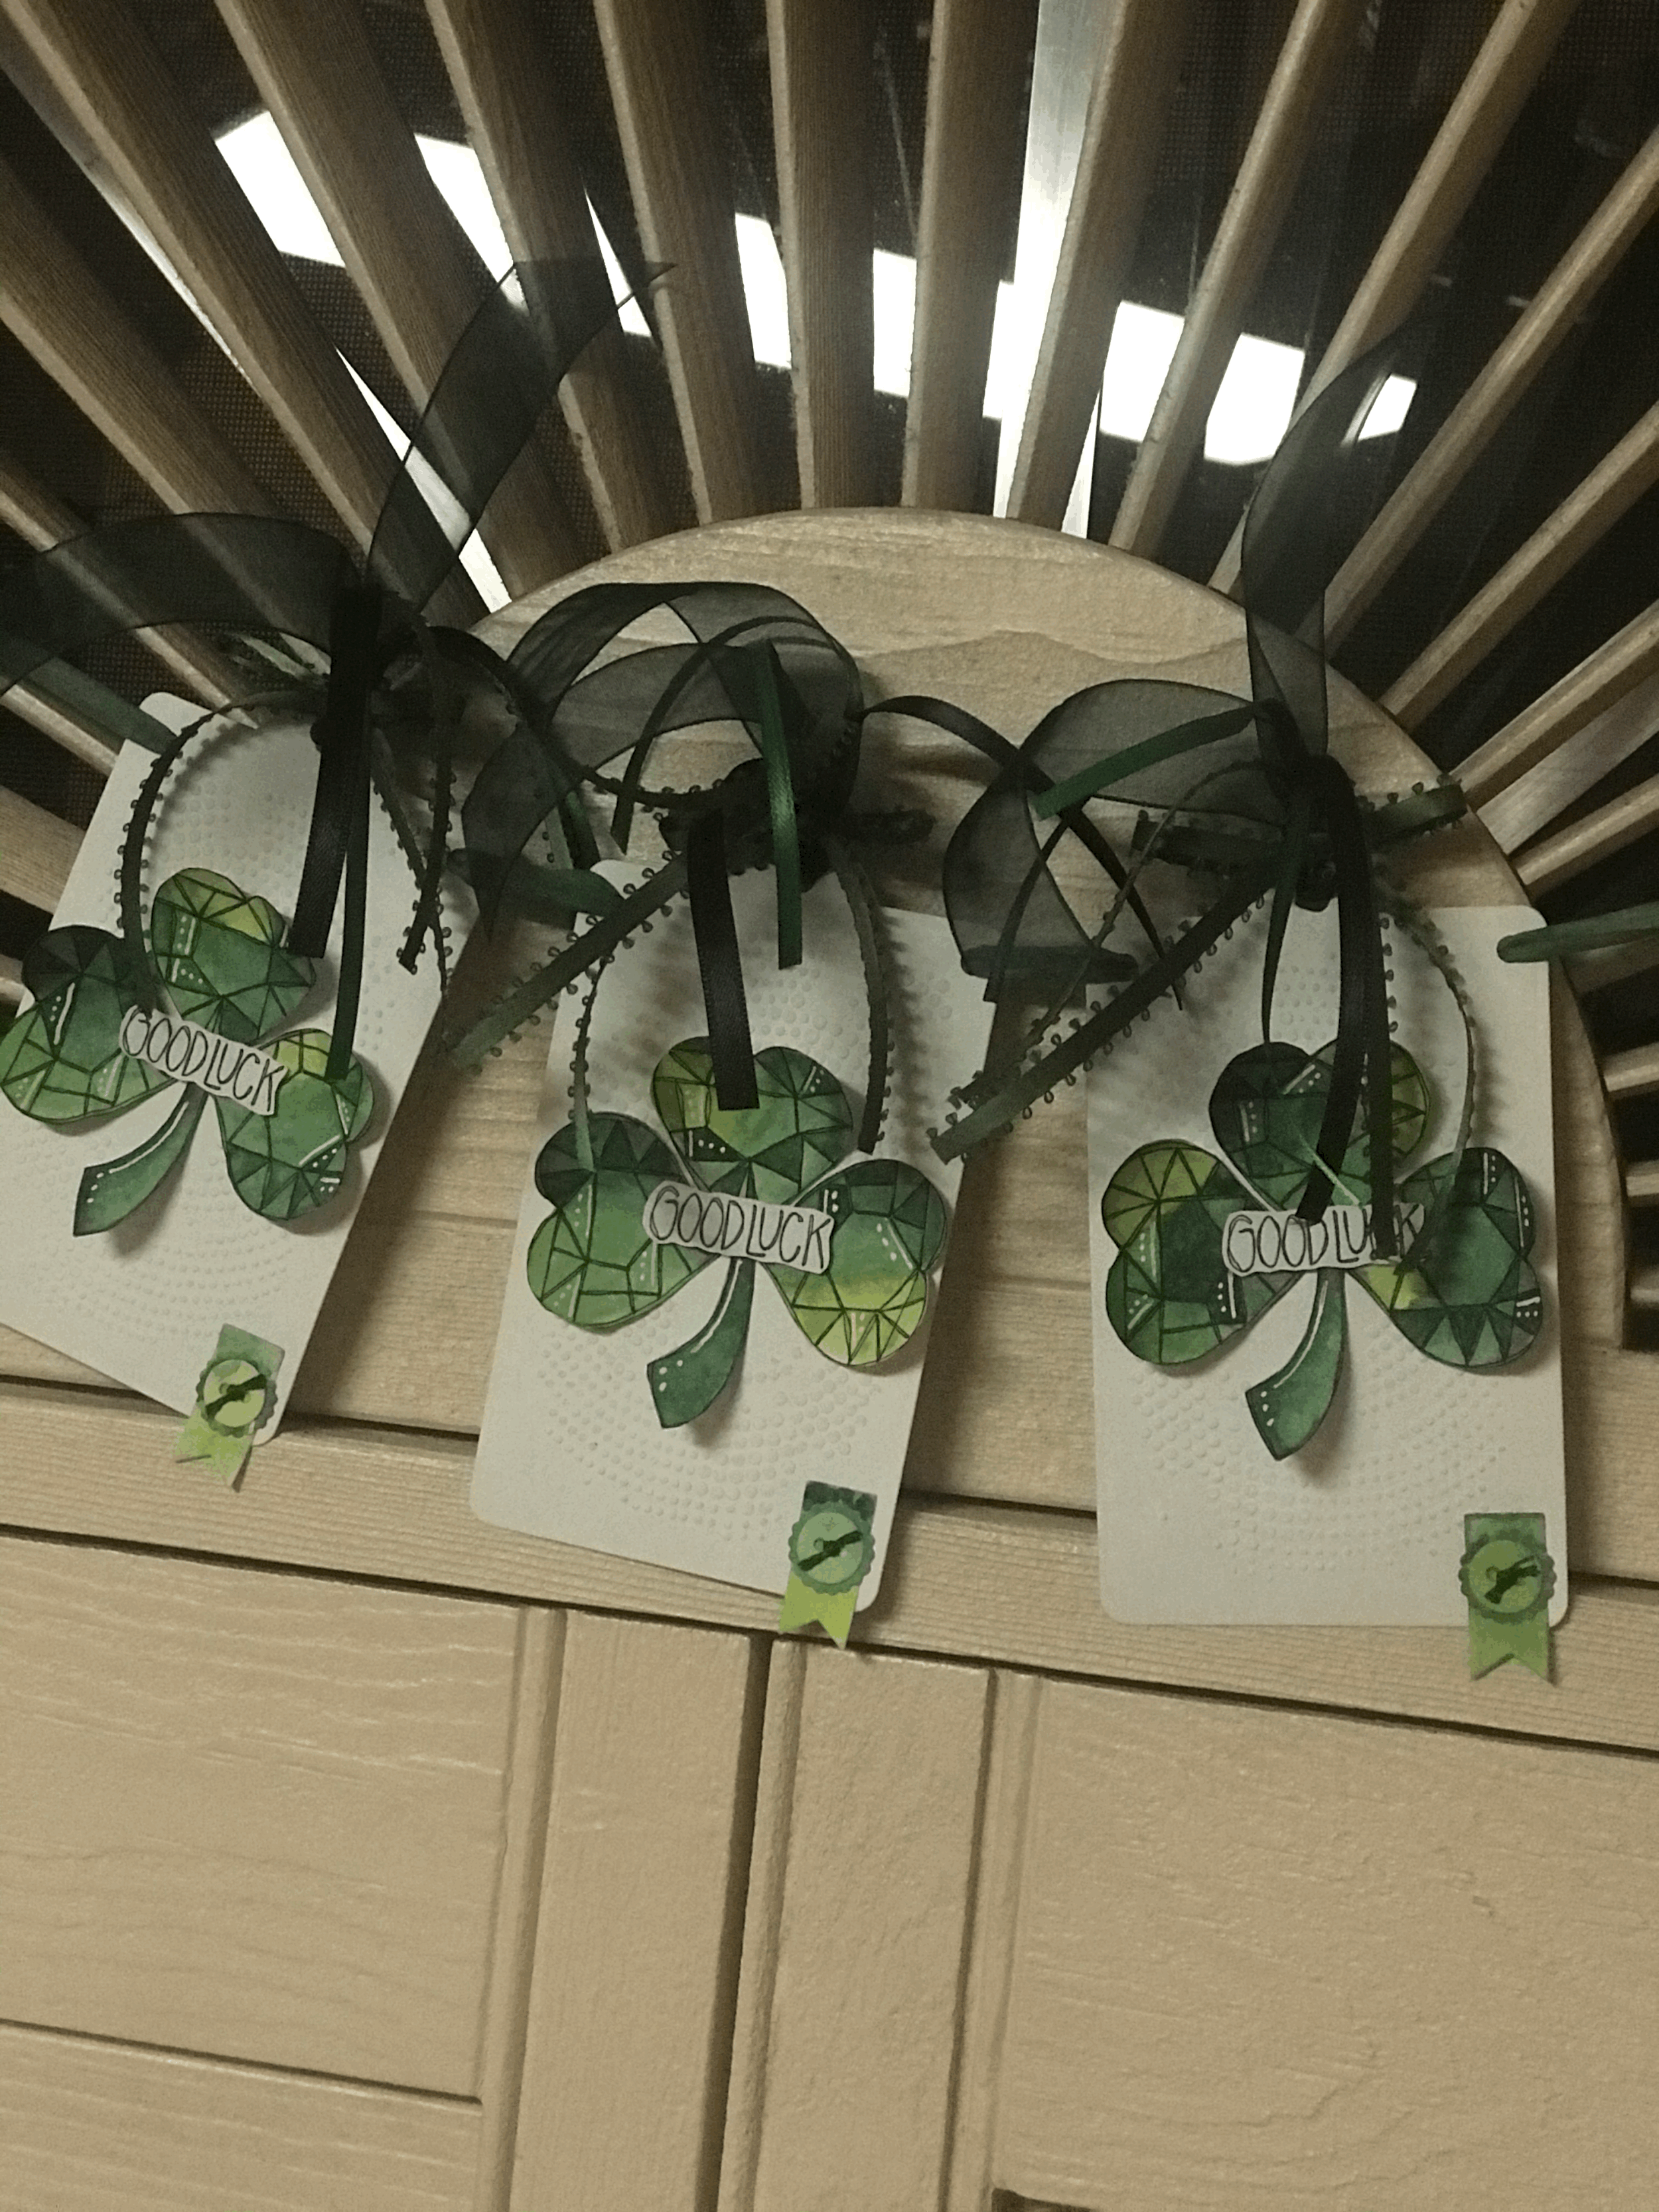
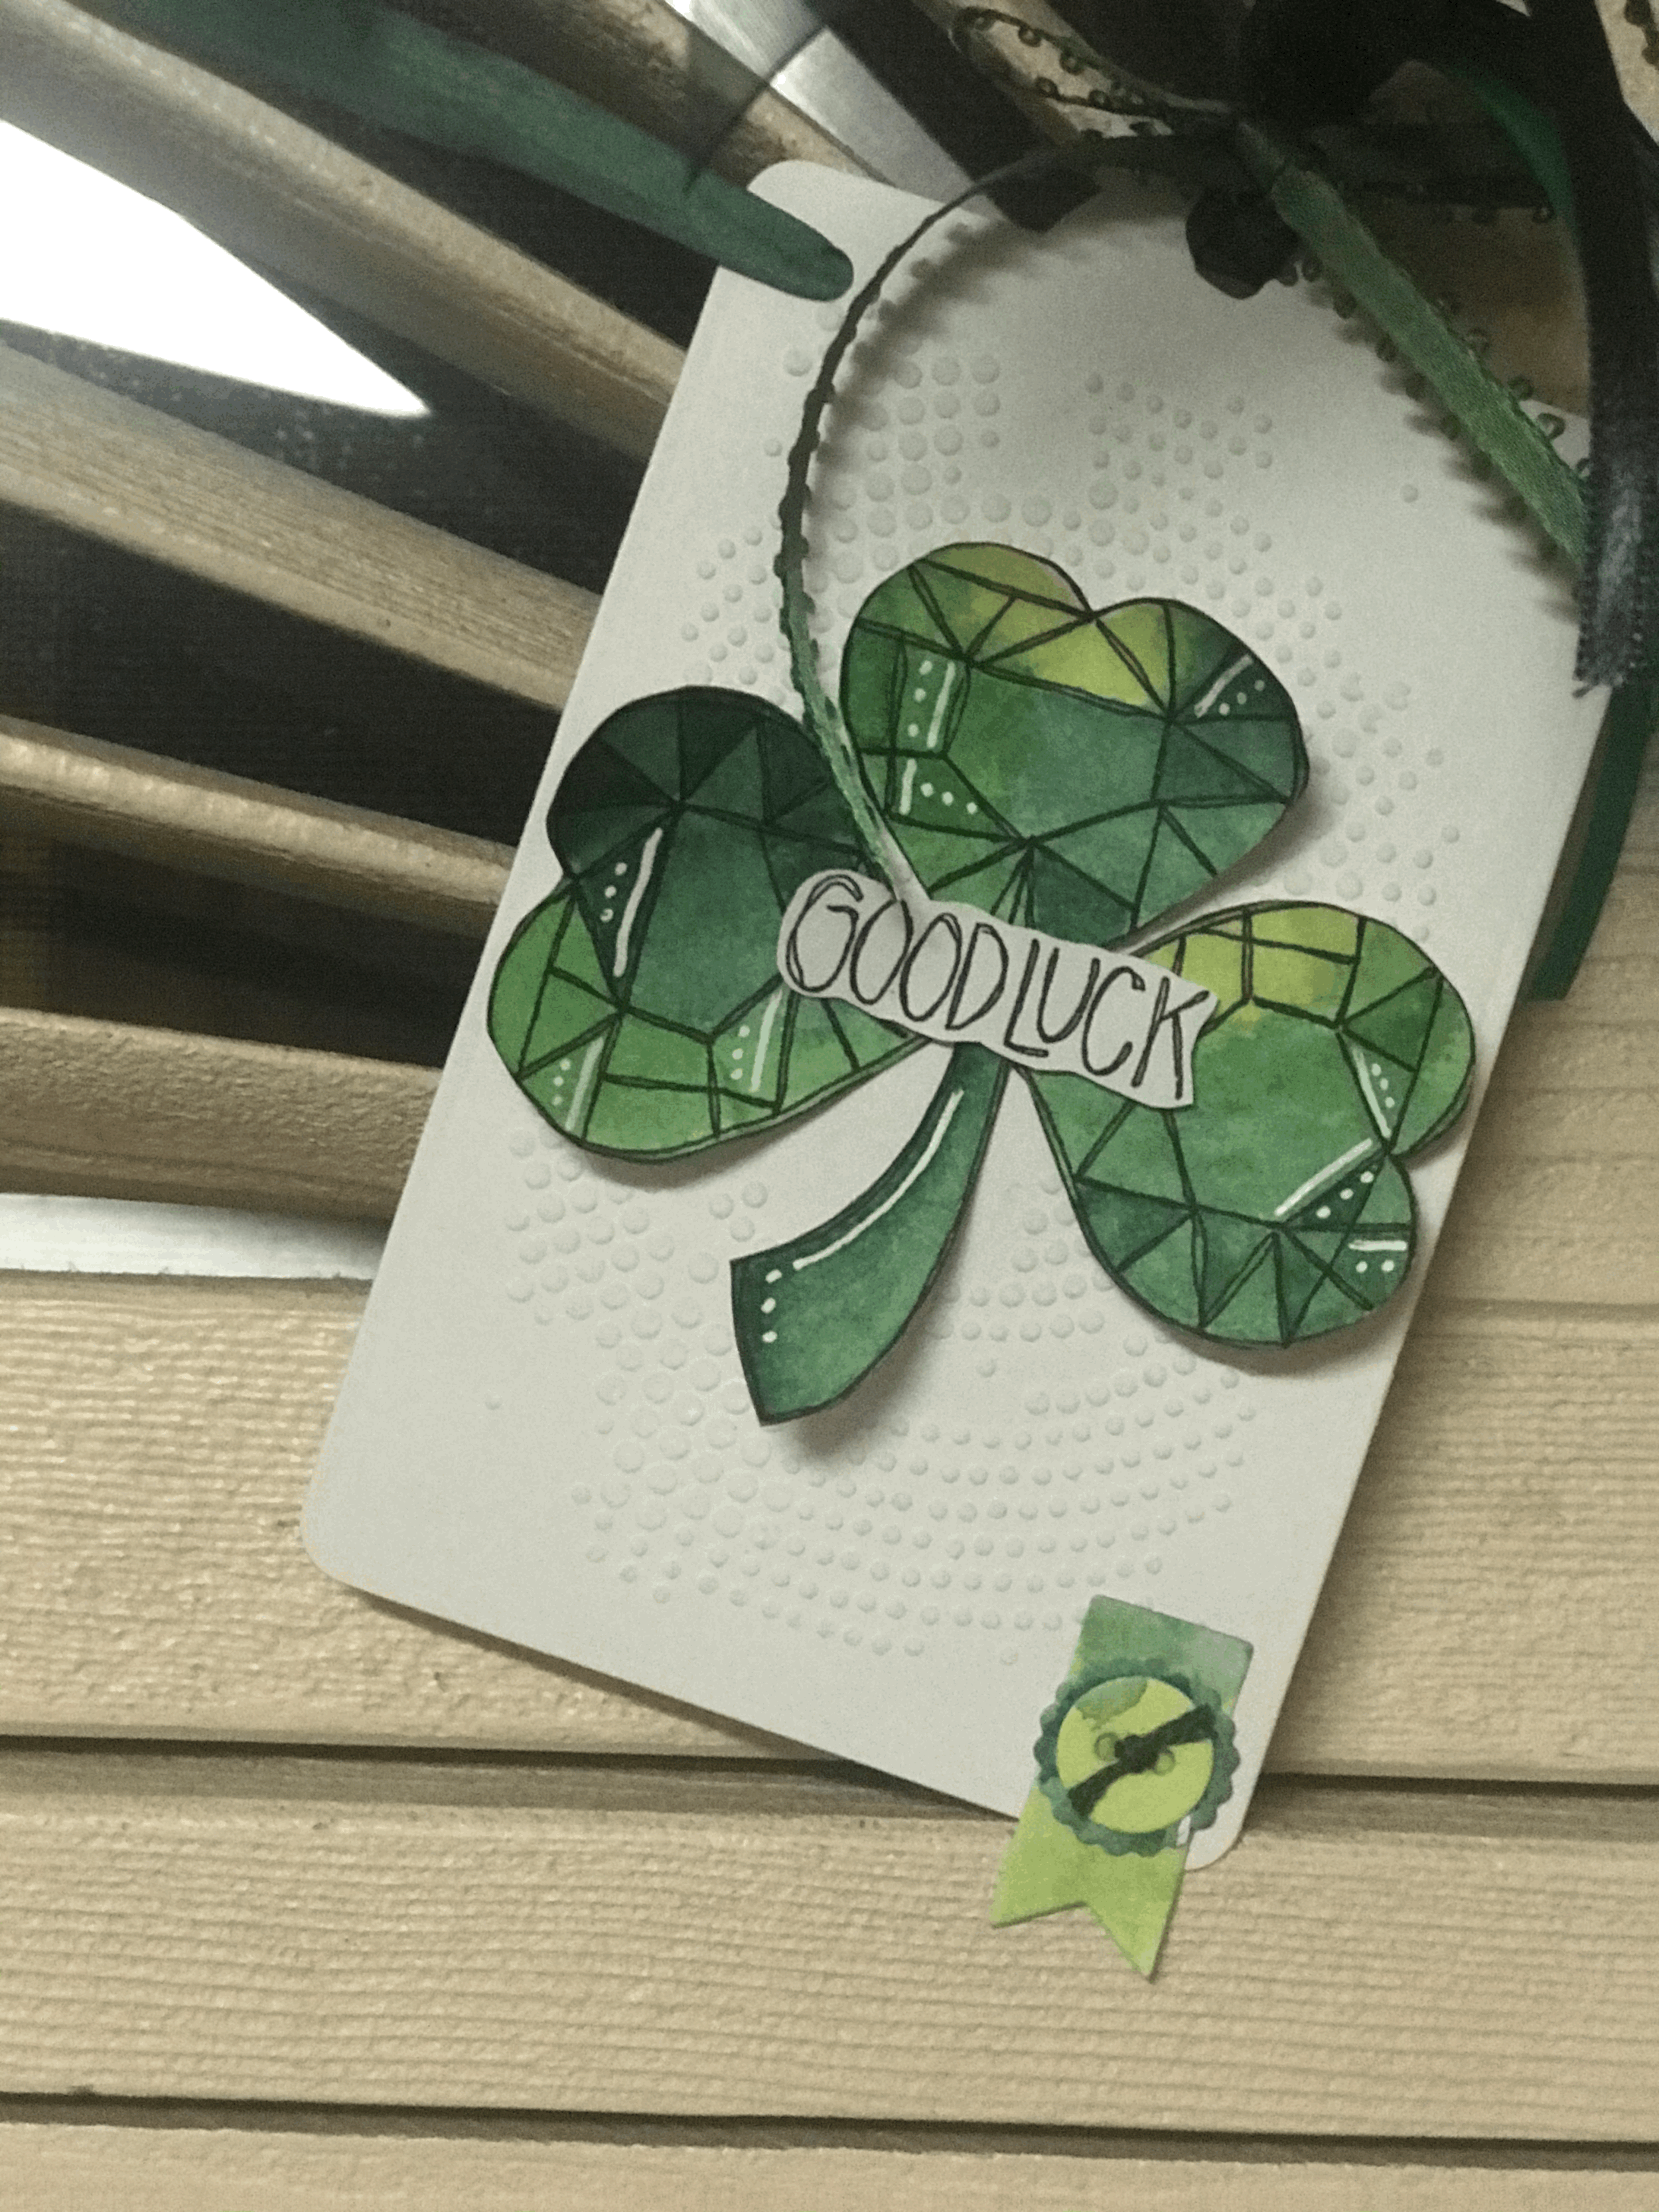
Kathleen Caughlin Good Luck banner
The anncorbierescottdesigns banner queen is back again with a brand new banner design for your inspiration! Thank you, Carmen!
Artsy arsenal for this banner-
Kathleen Caughlin art printable by anncorbierescottdesigns
Elizabeth Crafts watercolors (sap green, yellow green, deep green)
Elizabeth Crafts Butterfly pocket insert
Elizabeth Craft Summer Journal Special stencil
Ranger texture paste opaque matte
White Unibal Signo
assorted ribbons
Print Kathleen Caughlin art printable on 90 lb watercolor paper 3 times
After die cutting the tags, Carmen stencilled some texture paste through the stencil-set aside to dry.
While the texture paste is drying apply a variety of green watercolor to the shamrocks, button and flag pieces-set aside to dry
Fussy cut 3 Good Luck sentiments
Add details with Unibazl Signo White pen
Assemble tags and embellish with assorted ribbons.
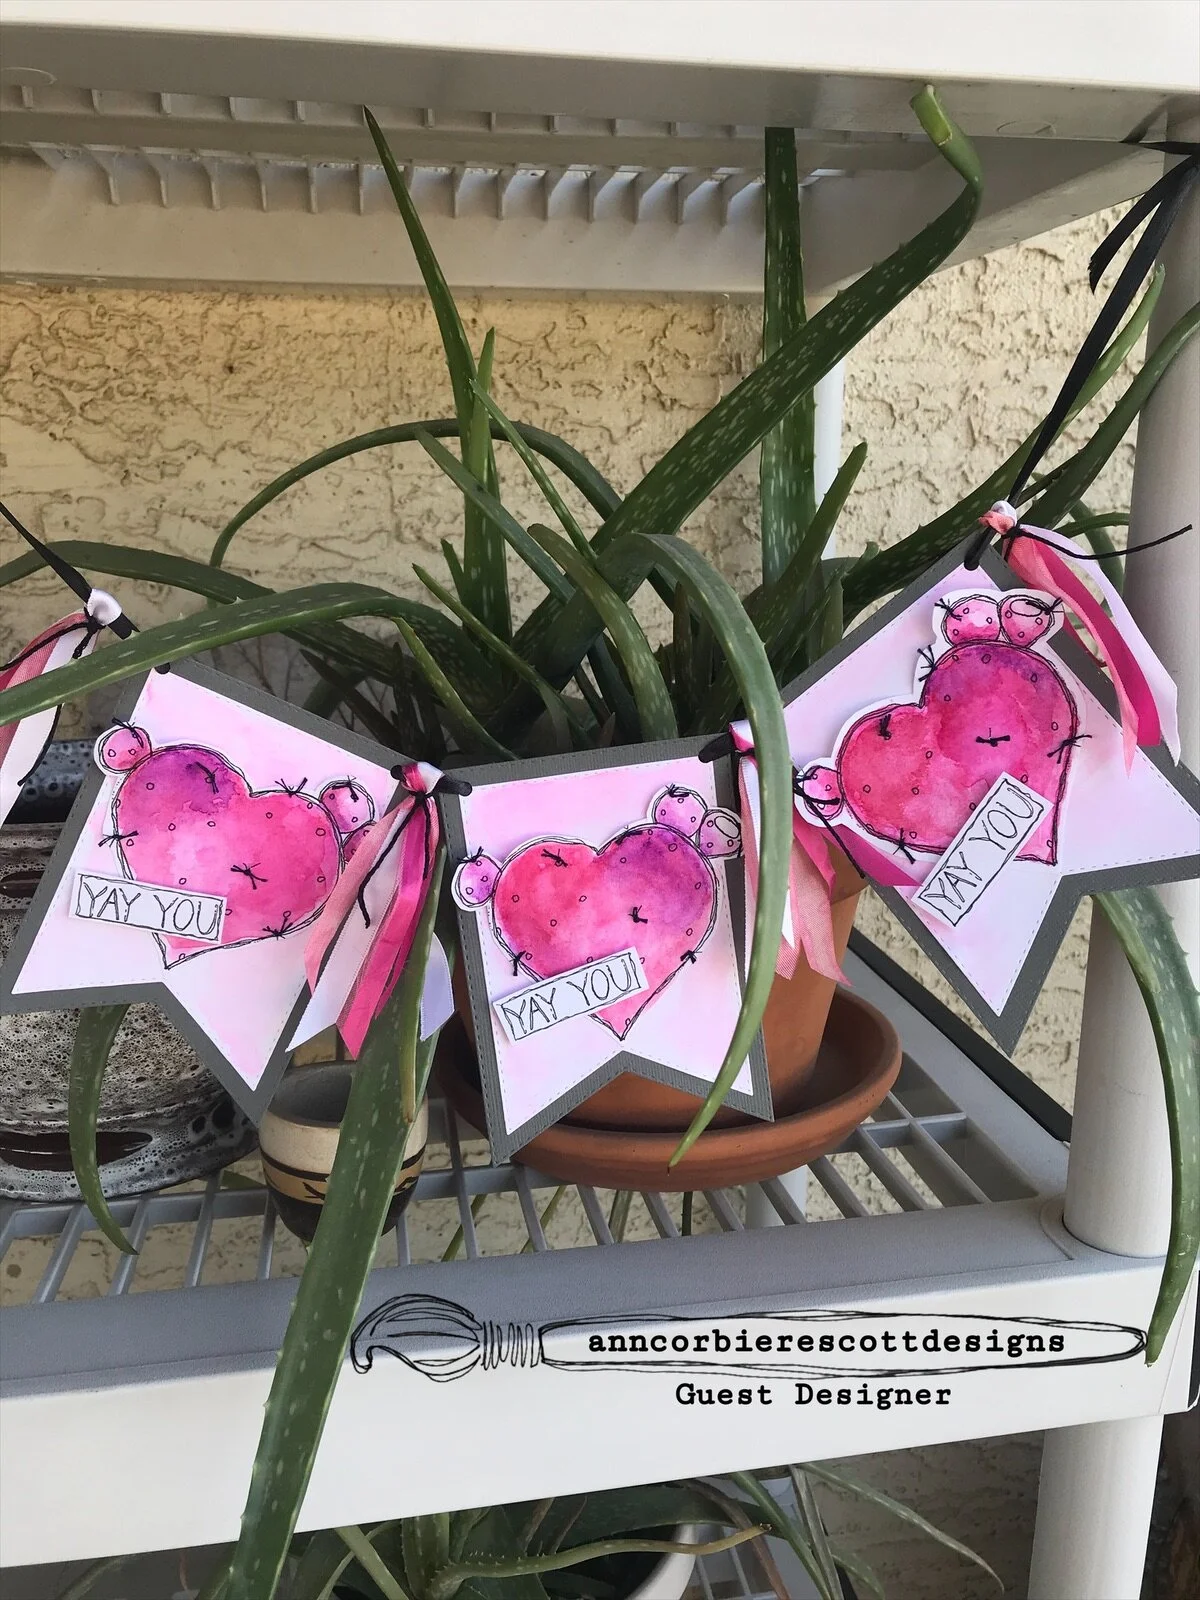
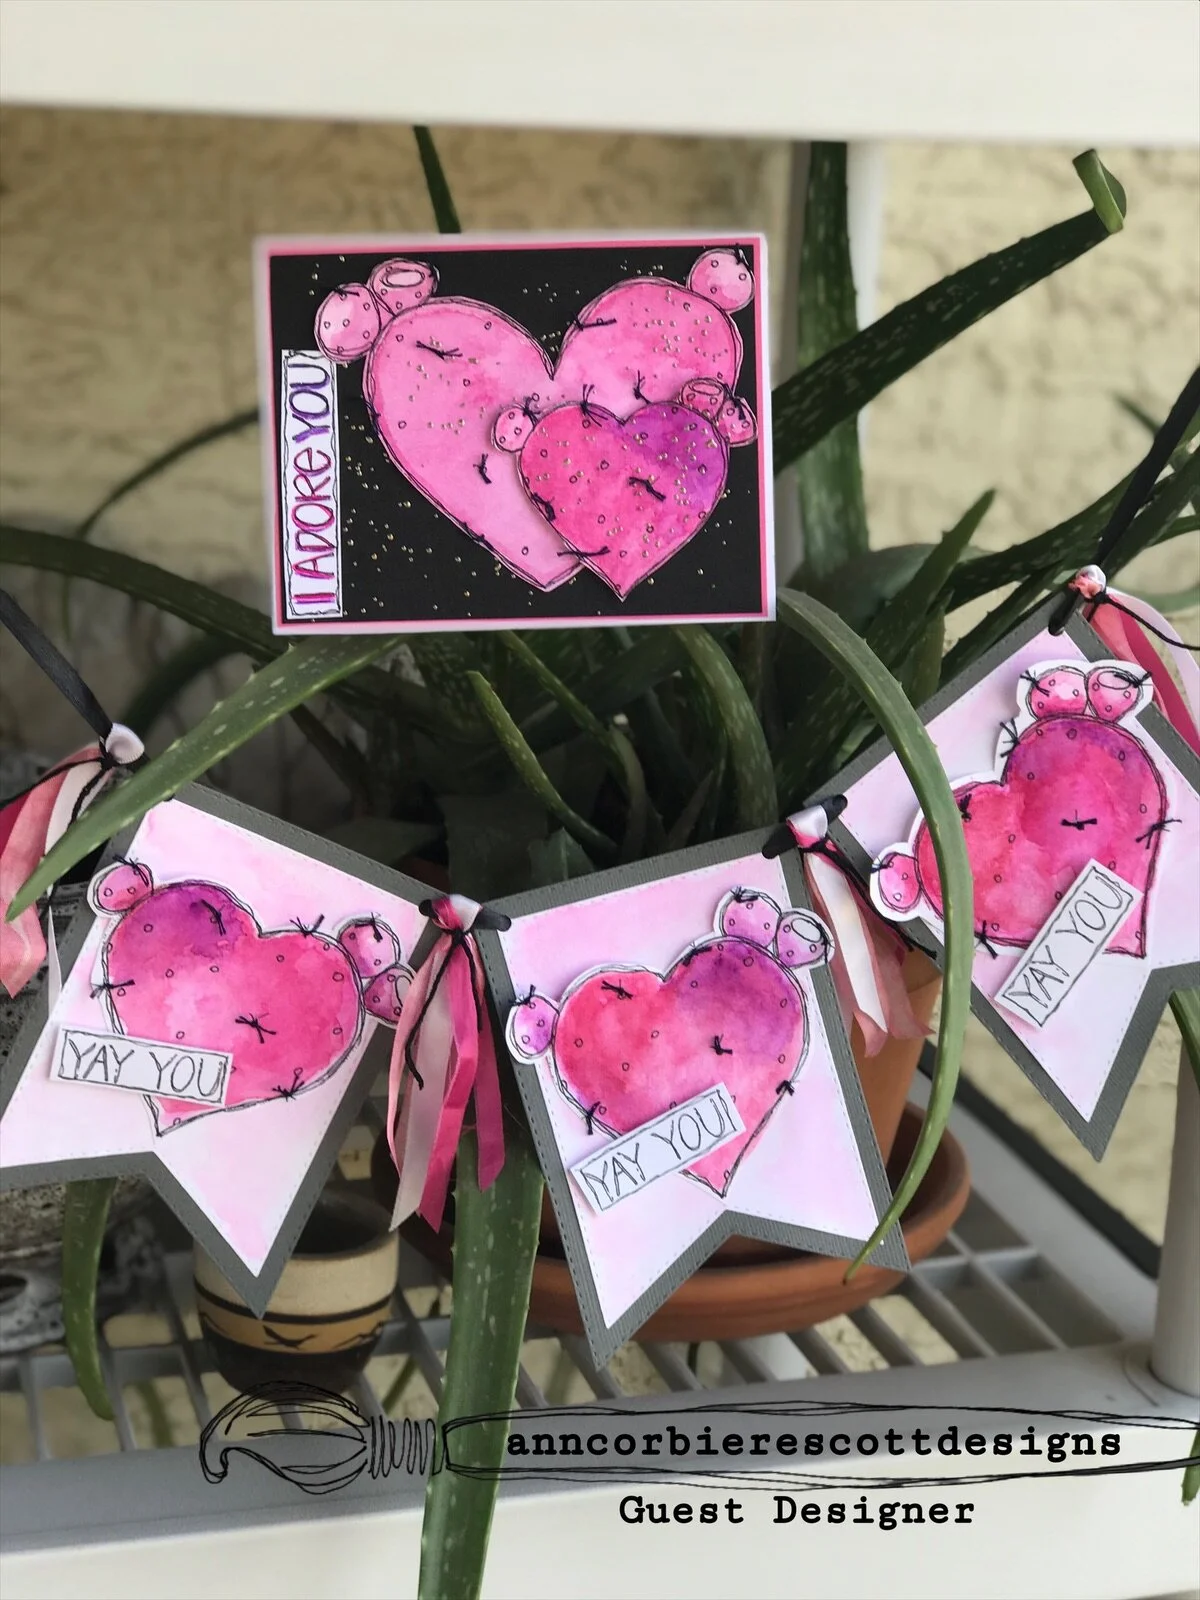
Aunt Dee Cactus Valentine Banner
Our Carmen has once again outdone her creative self!
Artsy Supply list
Aunt Dee art printable on cardstock 110 lb
AI Steel Dies-Banner Double Stitched Dies
Elizabeth craft watercolours-pink, rose, crimson and mauve.
Embroidery Floss-Black
Cardstock-grey and white
Banner
Heart- watercolored with a light pink, added some rose and a smalll touch of crimson and mauve. I always wait for each color to dry before going not to the next color. I knotted with 2 ply black embroidery floss where Ann had the spikes.
Banners-die cut the grey and die cut the white. I watercolored the white banner with the Elizabeth Craft Watercolor pink.
Sentiment-cut “YAY YOU” from Aunt Dee art printable. I used pop dots to place on the heart.
Tassels-I used white, hot pink, pink and black ribbons. Use the ribbons you have in your stash.
Card
Heart-created just as for banner including embroidery floss spikes. Add foam dots or tape to smaller heart to pop in up.
Card base-White card base, add pink card mat, then black mat
Sentiment-cut the “I ADORE YOU” sentiment from the Aunt Dee art printable, enhance letters with watercolors
Card front-adhere hearts and sentiment to card base. Lastly, splattering Stampendous Fran Tage aged silver embossing enamel
Joyce Ann & Aunt Mur wish you a Happy Valentine’s day
Our lovely banner girl extraordinaire, Carmen is in her sweet spot when she has her watercolors at hand and a banner design in her noggin!
And we are the lucky ones who reap the benefits!
Who are you Utterly Smitten with????
Here is her step by step instructions for creating this work of yarn-y art!
Artsy supply list Joyce Ann art printable, Aunt Mur art printable (Utterly Smitten), Elizabeth Crafts watercolours-rose crimson and orange, Prima Classic watercolors-#02 pink, Prismacolor Pencils-black, crimson red, orange, and process red, Burlap ribbon 5” wide, Banner-cereal box 8”x5”, Wood Beads 20mm-8, Yarn-dark red and neon pink
Heart-
*I colored the heart with Prima-classic #02 pink and Elizabeth Craft orange first
*Watercolored the rest with Elizabeth Craft rose and crimson.
*Used Prismacolor pencils black, crimson red, orange, and process red to add depth and darken some areas.
*Banner- Cut the coral box 8”x5” (3times). The top part is 5” long and the point is 3” long. I cut and glued the burlap to fit the banner.
*Top Border- I used 2 red and 1 hot pink yarn to crochet a chain for the top.
*Tassels-2 reds, 1 hot pink yarn and 1 twine-24” long
*Bows-I used 2 red and 1 hot pink yarn and 1 twine
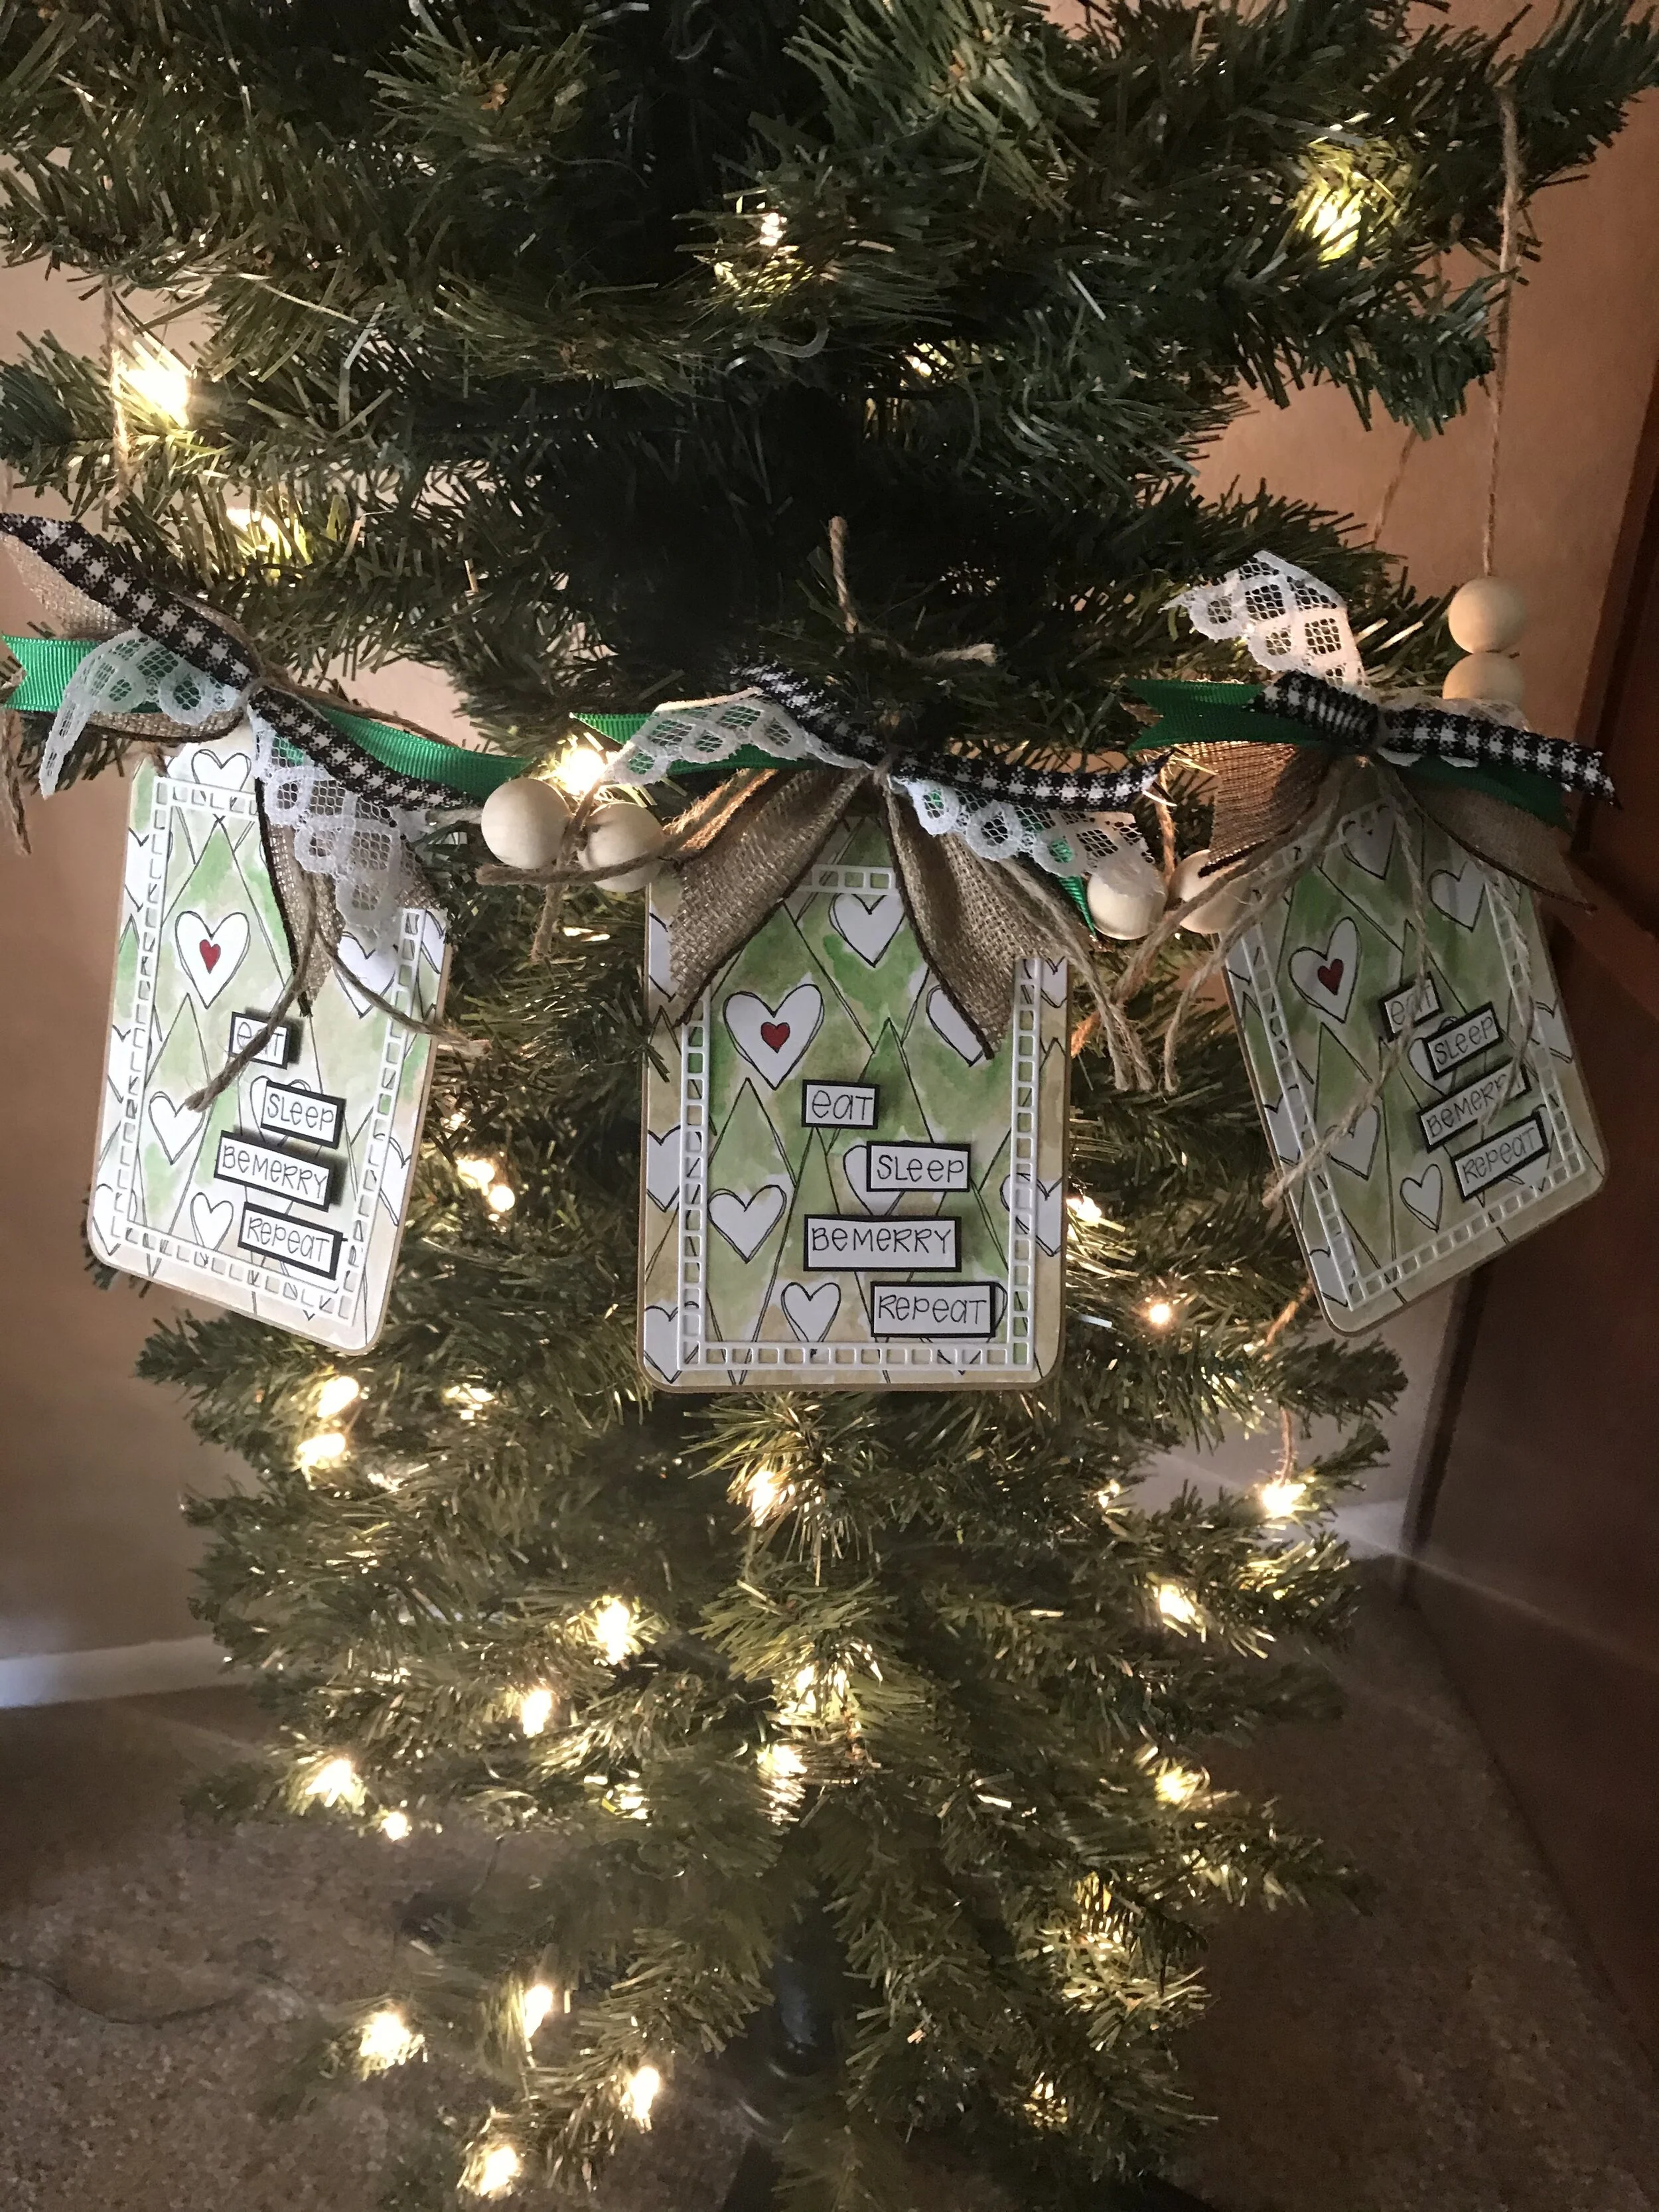
Oh Tannebaum!!!
I am so excited to share some inspiring creations made by my dear friend Carmen (of poinsettia fame )
Carmen has a unique eye that I admire-she sees possibilities in everything! Who wouldn’t want to have a friend like that???? FOOLS, I tell you, FOOLS!
Anyway, let’s get to the good stuff!
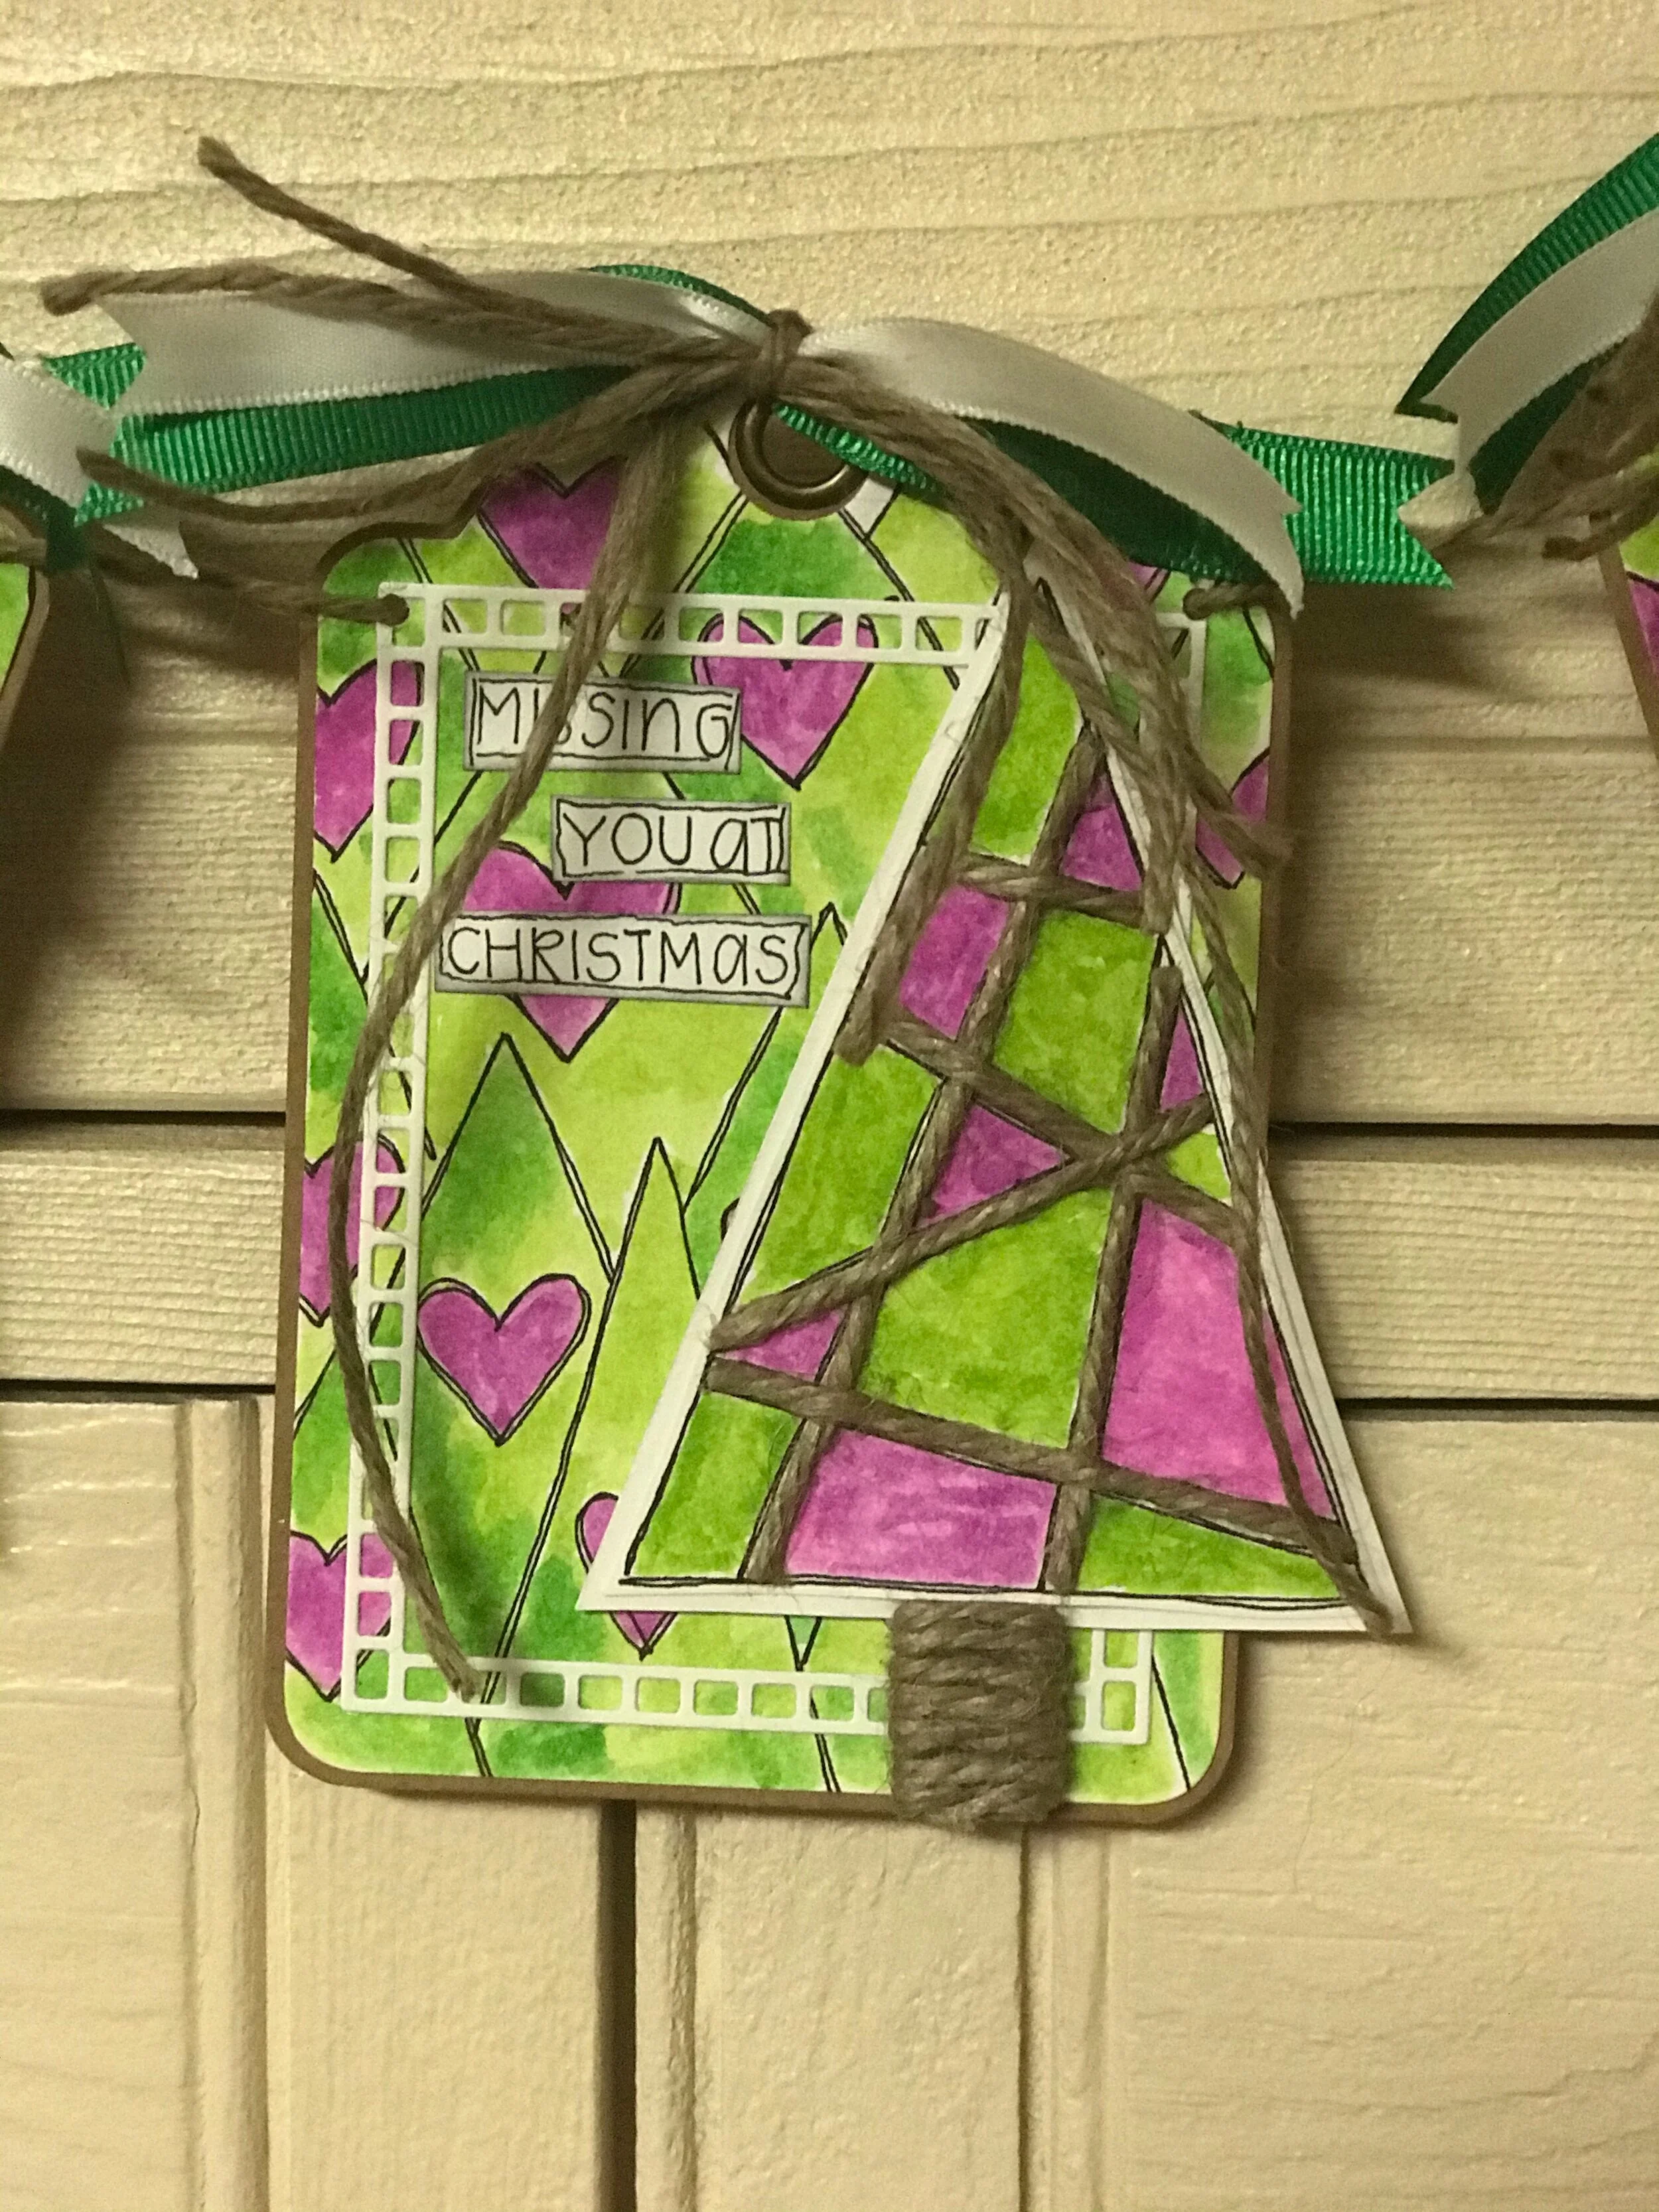
Carmen’s vision is glowingly apparent in this lovely banner donning her tannenbaum!
How lovely are her branches!
Here is the list of the artsy supplies Carmen used.
anncorbierescottdesigns Brandy art printable
110 lb cardstock
graphic 45 reg tag and metal dies
Penny Black square frames
Ranger Distress ink antique linen
Catherine Pooler Lime Rickey
Burlap twine
20mm wooden beads
assorted ribbons
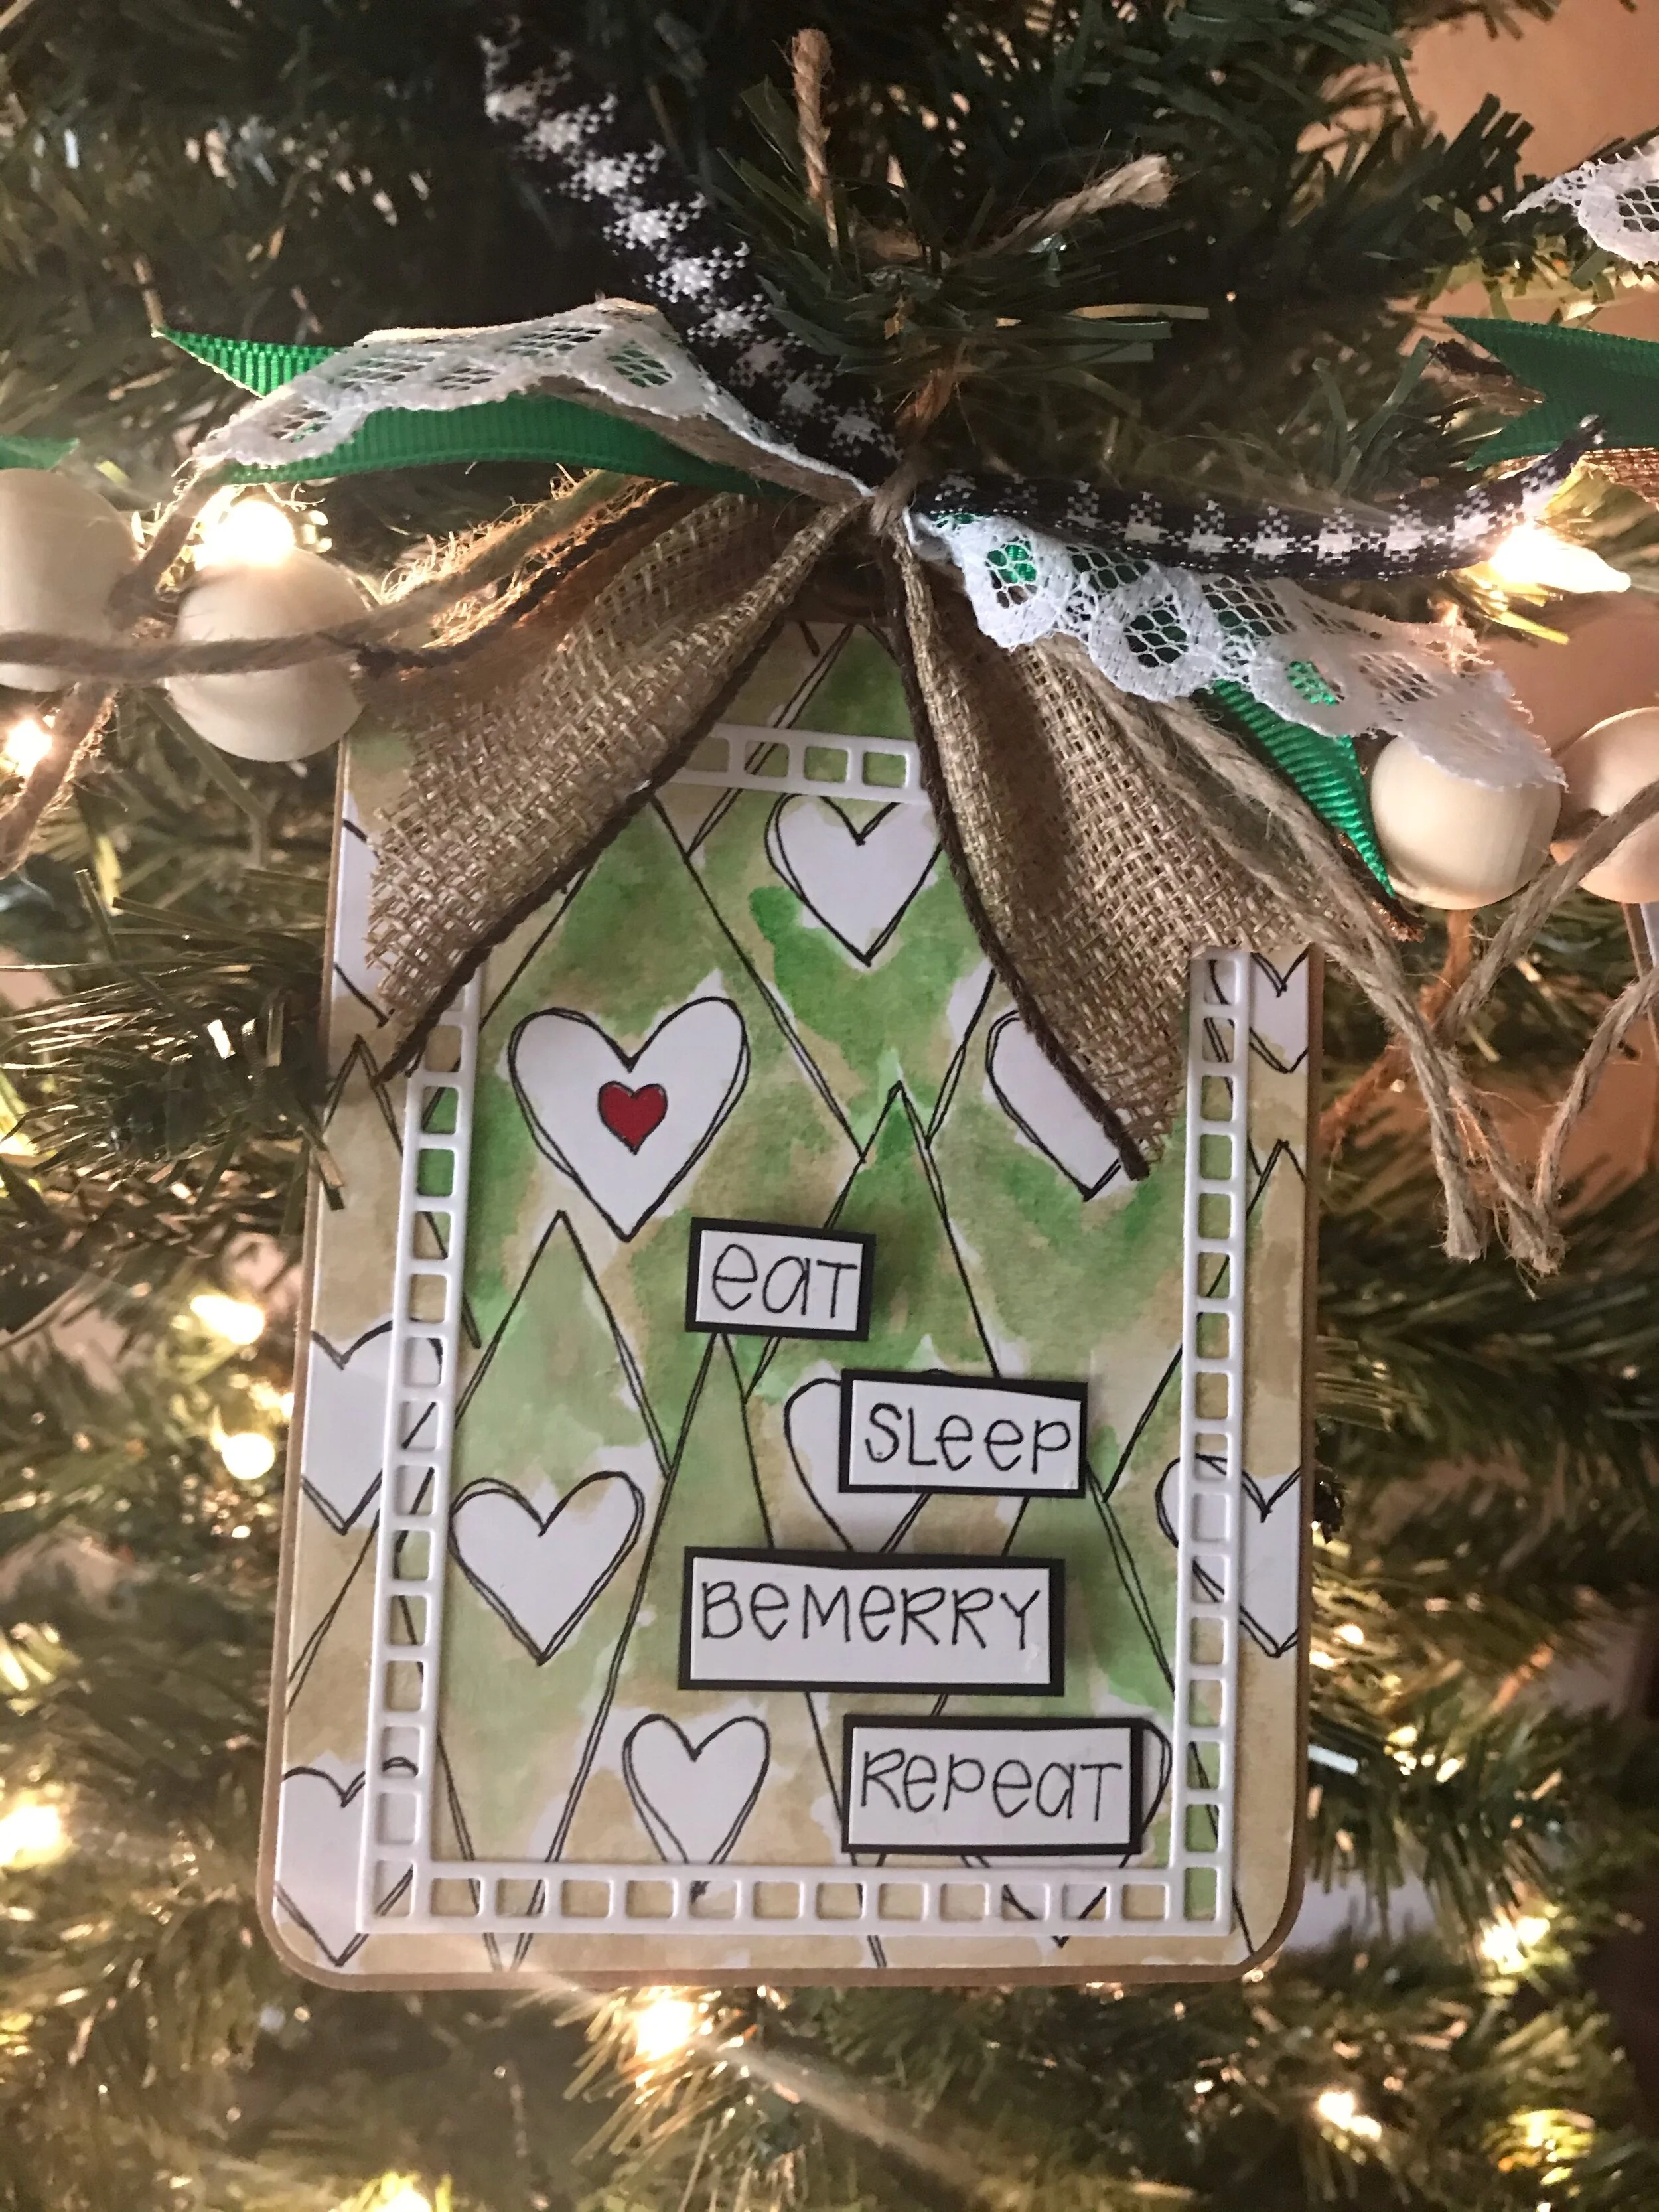
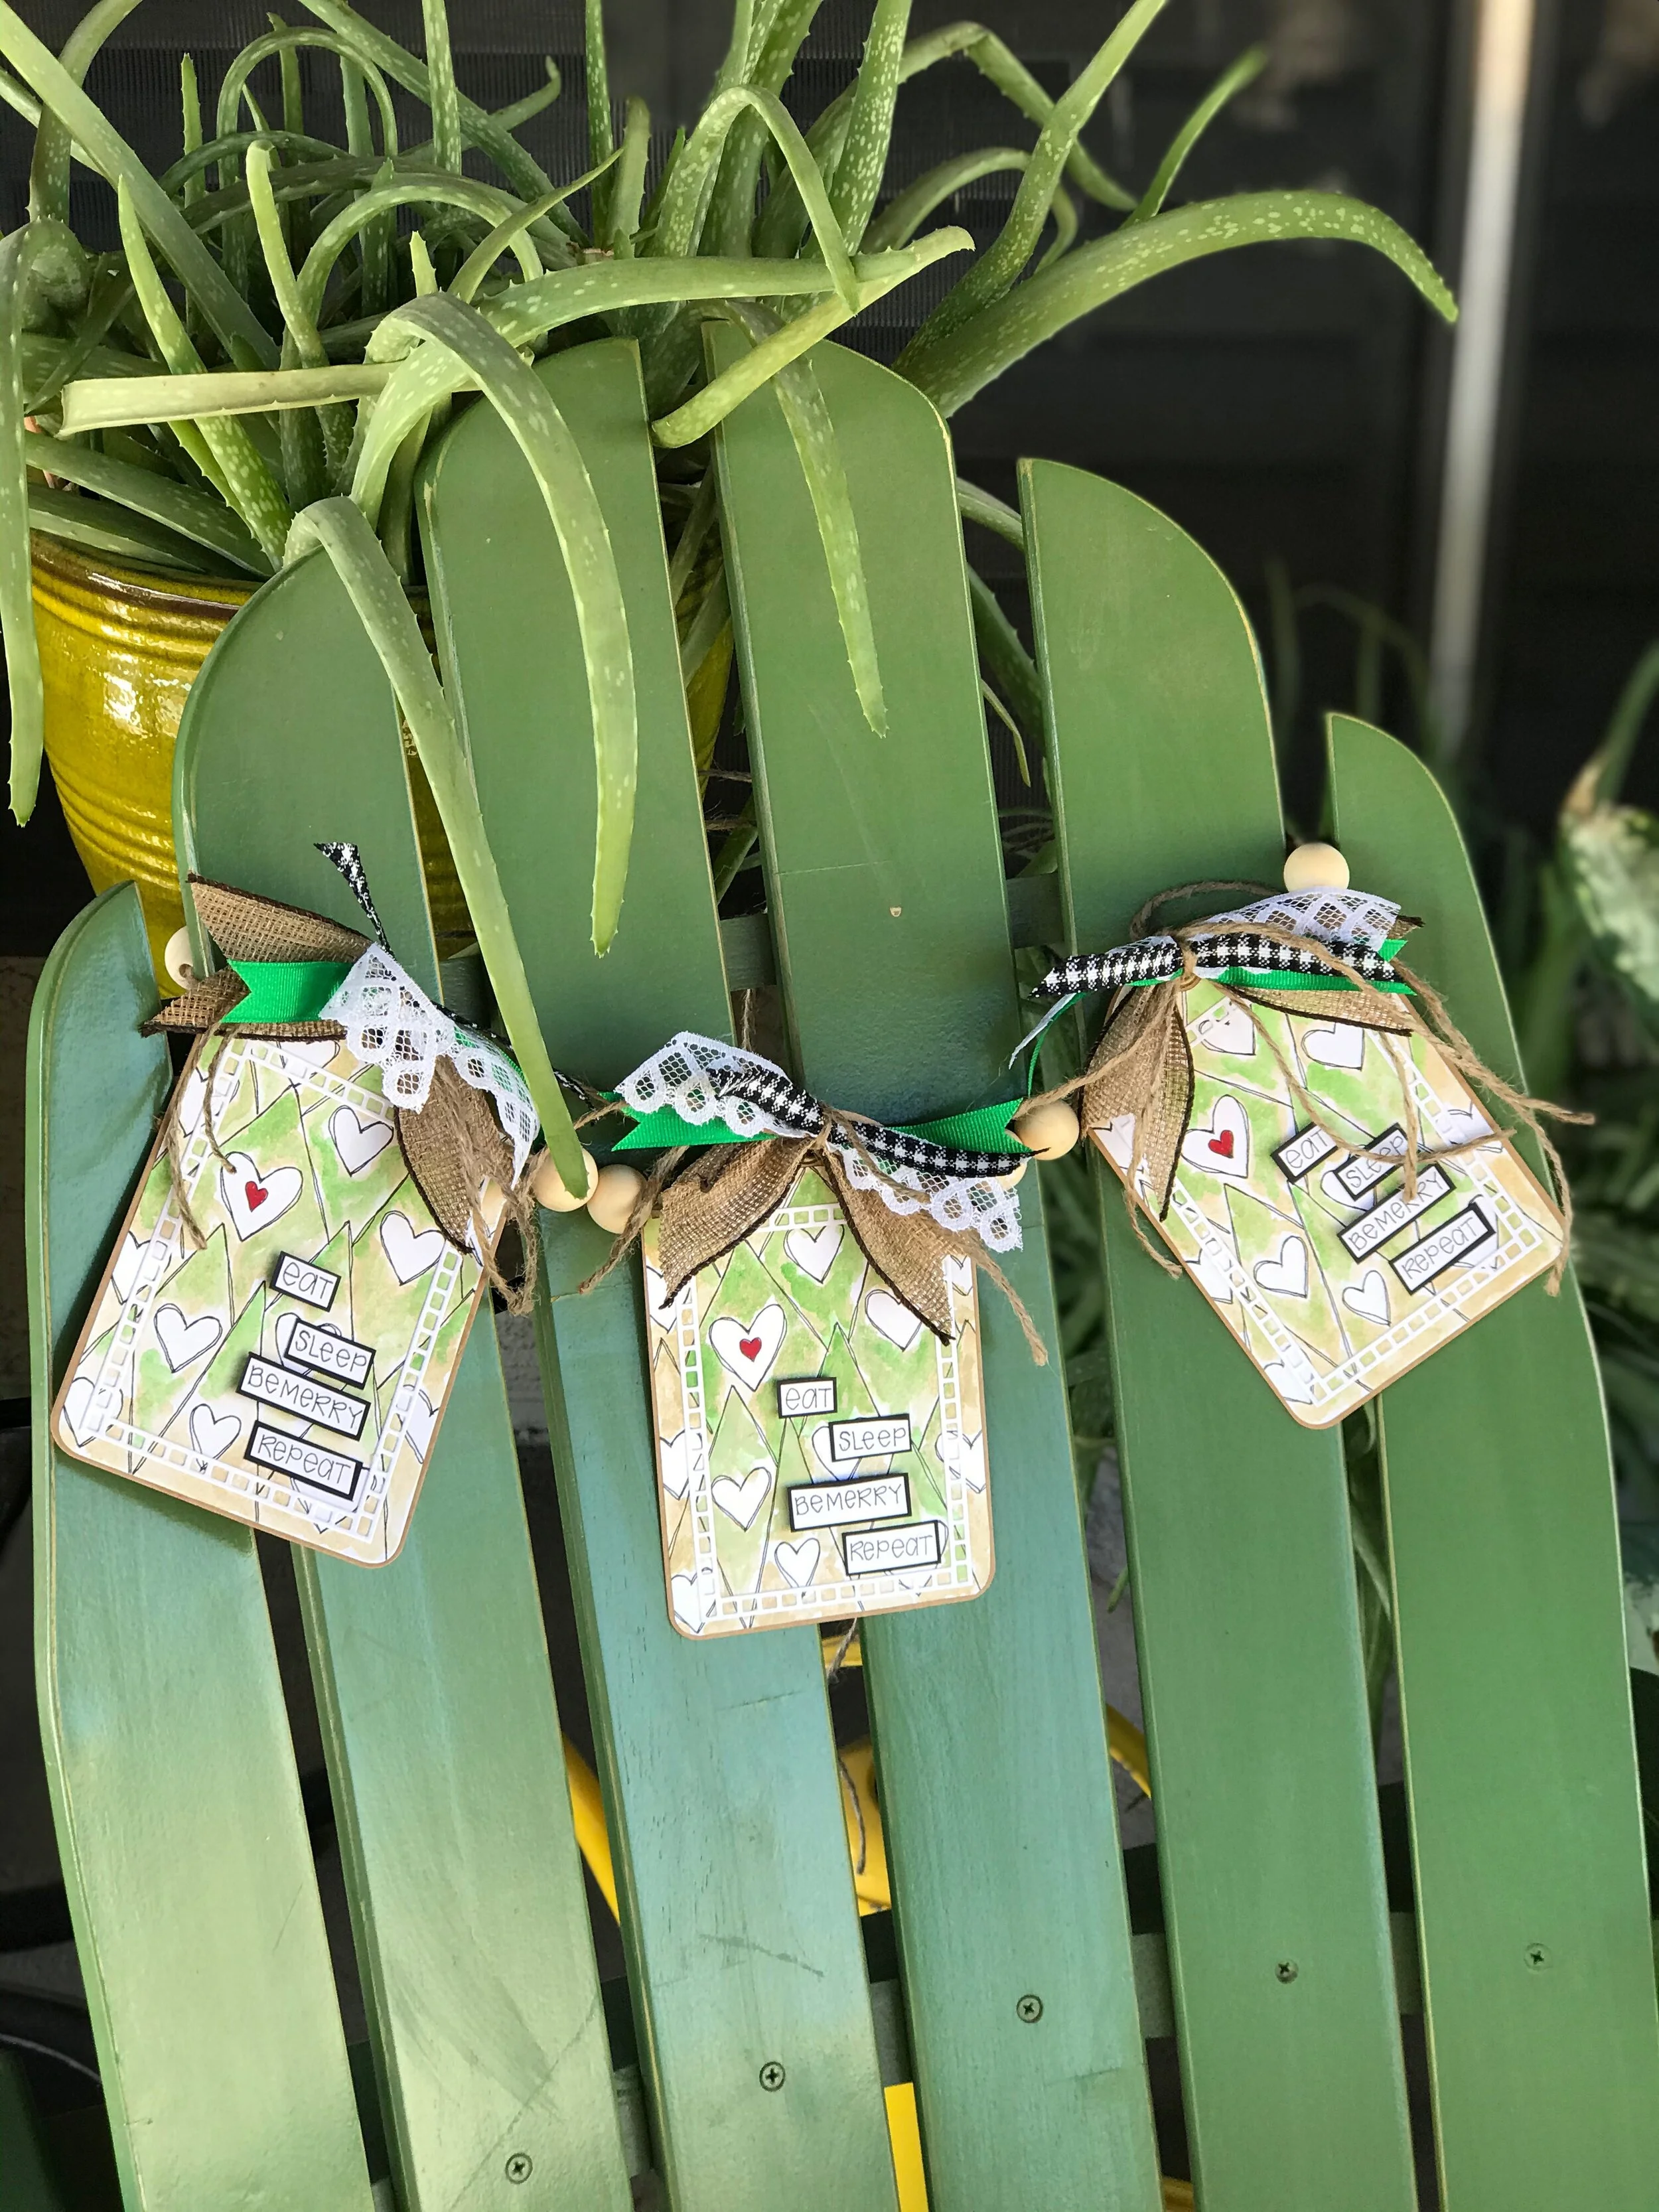
Carmen’s painterly style sets the mood for decorative holiday decor! Also, be sure to check out the attention to detail and how well they play together!
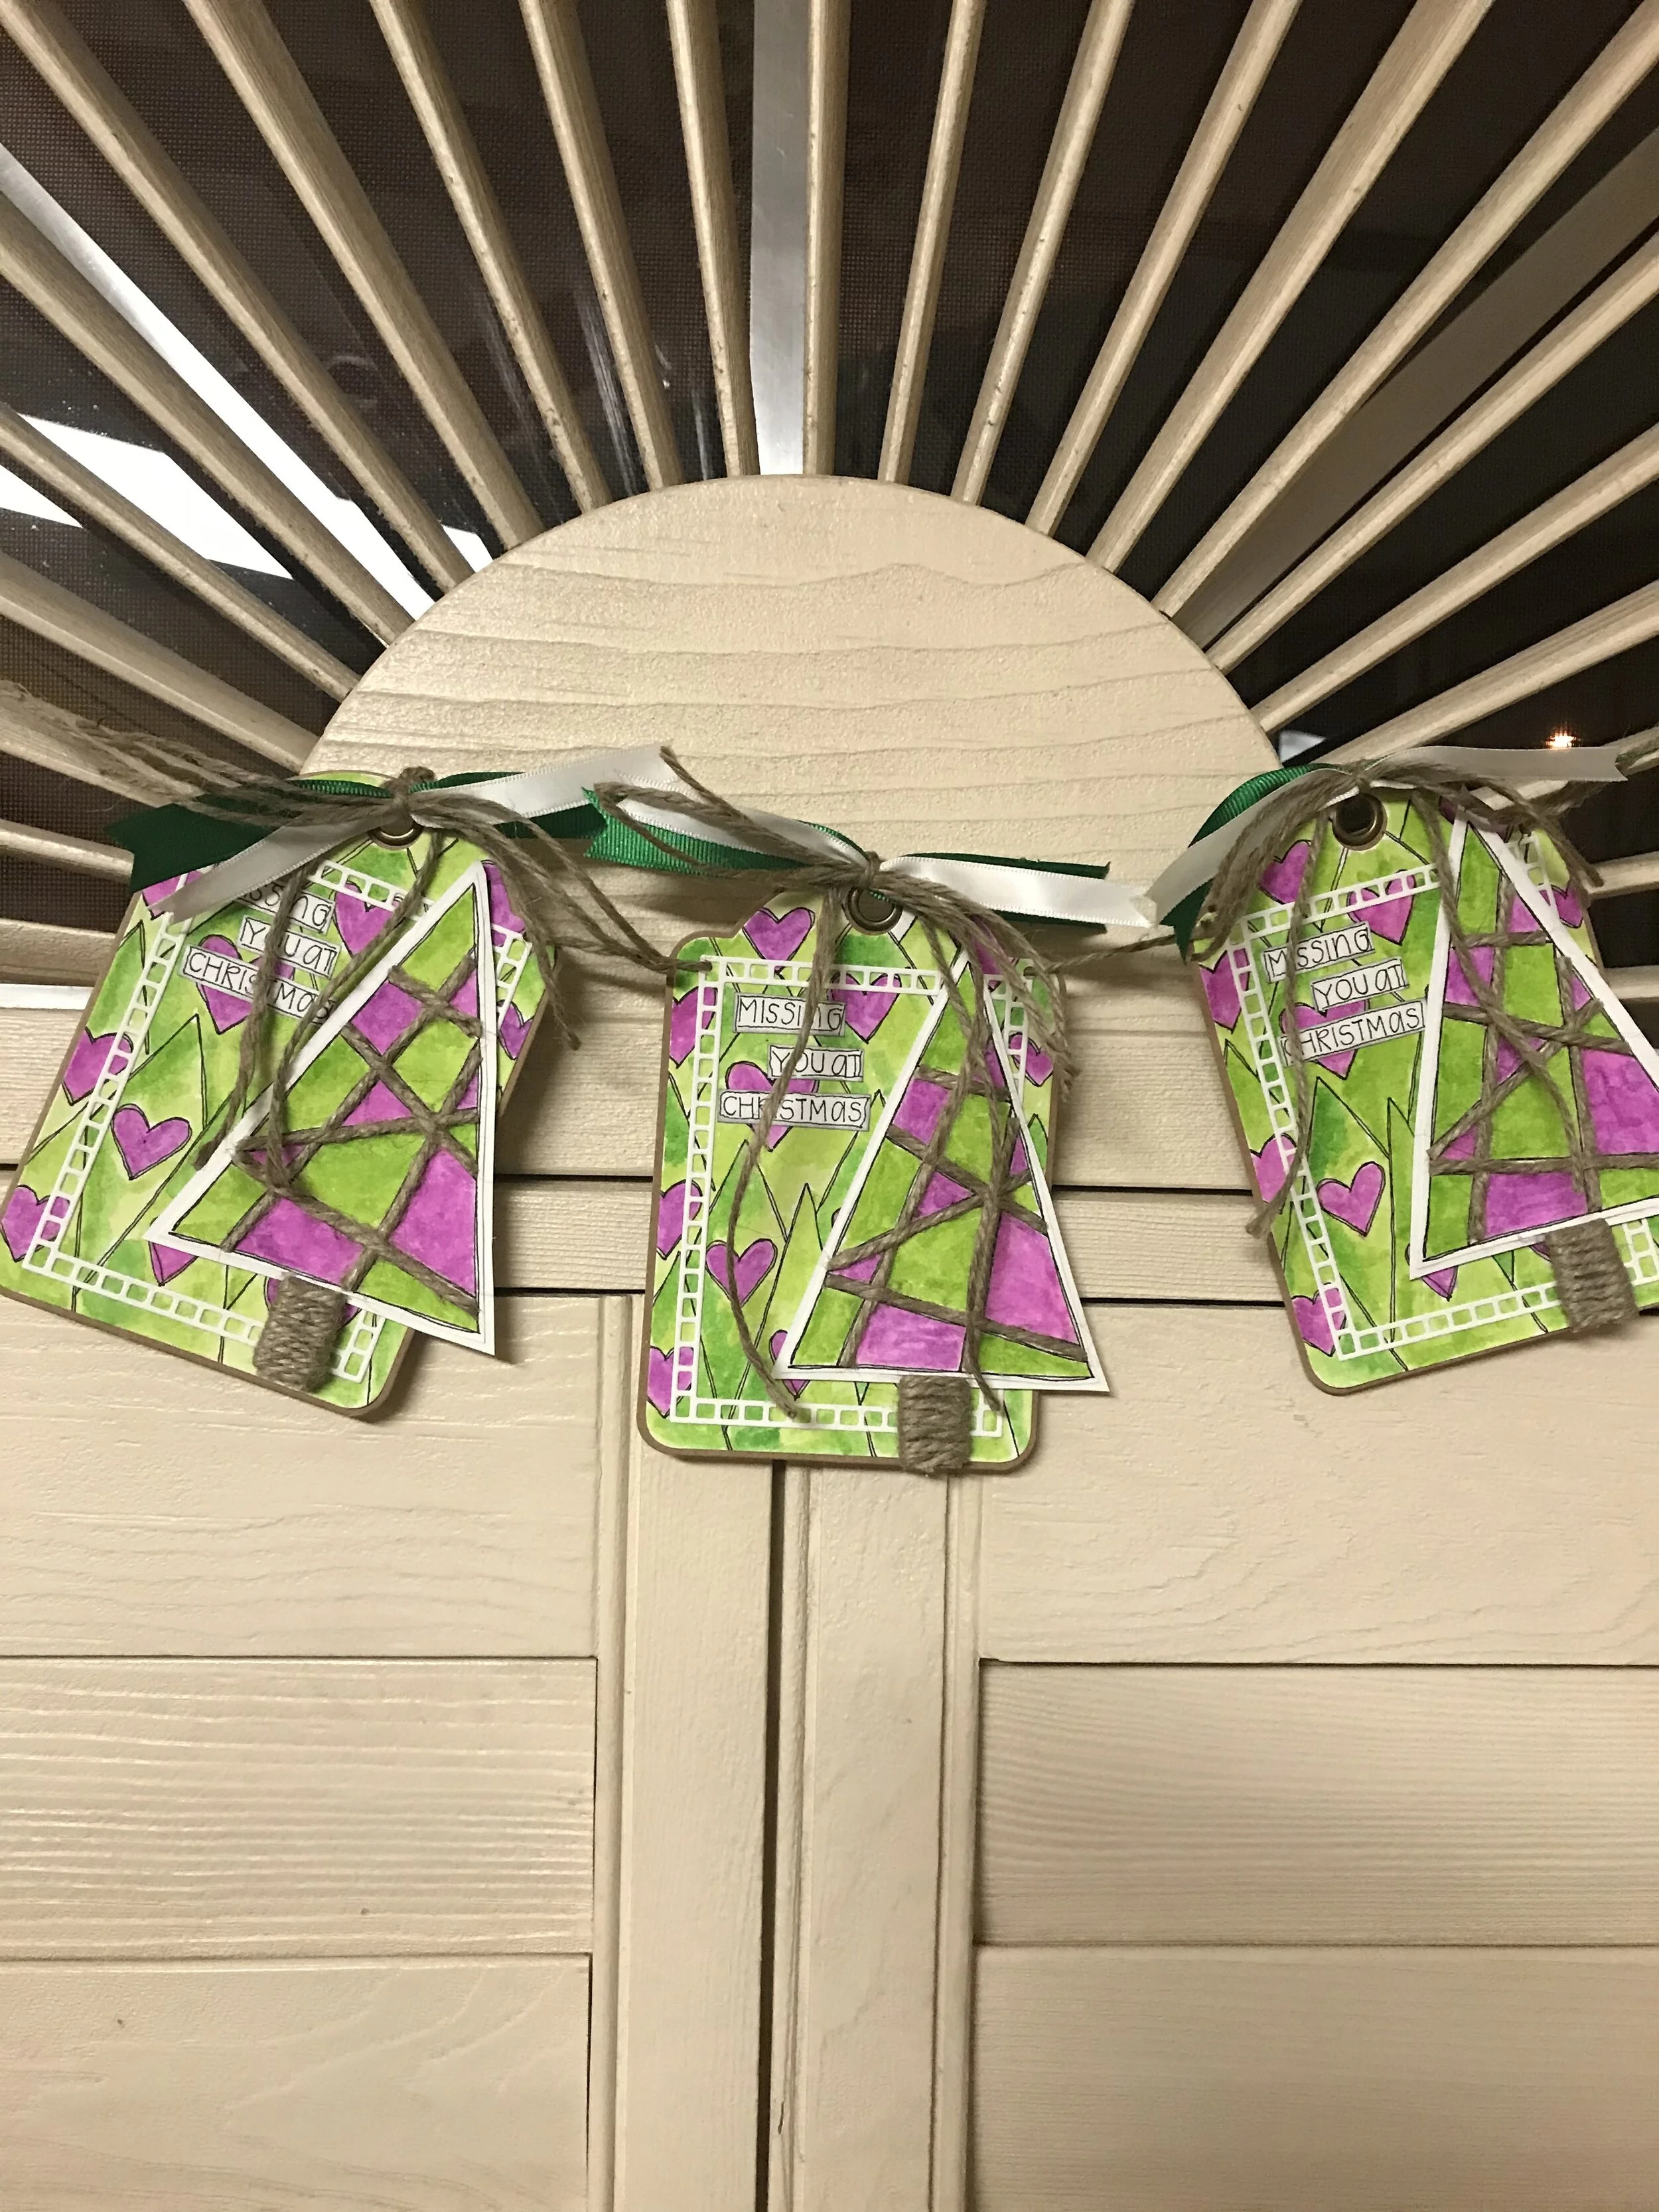
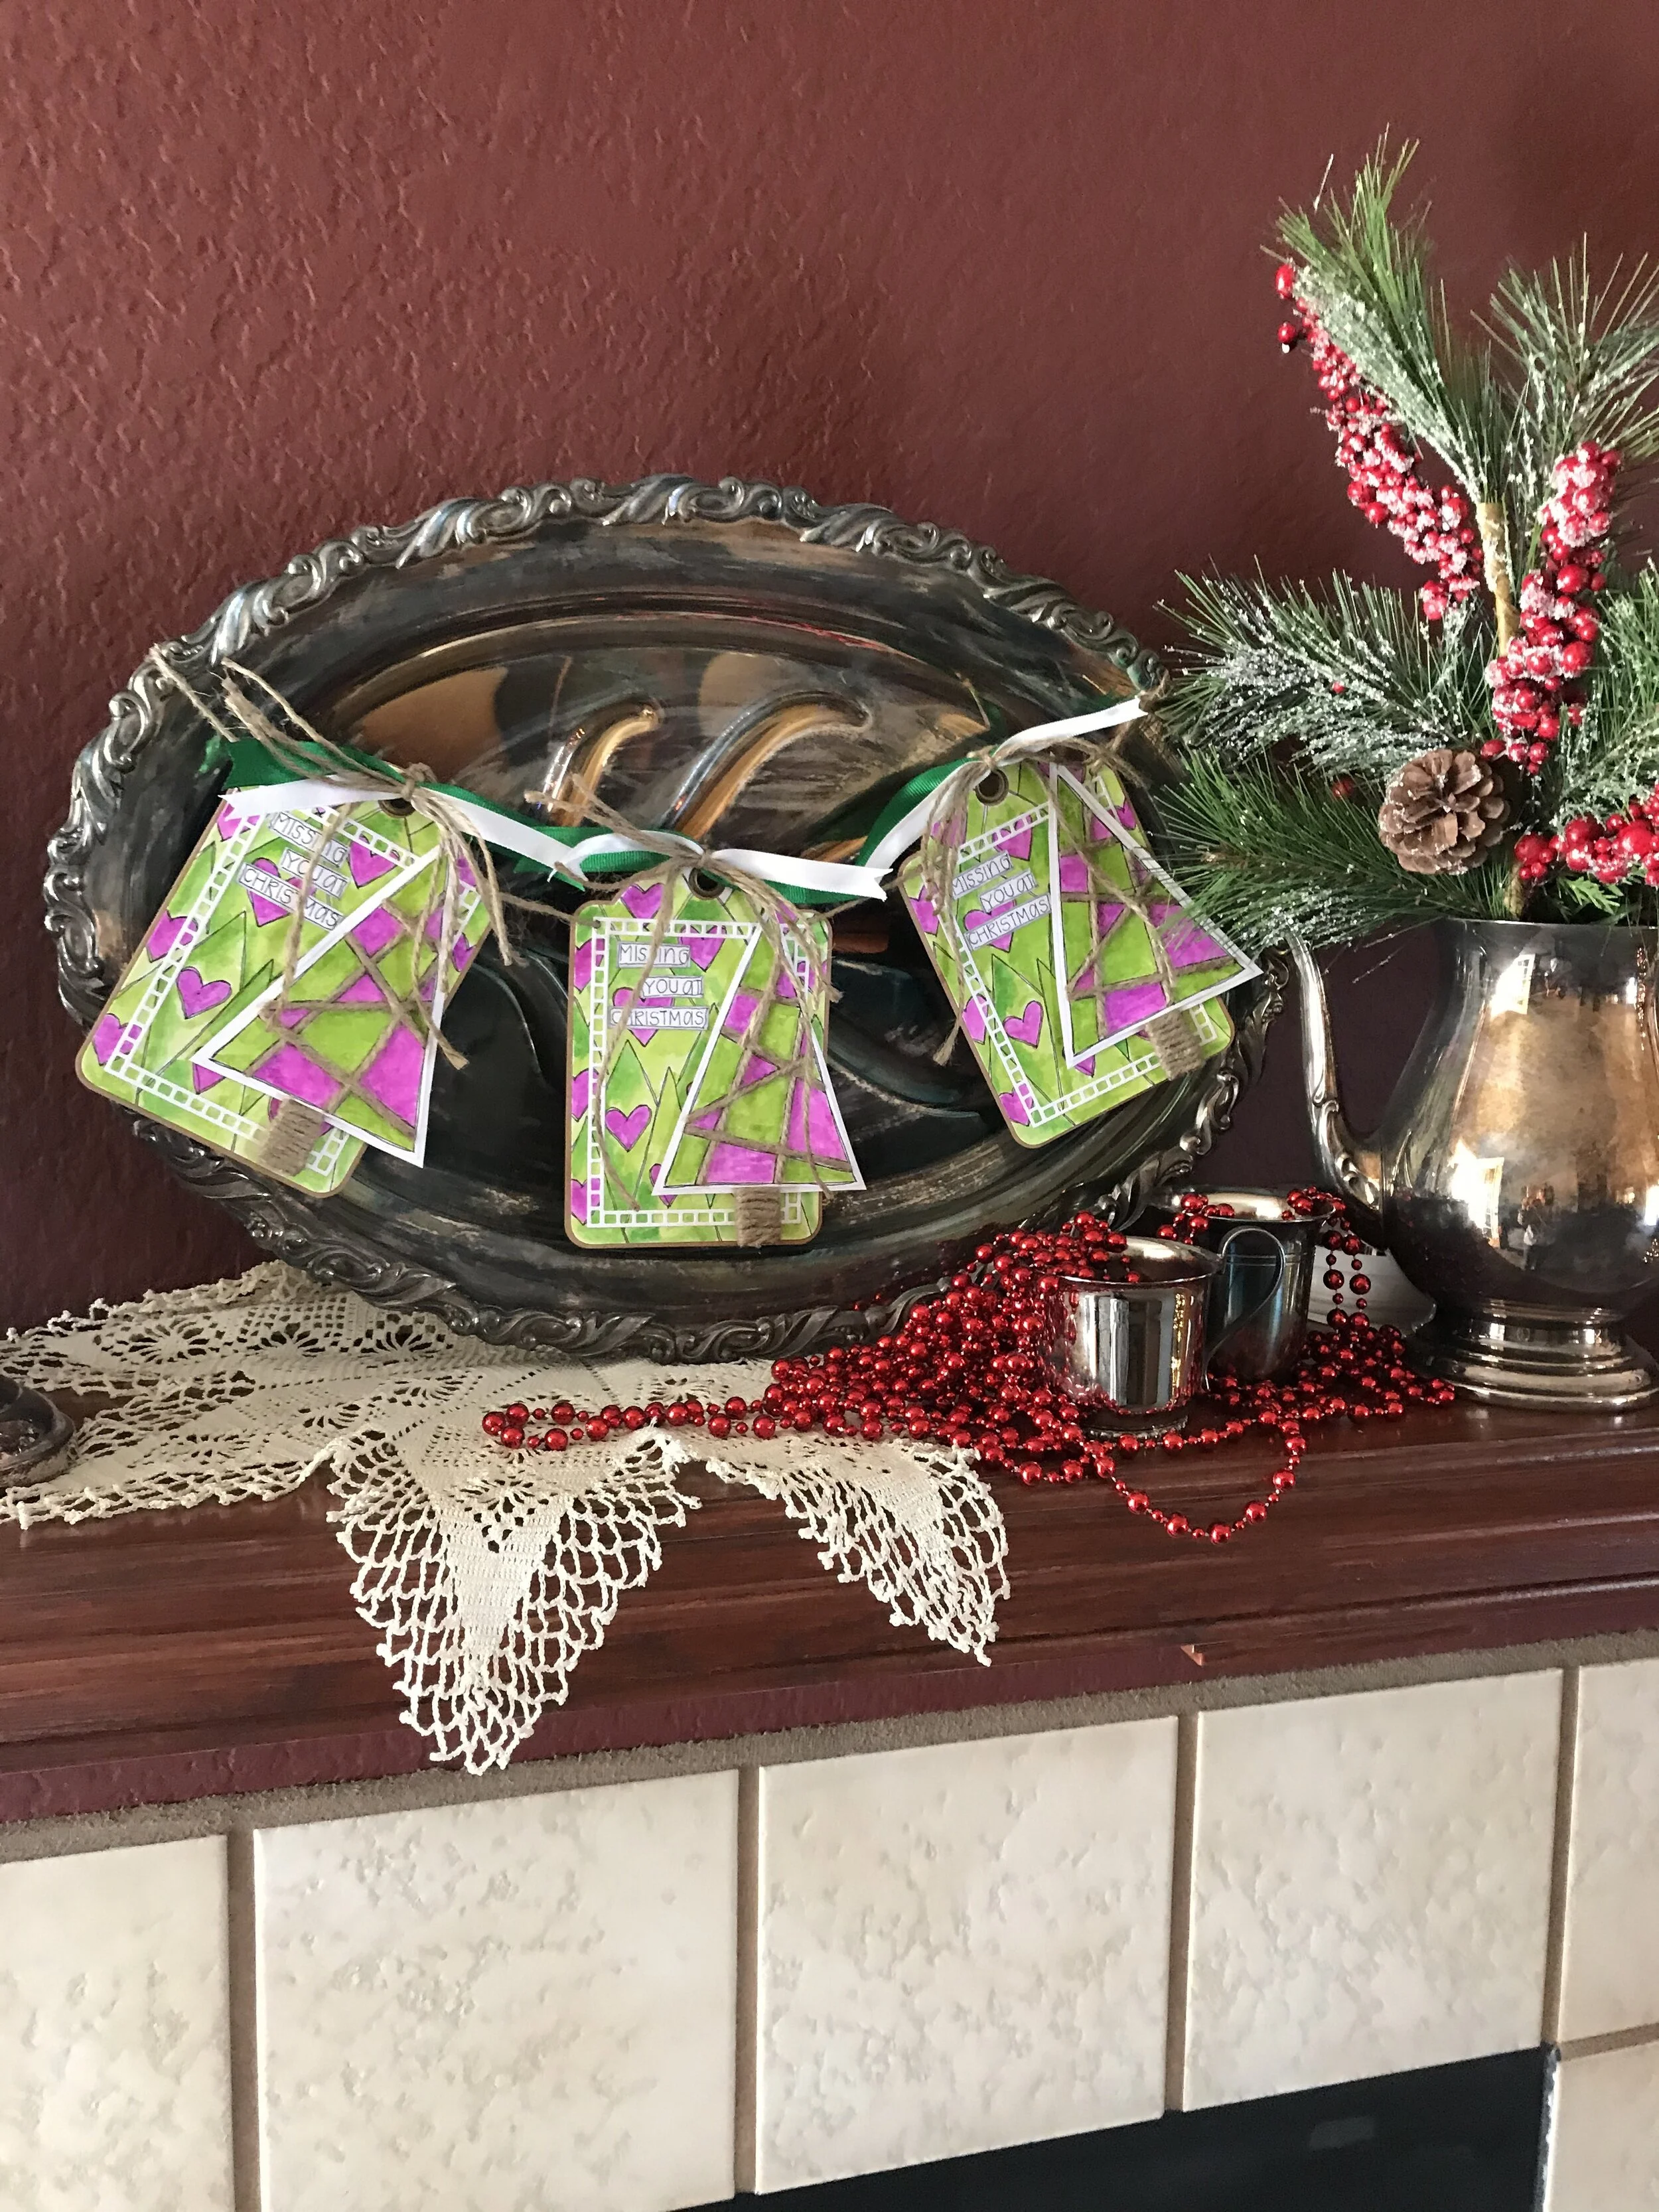
Next up-a bright and cheerful banner created with the same Brandy art printable! I love that Carmen showcases the versatility of my artwork! By simply changing her color palette and adding some dimensional details-this banner has an entirely different and funky vibe! Here is the list of artsy loot she used to create this fabulousness!
anncorbierescottdesigns Brandy art printable
110 lb cardstock
Graphic 45 regular tag and gears metal die
Penny Black Square frames
Catherine Pooler Lime Rickey, Grass Skirt and Flirty Fuchsia
Burlap twine
green and white ribbons
Take note of the fabulous dimensional details that add the perfect additions! Carmen rocks!
FAB U LOUS NESS personified!
ooo-It’s a blog hop!
When I was first approached about this exciting venture-I was inspired by the gorgeous Japanese washi paper from Hai Supply and I started sketching cherry blossoms and those sketches soon turned into an anncorbierescottdesigns art printable. Cherry blossoms obvious delicate beauty is so paramount-but lying just beneath that is this quiet strength that is so inspiring. In my mind the Pear Blossom press lights showcase that strength.
I knew I couldn’t wait to bring all of this fabulousness together.
Sakura art printable is available for purchase here
https://www.anncorbierescottdesigns.com
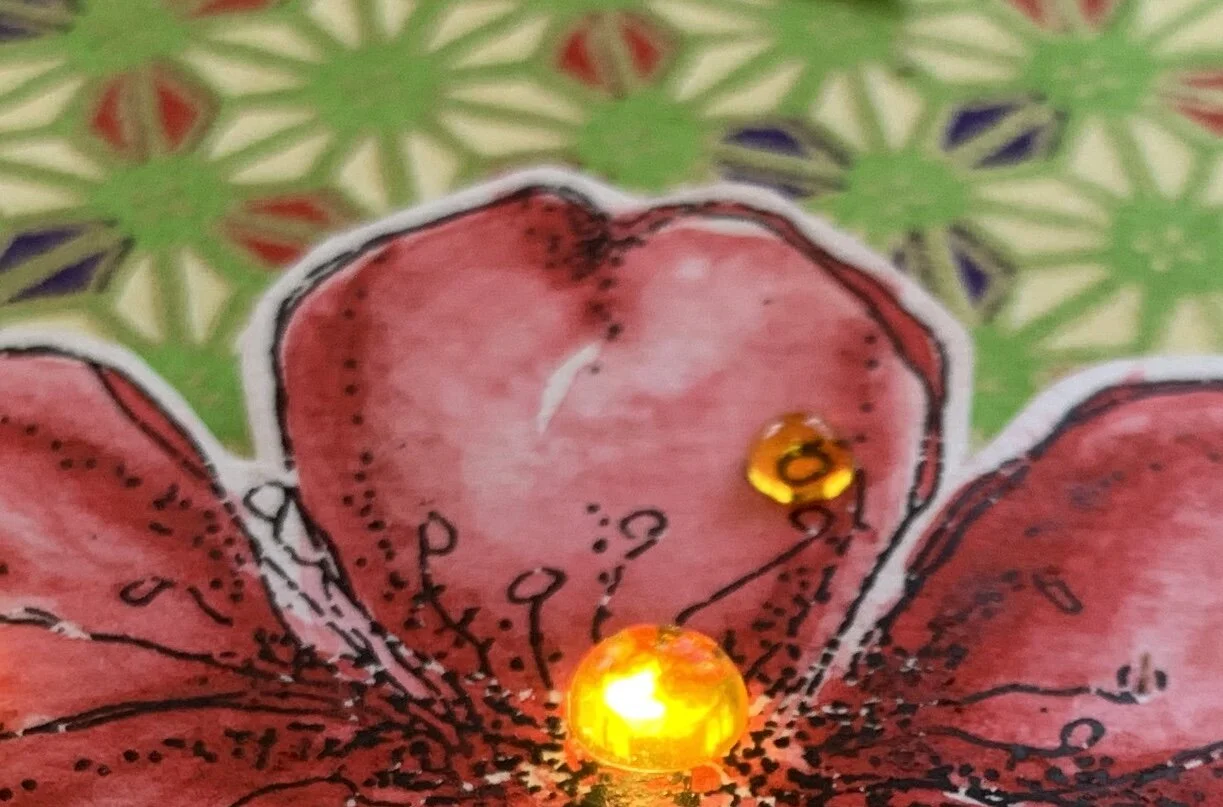
*I begin the process by adding a watery wash of color of red to the individual cherry blossom.
*next I take a paper towel and press it into the painted flower-the paper towel’s texture has created a level of dimension.
*I now begin the process of slowly building depth with my watercolors, adding small bits of color to the shaded areas-let it dry, then with a damp round brush pounce the edge to soften and blend the darker added color.
*with scissors fussy cut the cherry blossom and the Hello, Friend sentiment and set aside
*cut a piece of washi paper 3 3/4 x 5 1/4 and set aside
*die cut a double stitched rectangle from Lawn Fawn
*on card base, apply the die cut cardstock piece, and the washi paper piece on top of that.
*add the battery to the EZ-light pack-then push the purple button to make sure the yellow dots on the end of the wires light up.
*pick up the cherry blossom and with a exacto knife make 3 very small random slits-just big enough for the yellow end of the wires to poke through. Push the lights through and tape them in place with scotch tape.
*add a piece of red line tape to the back side of the EZ light pack and adhere it on the underside of the leaf.
*scotch tape the wires down, making sure to curl them into a flat circle-and not bending them. Next add a double layer of foam tape around the circumference of the backside of the cherry blossom-but not on top of the EZ-Light. Adhere to the lower right corner of the card front.
*with wet glue adhere yellow Hai Supply droplets on top of the yellow lights and then randomly on the front of the card.
*add a Hai Supply clay lady bug on the leaf, right above the button.
TAA-DAAA!!!!
Thank you for hopping along on the HAI Supply & Pear Blossom Press Collab Hop! For more inspiration, check out all of the stops in the hop...
Angela Myhre for Pear Blossom Press -
Ann Corbiere-Scott-you are here
Tessa Reed-next stop
*** PRIZES ***
Hops are always more fun when there are prizes, right?? Four prizes will be awarded to four separate winners, chosen at random, from comments left on participating blogs and videos. Prizes include $25.00 gift codes from Pear Blossom Press, and $25.00 gift codes from HAI Supply. No purchase necessary. Comments must be posted by 11:59 pm PST on June 27, 2020. Only one comment per blog or video will be counted, but you can comment on multiple blogs and videos in the hop for additional entries. (This is to prevent spam.) Contest open internationally to participants over 18 years of age. Void where prohibited by law. Any personal information collected will only be used for the purposes of contacting winners, your information will never be shared or sold. Comments left on YouTube videos must not violate community guidelines. This contest is not sponsored by YouTube. Winners will be announced on July 6, 2020 at pearblossompress.com and prizes must be claimed within thirty days of announcement, or new winners will be drawn.
*** DISCOUNTS ***
One code, two stores! Enter discount code EZSHIP4 at checkout on Pear Blossom Press and HAI Supply for $4.00 off your total, on orders over $25.00 (before tax and shipping), valid until June 27, 2020.
I am SUPER excited to share my creation featuring some fabulous and innovative products created by my friends Victor (HAI Supply) and Amanda (Pear blossom press)
Let’s Get Artsy with Ann
Greetings and Salutations my Artsy friends!
I am SO excited to be launching my anncorbierescottdesigns blog!
My dream is to fill it with artsy inspiration and musings!
I hope you will visit often and be inspired!
Come on, Let’s get Artsy!!!
